Note: This post has been updated to reflect the recent changes in terminology from "master pages" to "parent pages" in InDesign. Please note that some of the screenshots included in this article might still display the term "master pages." We appreciate your understanding as we work to update all visual references accordingly.
What are InDesign parent pages?
InDesign parent pages are a tool that you can use to keep a consistent layout among the pages in your document.
They work as little templates that help you to share different elements with pages in your document. The elements in the parent appear in all of those pages that have the master assigned.
In this blog, we’ve seen how paragraph styles are variables for your text that help you keep your text appearance consistent. InDesign parent pages instead are variables that help you keep the look of your pages consistent.
When do you use parent pages?
You should use parent pages when:
- an element repeats in many pages of your document
- you place page numbers
- you have a background that repeats in your document
- you want to layout some text very very quickly
- you want to try different layout choices
Where you find parent pages?
Open the Page Panel to see/create/delete parent pages.
- Click on Window > Pages.
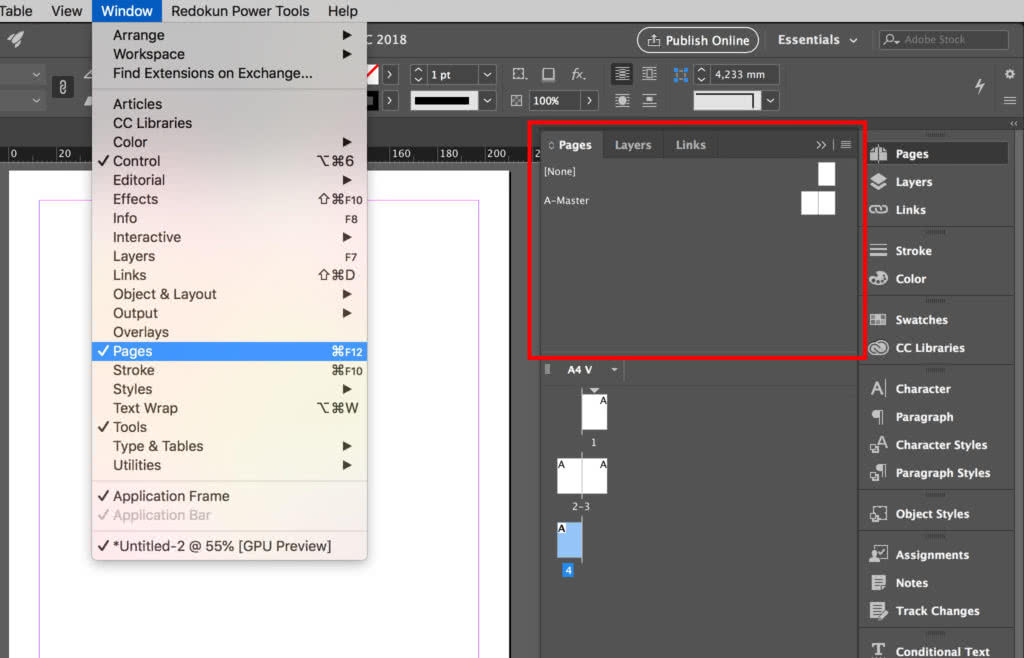
As you probably noticed, you already have a default parent page “A” and it is applied to all the pages of your document.
What’s in this tutorial?
So, you now know what a parent page is and when to use it.
Let’s take a look at what you’ll find in this tutorial, just click on one of the links to go directly to the topic you’d like to read about:
- How do I edit, create, and apply a parent page in InDesign?
- Delete a parent page
- How do you number pages using InDesign parent pages?
- Override parent elements
- Remove local overrides
- Make sure an element of the parent page cannot be modified
- Copy parent from other documents
Pro Tips
- Use parent pages to automatically flow text or a Word document
- Change margin or column settings with just a few clicks
How do I edit, create, and apply a parent page in InDesign?
Edit
- From the page panel double click on the parent page A - Master. You can edit the parent page as if it were a normal page. Place an element, you’ll see that the element will be repeated across all the pages with that parent applied.
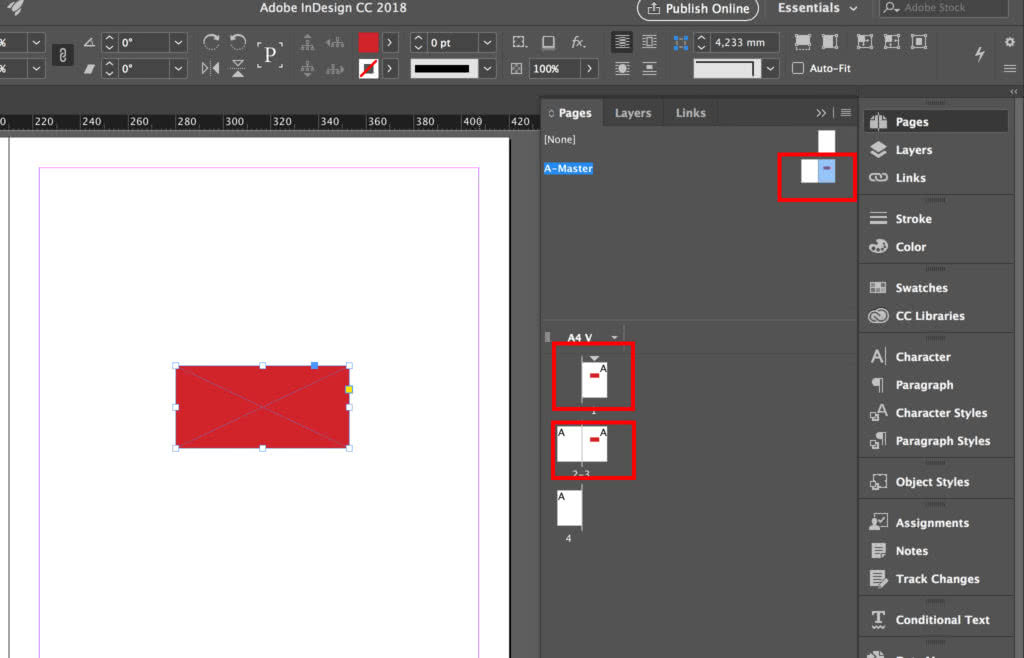
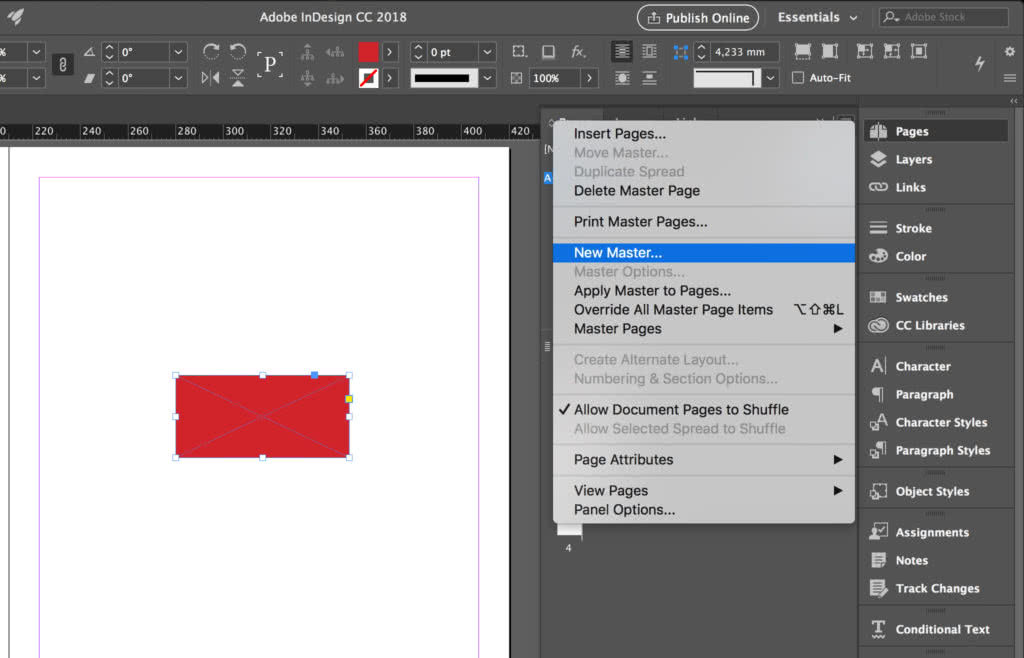
Create new parent page
- Click on the icon in the top-right corner of the Page Panel, and select New Parent.
- Here it opens a new window that allows you to set up the new parent page. Here you see the option: Based on Parent. This is a very interesting feature since it allows you to link your parent page to another. Let’s link this new master with the A - Master.
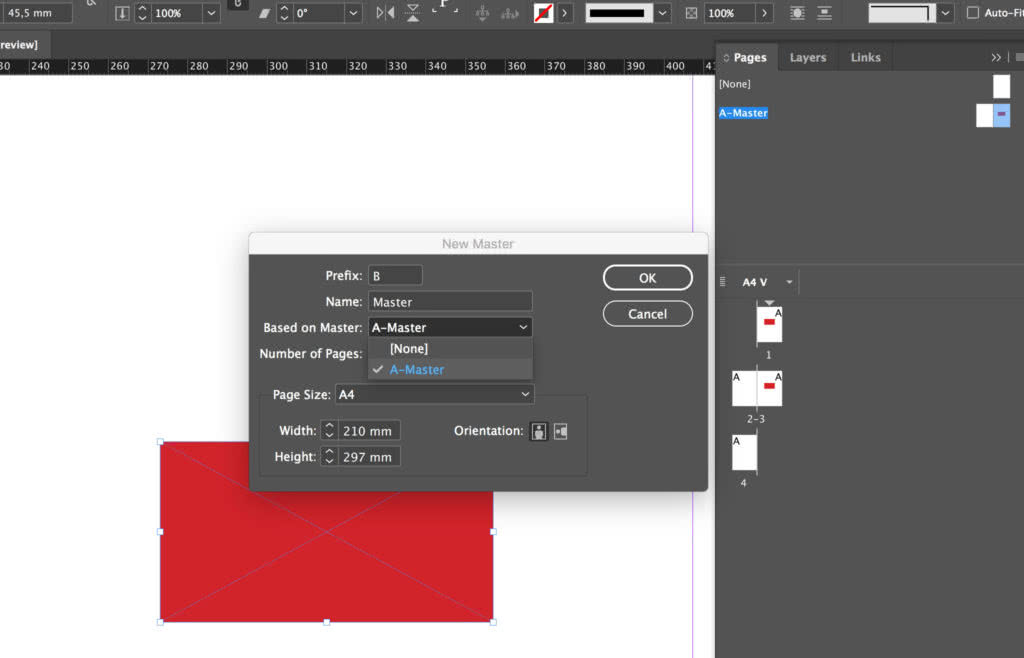
The new parent contains the elements of master A, and you can edit the new master to add other additional elements. Further on in the tutorial we will see also how to override the elements of a parent page.
Apply new parent page
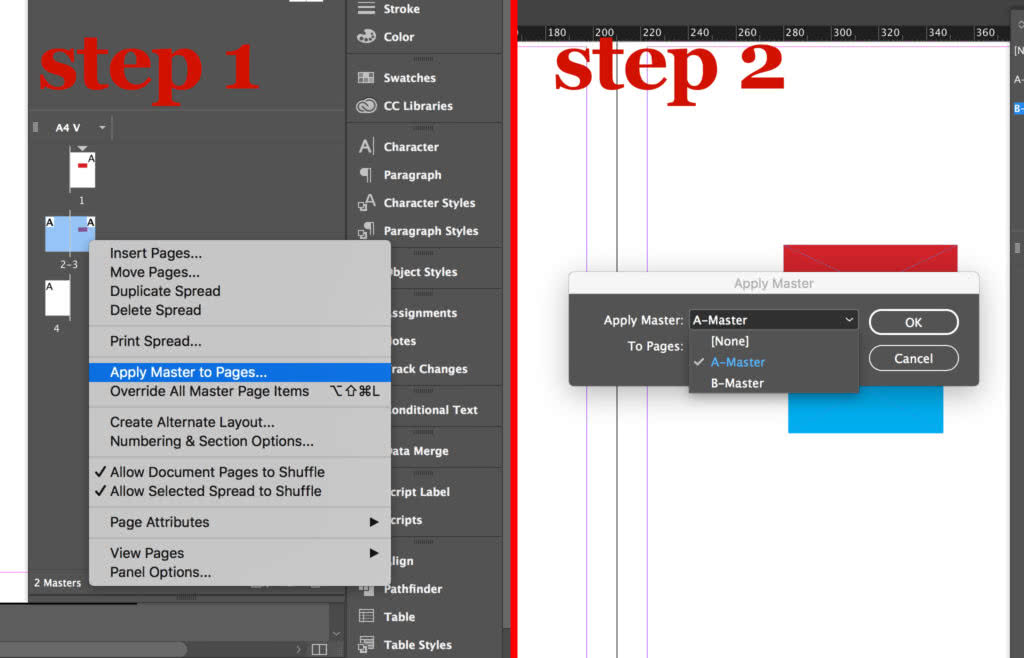
You have many ways to apply a parent to the pages of your document. You can drag & drop the parent page onto each page of your document in the Page Panel, or you can select the pages in your document in the Page Panel, right click and select Apply Parent to Pages….
Delete a parent page
- In the Page Panel, click on the name of the parent page (This will select the page pair). Now, click on the delete icon.
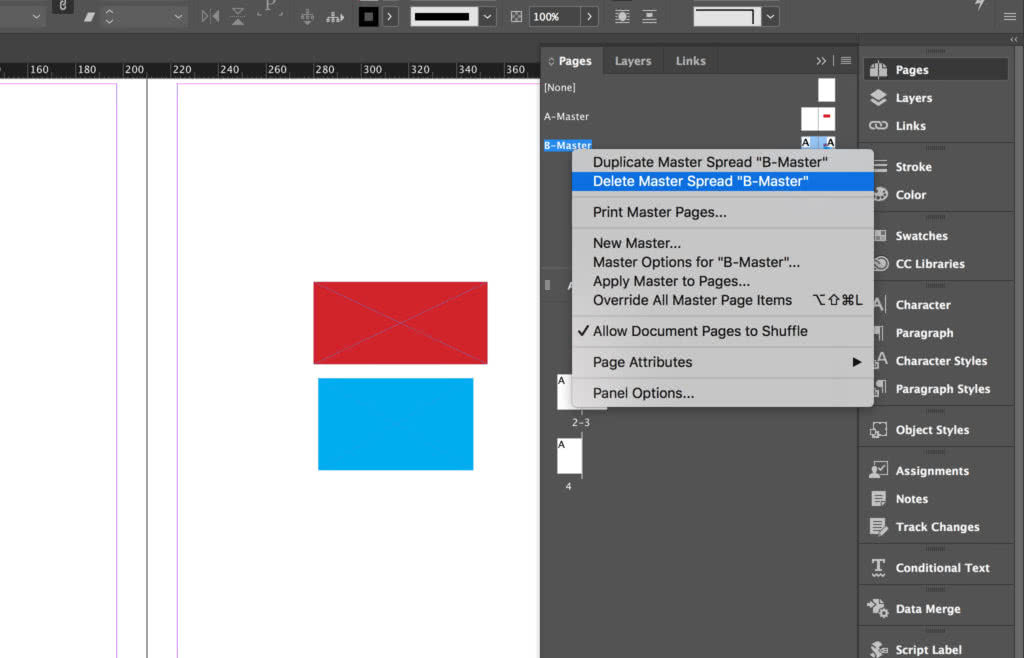
An InDesign document always has to have at least one parent page. You can decide to not use any parent page and assign [none] to your pages, but InDesign doesn’t allow you to eliminate all the parents.
How do you number pages using InDesign parent pages?
You should insert your page numbers in the parent page and in a proper layer. I wrote a tutorial that is dedicated to page numbers. You should definitely check it out to learn everything there is to know about page numbers in InDesign.
Working with elements placed in a parent page
Elements in your document that come from the parent page are indicated with a dotted border.
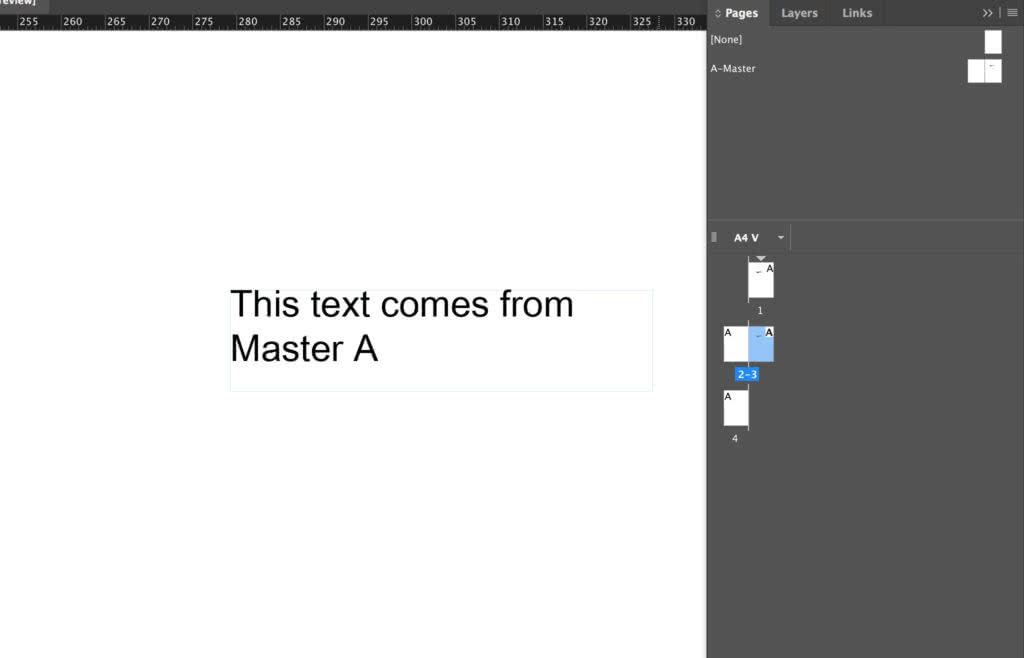
When you click on one of these elements, you’ll notice that it cannot be edited.
You can change the element appearance from the parent page but this change will be applied to all the pages linked to that parent.
What if you want to edit that element in a single page?
Override parent elements
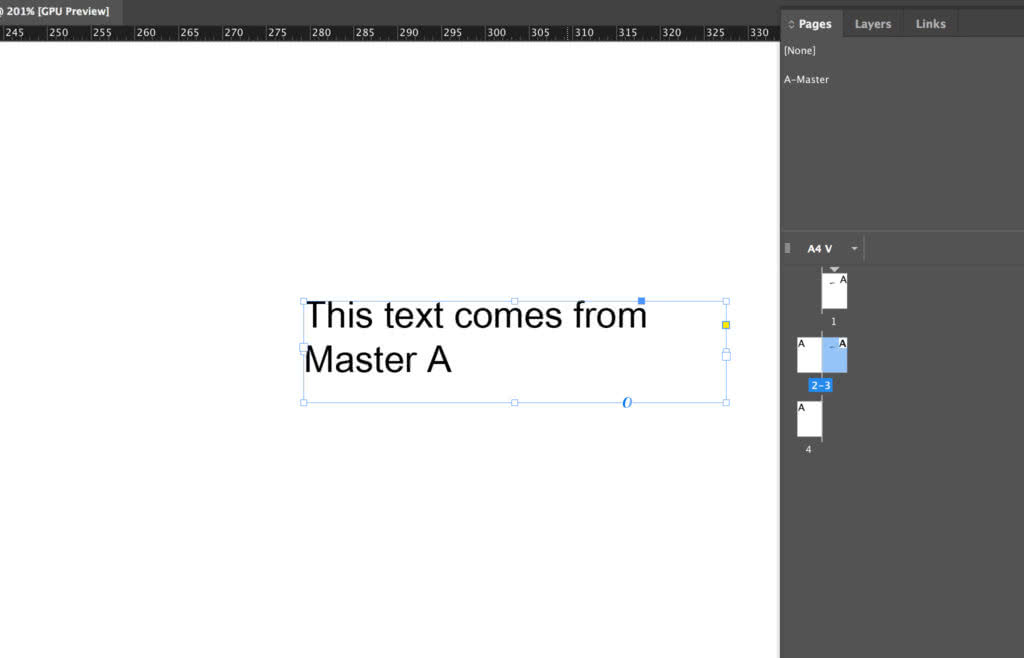
To override a single element press Cmd + Shift on MacOS or Ctrl + Shift on Windows and click on the element. The margins of the element becomes a solid line instead of a dotted one. The element can be edit.
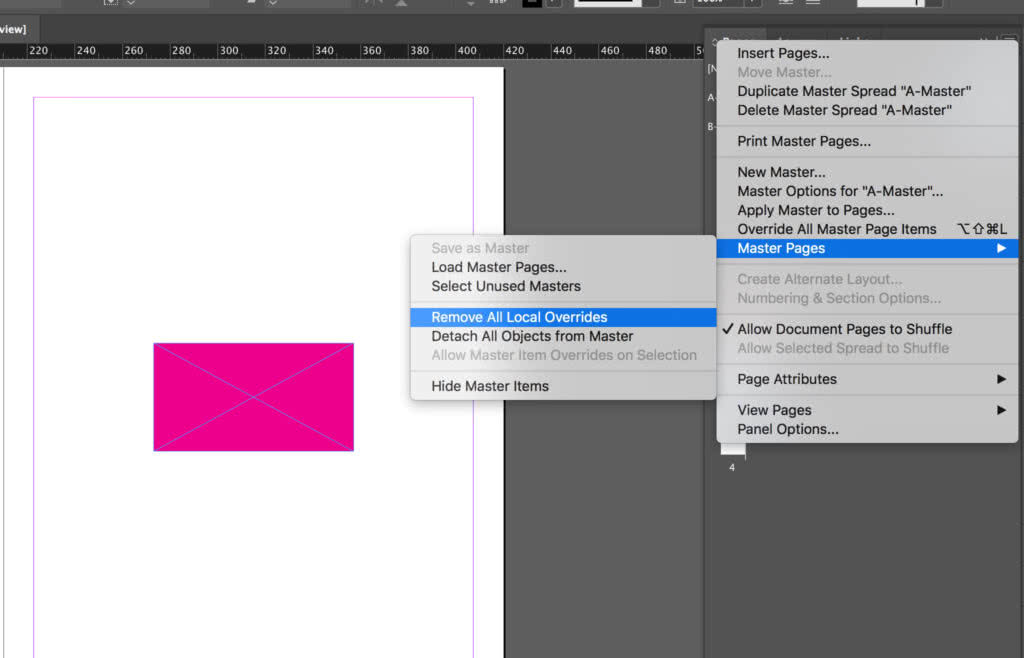
Remove local overrides
When you override an item as we’ve just seen, the element retains its connection with the parent page and in case you want to restore the look/position of it, you can select the element, click on the icon in the top-right corner of the Page Panel and select Parent Pages > Remove Selected Local Overrides. To break the link with the parent page instead, you’ll have to click on Detach Selection From Parent.
If you don’t select any item, you’ll be able to remove the overrides to all the elements by selecting Remove All Local Overrides instead of Remove Selected Local Overrides.
Make sure an element of the parent page cannot be modified
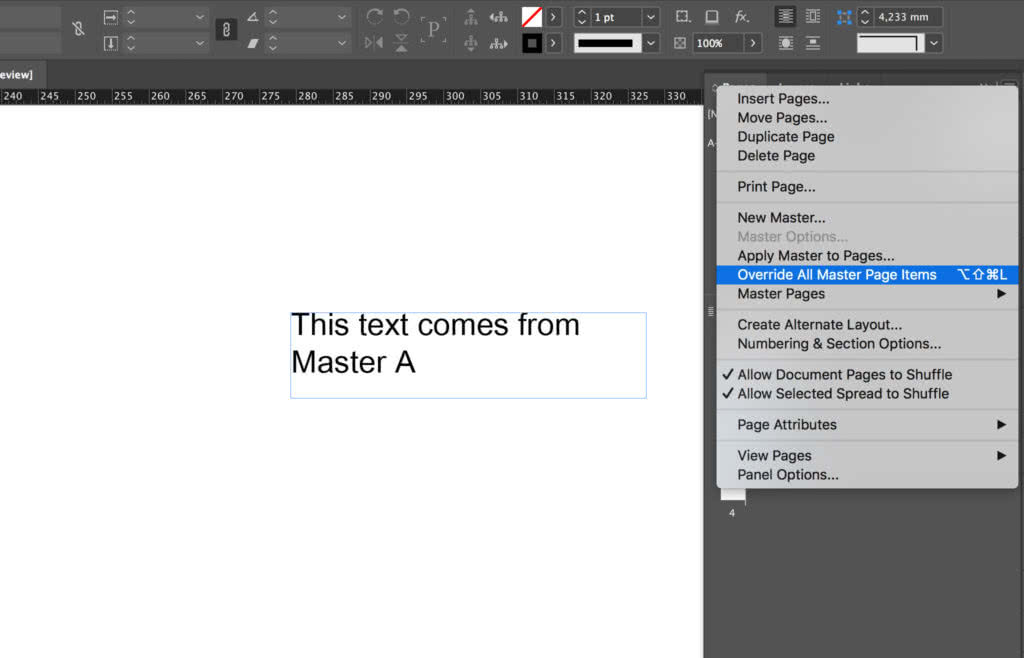
InDesign gives you the ability to override all parent page items from a specific page. Select a page and click on the icon in the top-right corner of the Page Panel and select Override All Parent Page Items.
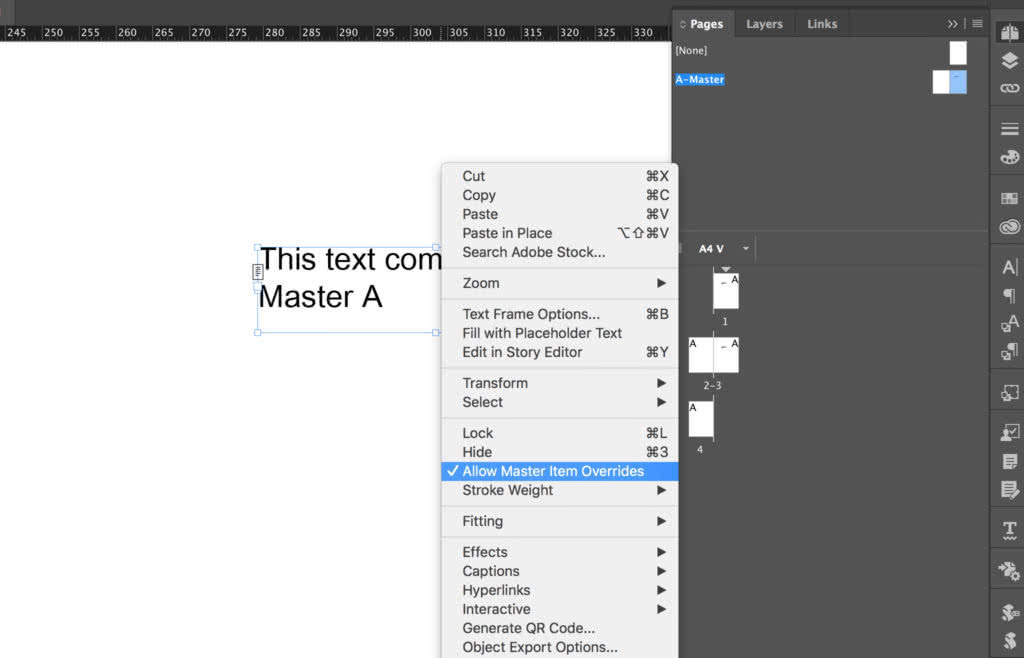
What if you want some of these elements to be locked and you don’t want anybody to be able to edit them?
Well, you can easily do that by selecting the item in the parent page, right-clicking on it and unflagging Allow Parent Items Override.
Copy parent from other documents
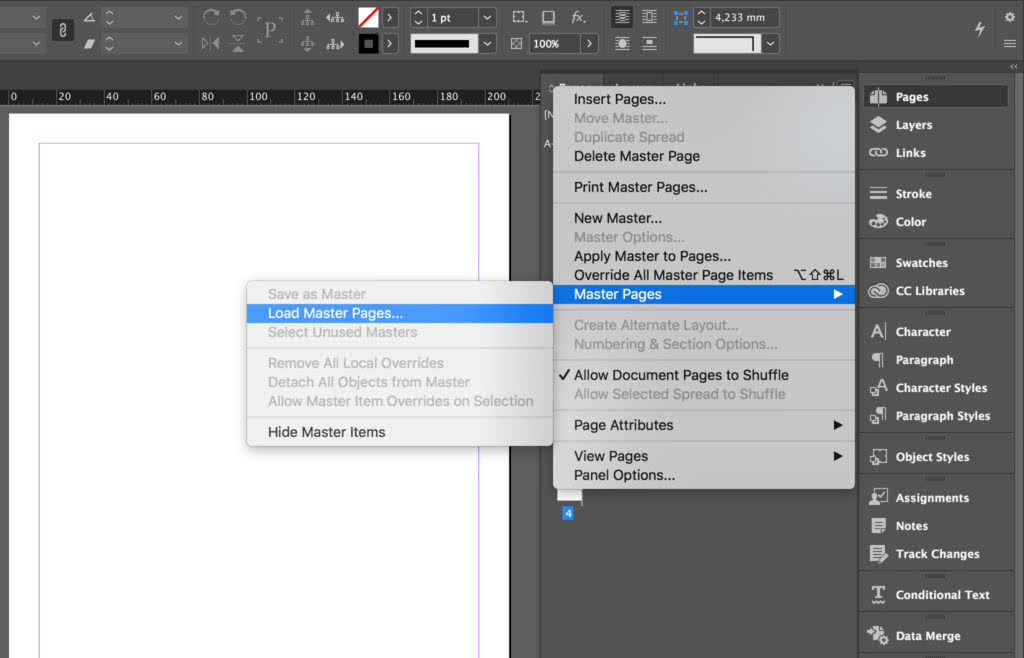
You can import parent pages from other InDesign documents by clicking on the icon in the top-right corner of the Page Panel and selecting Parent Pages > Load Parent Pages.
[Pro Tips] Use InDesign Parent Pages like a pro
InDesign parent pages are very handy and powerful but many InDesign users don’t know their full potential. Here are a couple simple tips that can literally save you hours of work.
[Pro Tip 1] Use parent pages to automatically flow text or a Word document
InDesign can load an entire story from a Word document or a general text file. It can even create pages automatically and create threaded text-frames.
This can save you loads of time and almost completely automate the process. How do you do that?
- First of all, you need to create a text frame in each page of the parent page.
- Then thread the two frames together. Click on the small square at the bottom of the frame on the left page. And then click on the frame on the right page.
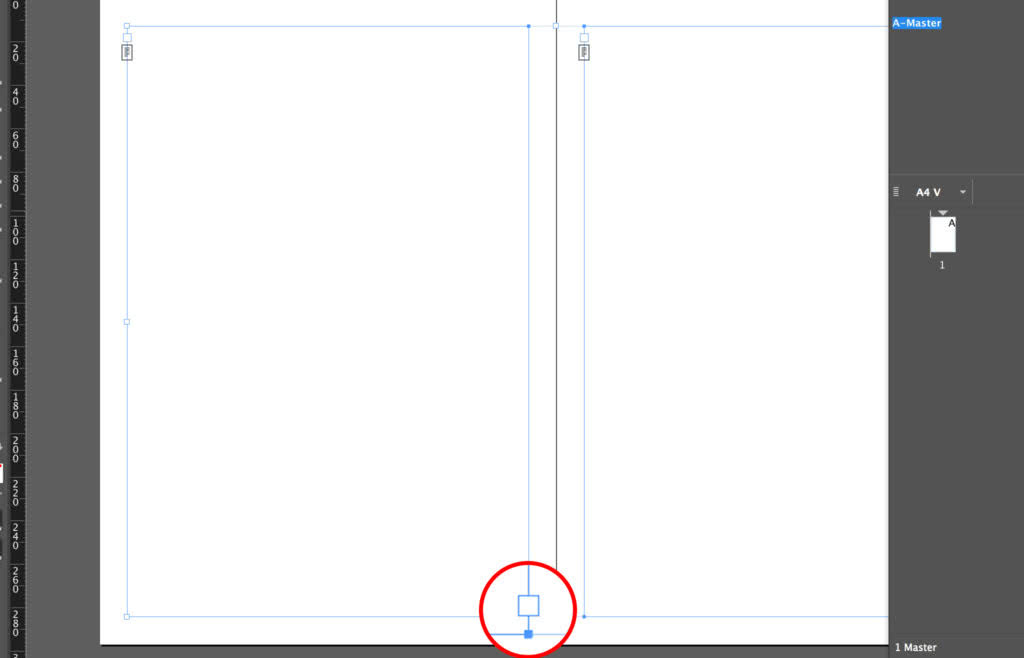
To be able to see the thread, click on View > Extras > Show Text Thread.
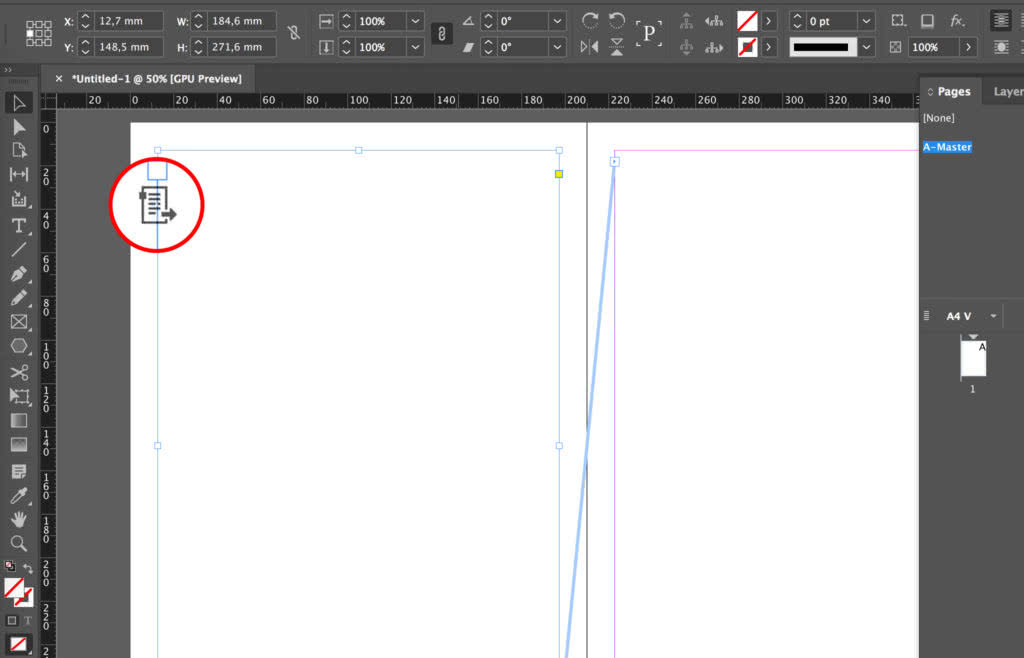
- Let’s make the frame on page one a Primary Text Frame by clicking on the “document” icon in the top-left corner. InDesign will add a black arrow to the icon and that tells you that is a Primary Text Frame.
- Go back to the first page of the document and place your Word file. File > Place, then select the document and click on the first page.
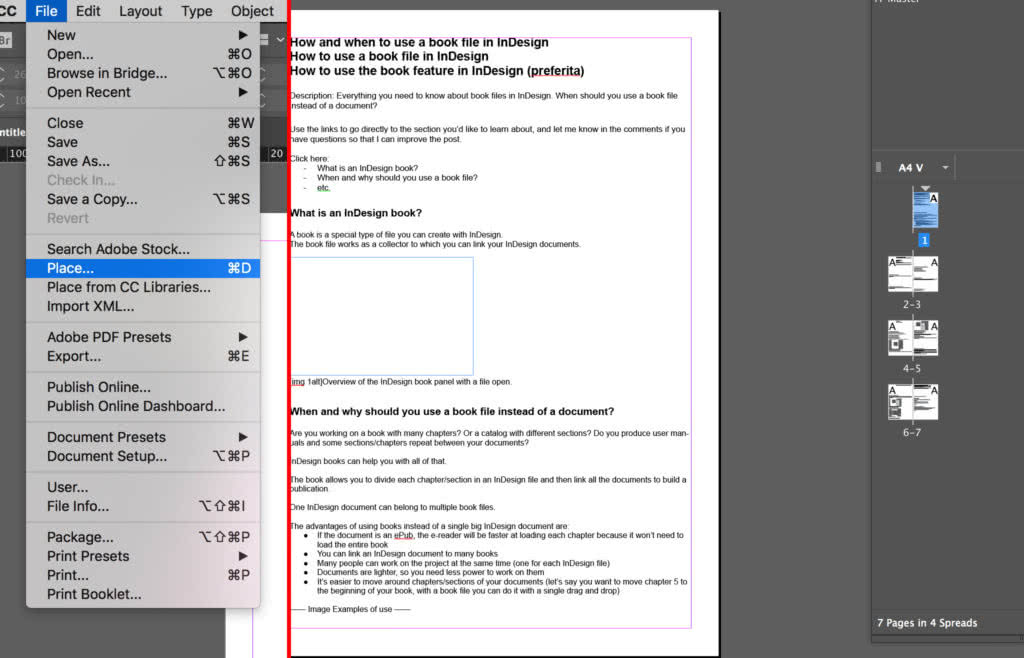
Because we set up the primary text frame and leveraged InDesign parent pages, the entire document was laid out instantly.
Follow this link if you need help with importing a file Word in InDesign.
[Pro Tip 2] Change margin or column settings with just a few clicks
Once you’ve laid out your document as we’ve just seen, you can use the parent pages to change the layout of your document with a couple of clicks.
That can be done both by changing the margins set to the parent page or by changing the parent page assigned to a page of your document.
Using margins
Let’s see first how the document adapts when you change the margin of the parent page.
- Select the parent page by clicking on its name in the Page Panel. Then click on Layout > Margins and Columns.
- Flag Enable Layout Adjustment and only after doing so, change the margins.
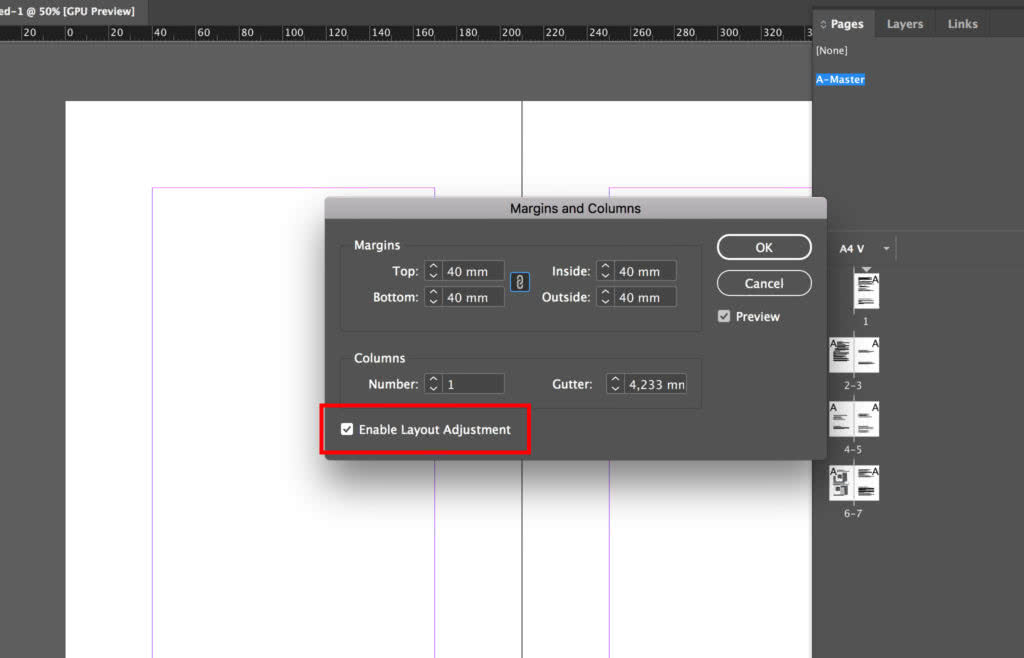
I change them all to 40 mm, and I also change the number of columns. Then I go back to my document.
See the difference from before and now?
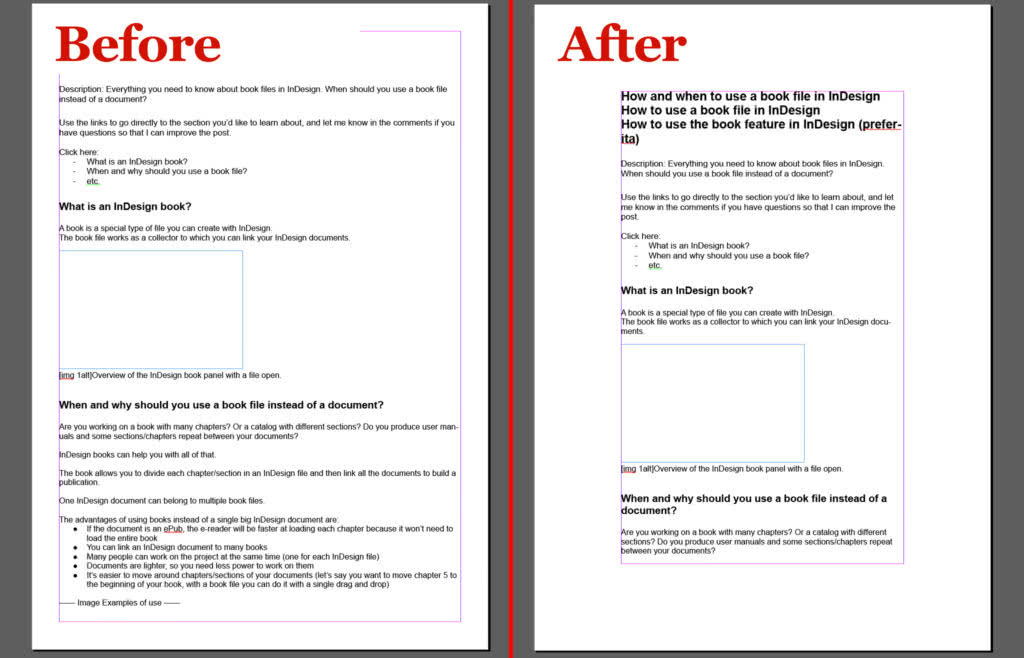
All the pages of my document have been automatically adapted to the new settings. This also works if you change the dimensions or the number of columns to the text frame in the parent page.
Using a parent page
You can also create a second parent page and assign it to your pages to then see the changes applied to your document. Let me show you how.
- Let’s create the new parent page and base it to master A as we’ve seen above in this tutorial. And then let’s change its layout.
See in the image below, master A and master B are pretty different. One has a single column (master A) the other has two columns (master B).
Don’t forget to adapt the two text-boxes in the new parent page B.
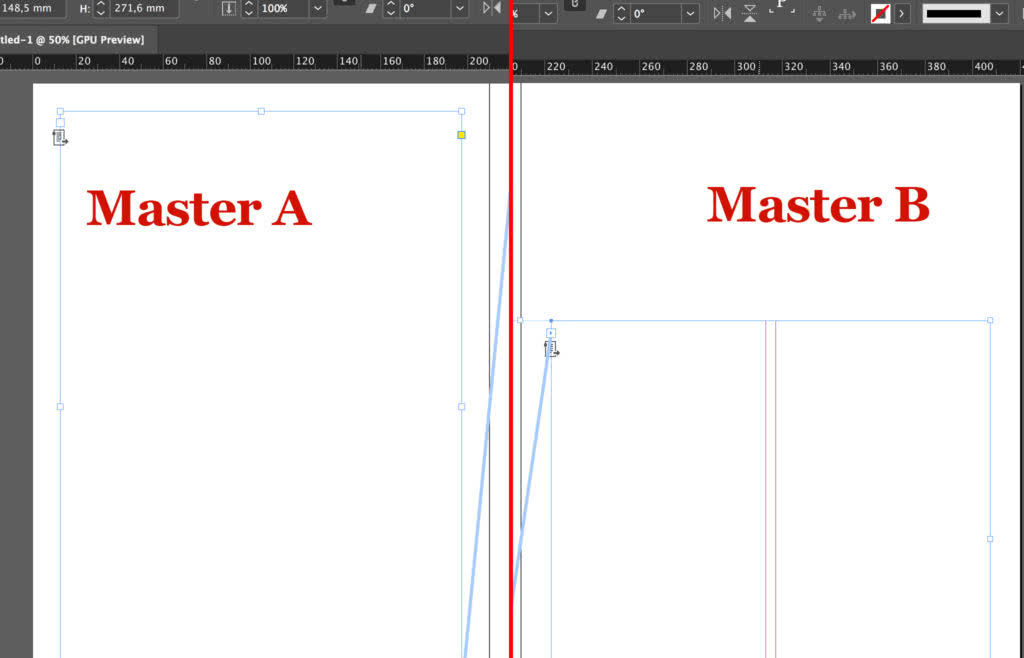
Our InDesign document at the moment has parent A applied to all the pages. What happens if I apply parent page B to one of the pages?
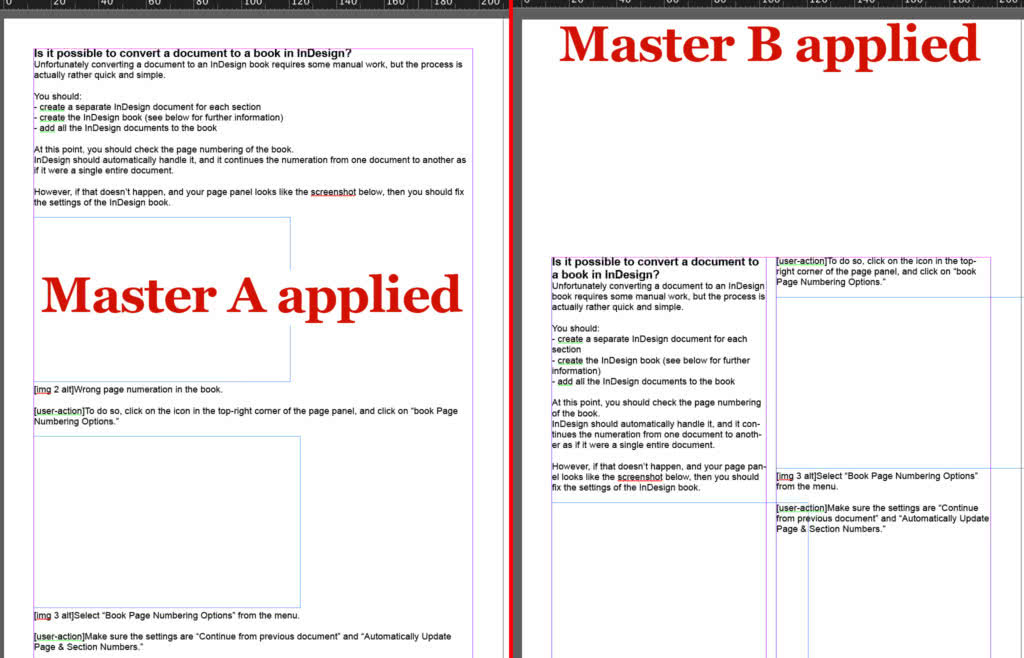
See? InDesign automatically adapted the text-box and the margins to the new parent page.
If you don’t see the changes applied, that probably means that you forgot to flag Enable Layout Adjustmentbefore changing the layout of the page in Margins and Columns.
If you missed some steps, check out this video from InDesignSecrets’ David Blatner to see how to use the features we’ve just seen above.
Until next time,
Stefano


