


Converting a Word document to an InDesign document is not a simple task.
Actually, since some operations are always required when you import a Word document into your InDesign file, I’d say that we can’t even talk about conversion.
Also, if the Word file you want to convert is complex, you’d probably end up completely creating it from scratch inside InDesign. Unfortunately, there is no software that can convert Word to InDesign, but you can learn how to set both the Word document and the InDesign file correctly, so that the manual conversion will be less painful and time-consuming.
As a side note, if you need to use Word to create an exchange file for translation, I highly encourage you to use a specific tool (like Redokun). Your translation agency will be much happier to receive an XLIFF file instead of a Word document, and your in-house translators will love the simplicity of the integrated translation tool.
In this tutorial we will see:
- How to import a Word document into InDesign
- How to link a file Word into InDesign
- [Pro Tip] Use master pages to automatically flow a Word document (update)
Import Word files in InDesign
When having to deal with a coworker or client who needs or wants to edit the text inside your InDesign document, the best solution is to prepare your InDesign file beforehand. As we’ve seen for the spreadsheets in Excel (here’s the post: Link InDesign tables to Excel), you can link also Word files inside an InDesign document.
Linking Word documents to an InDesign file is great because it allows you to work on your layout inside InDesign and your coworker, client, or whoever has to type the content to work in a software much simpler (and cheaper), like Microsoft Word.
This method requires a little bit of work to get started, but trust me, for most jobs it’s a life-saver.
If you set your Paragraph Styles and Character Styles properly, you’ll have nothing to do but watch InDesign automatically lay out the content.
Here is a post that goes deeply into Paragraph Styles and Character Styles that covers great advanced features like keep options, nested styles, and others in a practical case scenario — subscribe to our newsletter to keep up with other helpful posts.
Setting up the source file
When you import a Word document into an InDesign file, the default settings are to also import the styles applied to the text in Word. This creates in your InDesign document the same Paragraph Styles used in the Word document. You can leverage this feature to override the appearance of the imported text (we will see later how to do so) and make the import in InDesign and layout of the text very quickly.
However, be aware that the conversion from Word to InDesign may lay out the text differently from the way you’d do it manually. For example, if I had to create a bulleted list inside InDesign, I would use a Paragraph Style. The conversion instead applies the bulleted text characteristics as an inline property.
I have a simple one page document in Word that I want to import into my document in InDesign.
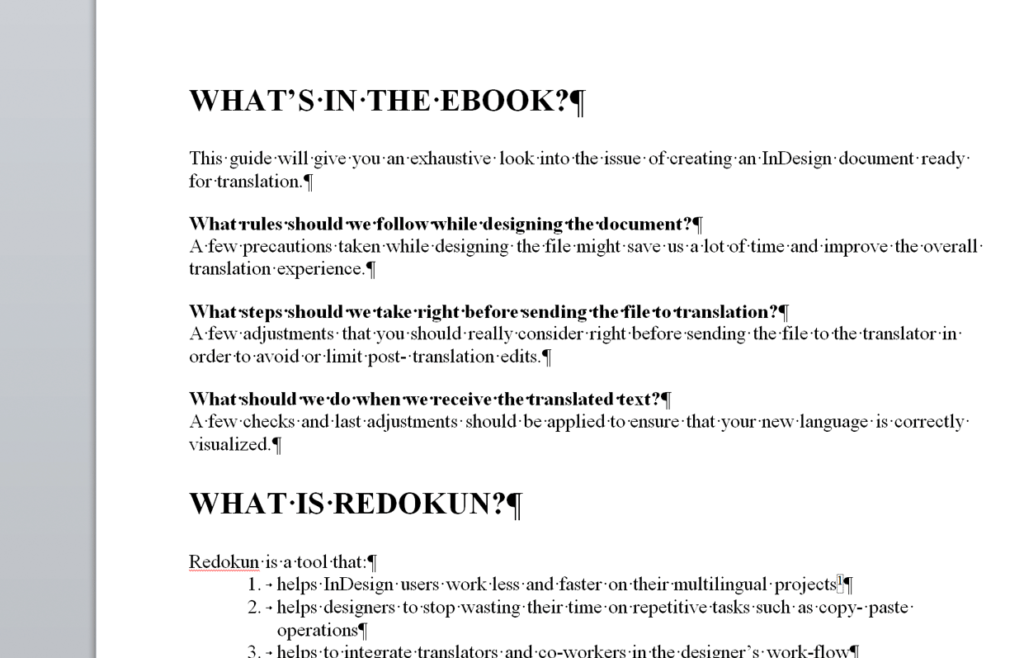
Notice that I used the styles in Word to lay out my text (yes, you can also create your own styles in Word – see this guide or this video – similar to how you would do it in InDesign with Character Styles). Like in InDesign, pay attention to not set inline properties to the text inside Word.
In other words, if you have to change the characteristics of the text, don’t do that directly to the text, but change the style properties because those inline properties will also be kept in the text in InDesign, and if you want to apply a different style inside your InDesign document, you’ll have to manually override each part with inline styles applied. This is very important if you want to have control over your document and lay out the text quickly.
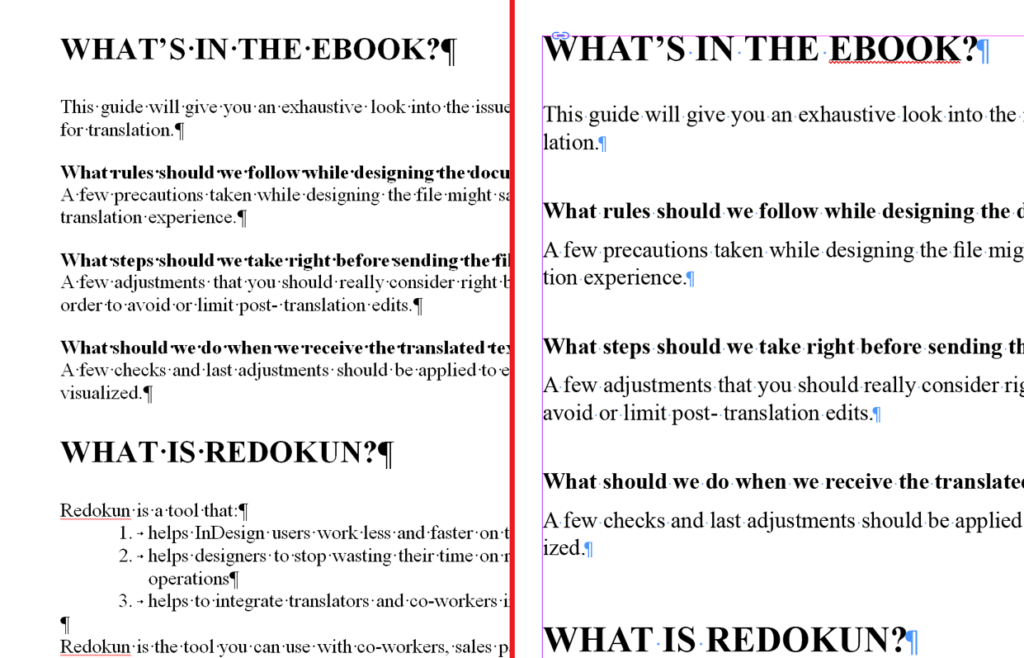
See here what happens if you apply inline styles to the text in Word (left), and what happens if you don’t (right).
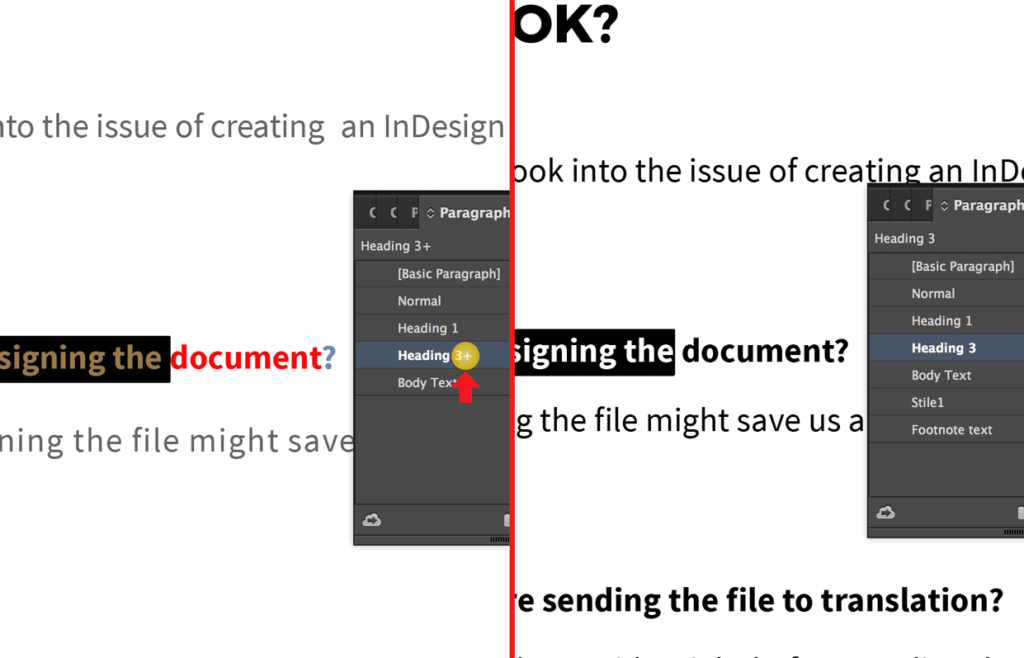
As you can see in the left screenshot, close to the Paragraph Style name there is a ‘+’ mark, which is not present in the screenshot to the right. Also, the two strings clearly have different styles.
The ‘+’ mark is shown close to the Paragraph Style name any time there is an override of the style applied to the text. This means that the text in the left screenshot doesn’t respect the Paragraph Style. Instead, the screenshot to the right shows the text with the right Paragraph Style that I created.
Import the Word document
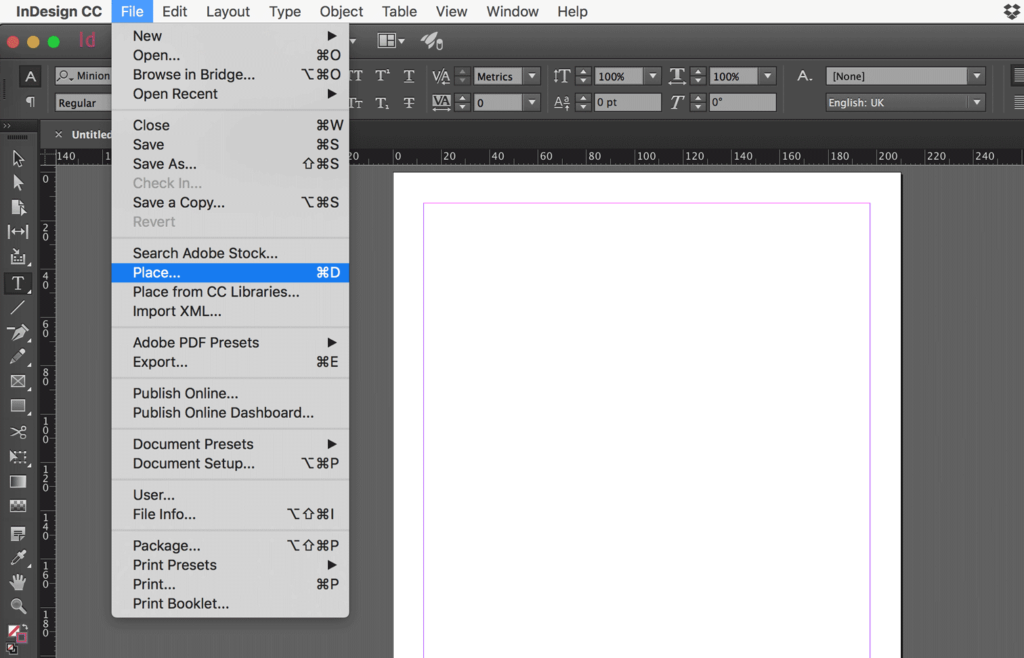
- In InDesign, click File in the main menu bar and then Place (otherwise, you can press Cmd+D on Mac Os or Ctrl+D in Windows). As mentioned above, be sure that the styles in the Word document are correctly set to the text.
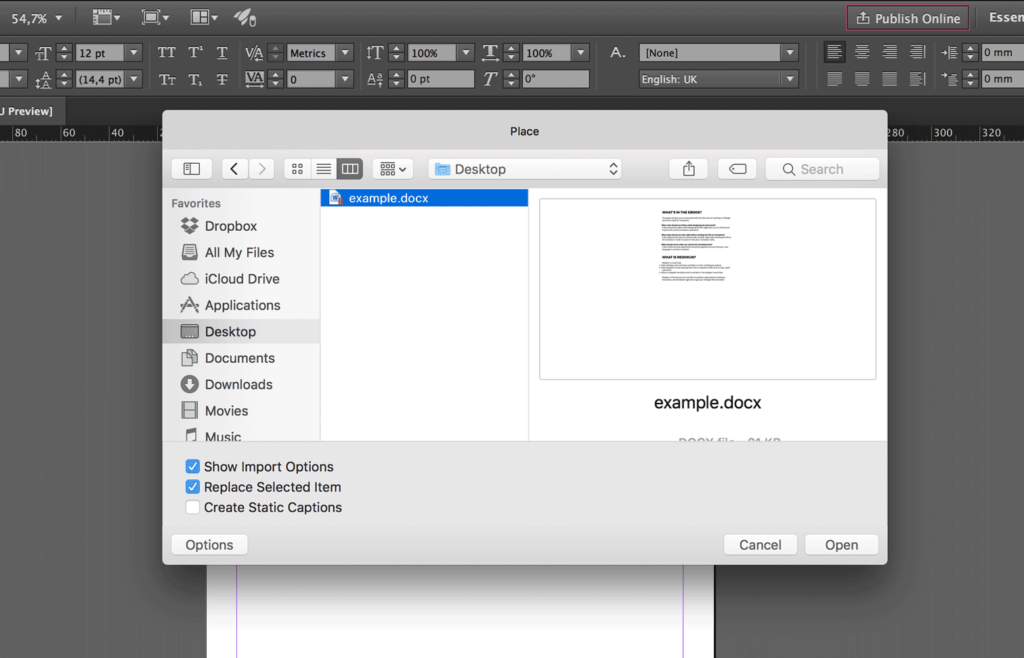
- Click on Options and check Show Import Options in the import window (if it’s not already checked), select the file and click Open to import the Word file into InDesign.
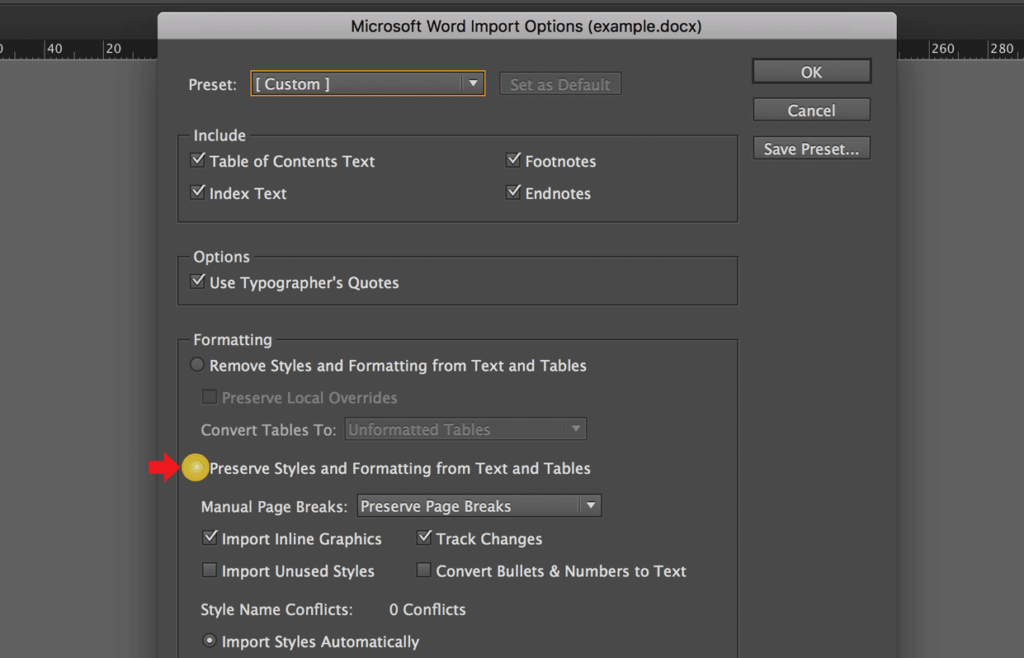
In this window, you can personalize a few settings. Generally, the default settings are OK. However, you should pay special attention to these settings:
- Preserve Styles and Formatting from Text and Tables
- Manual Page Breaks
- Import Styles Automatically
If you select “Remove Styles and Formatting from Text and Tables”, you’ll import only the plain text from your Word file (without the styles).
- Let’s import the Word file with Preserve Styles and Formatting from Text and Tables activated. This will import the text and emulate the Styles of the Word file in InDesign.
Lately, we will then change those styles created by the import and see what happens when we import the same document again.
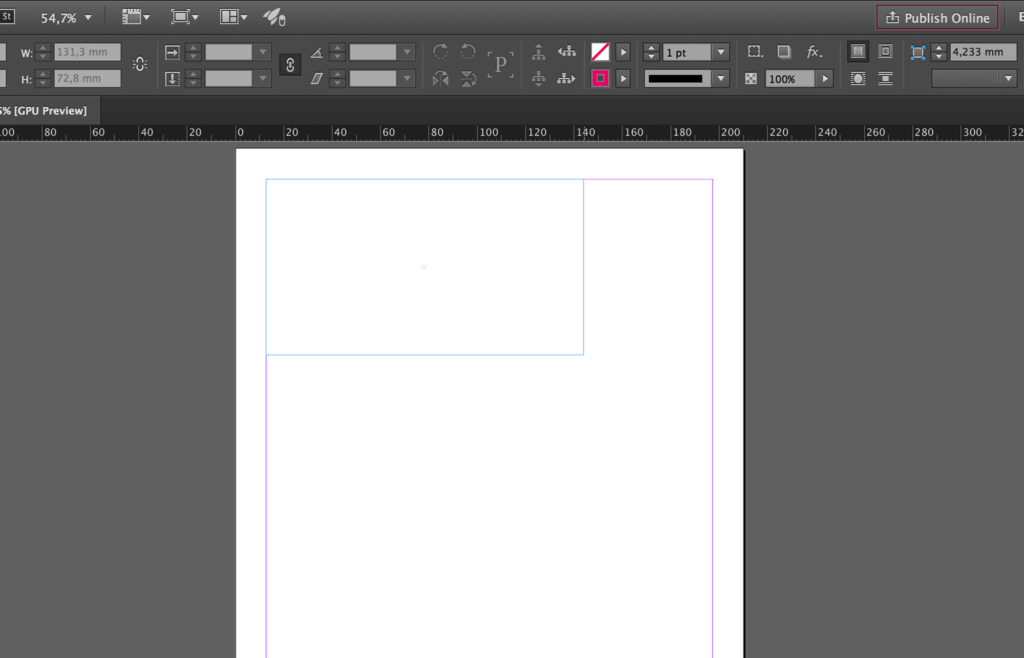
- Click OK and then draw a text-frame in InDesign to place the content of your Word file.
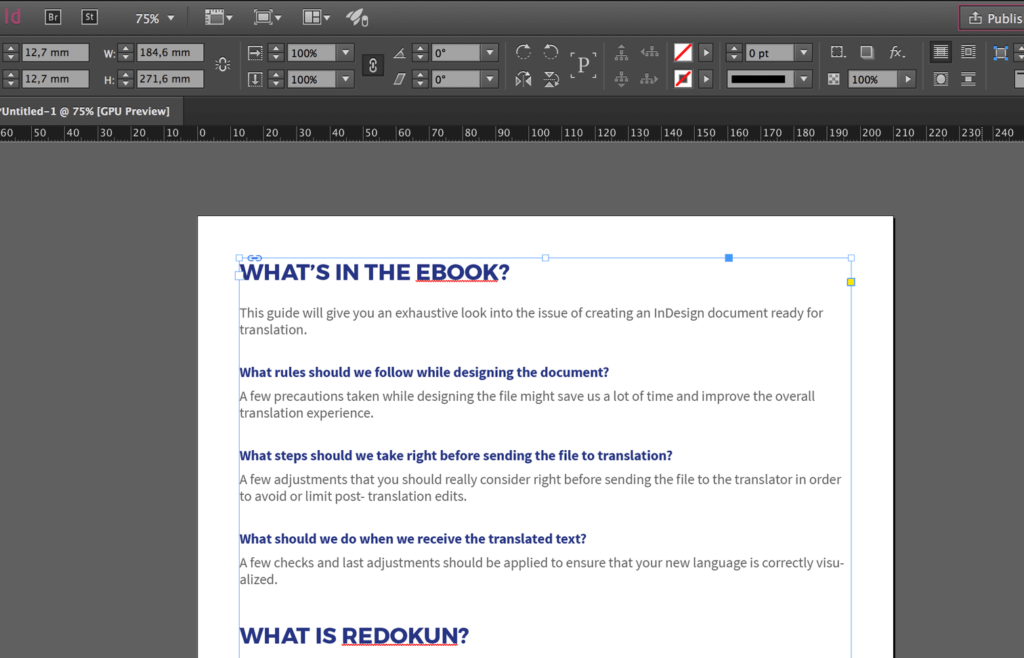
See, the text in InDesign (right) has the same styles and appearance of the text in Word (left).
We are going to override the settings of the Paragraph Styles.
As you see, near the imported Paragraph Styles there is an icon that shows that the Style has been imported, and none of the properties is overridden.
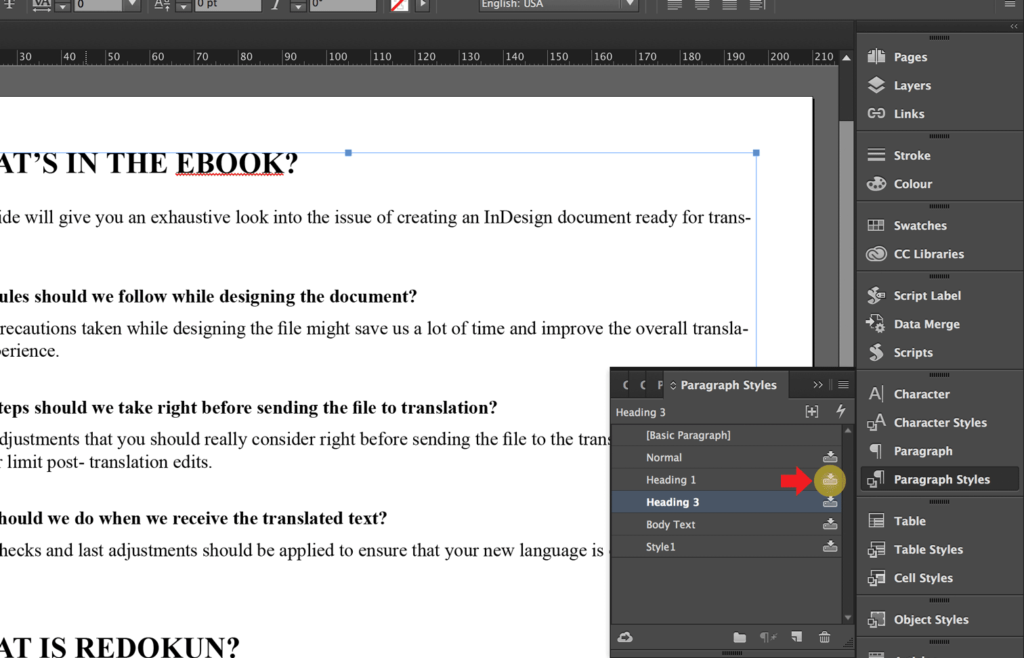
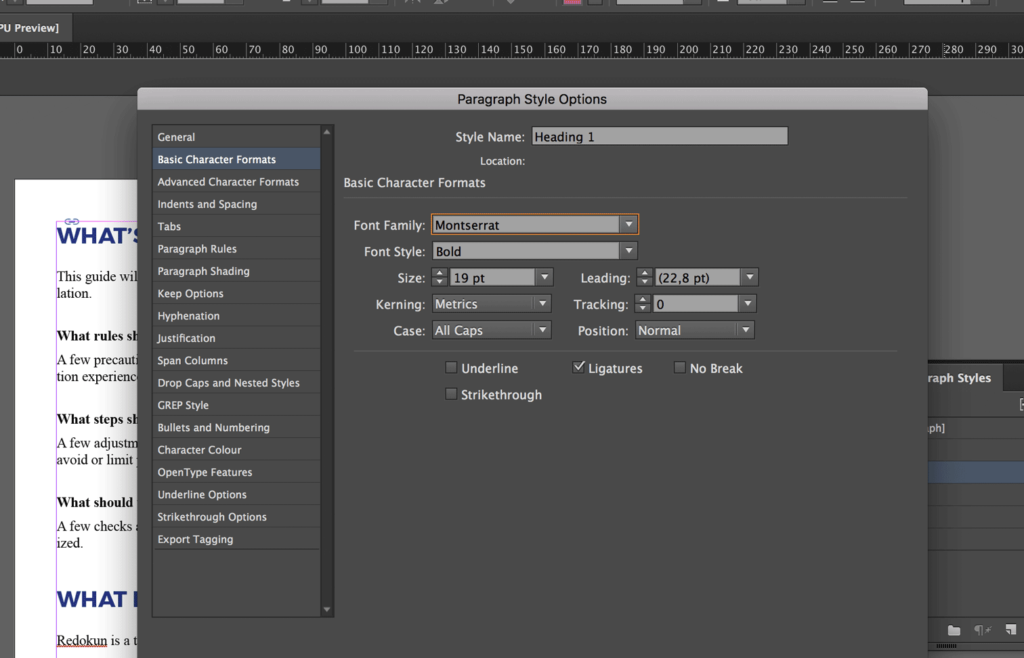
- Double click on “Heading 1”. In Basic Character Formats, set Montserrat as Font Family, bold as Font Style, 19 pt for size, and change Case into All Caps.
- Then in Character Color, set C=100 M=90 Y=10 K=0 (it’s a color that is shipped by default with InDesign; if you can’t find it, create it or just skip this setting).
Notice that the icon close to the Paragraph Styles “Heading 1” is not present any more.
Let's change also the styles Heading 3 and Body Text with the following properties.
Heading 3: Source Sans Pro, bold, 12 pt, color: C=100 M=90 Y=10 K=0;
Body Text: Source Sans Pro, regular, 12 pt, color: Black, tint: 75%;
Now the text you imported from the document in Word to InDesign looks like this.

- Let’s import the same Word document into InDesign and see how the text looks this time.
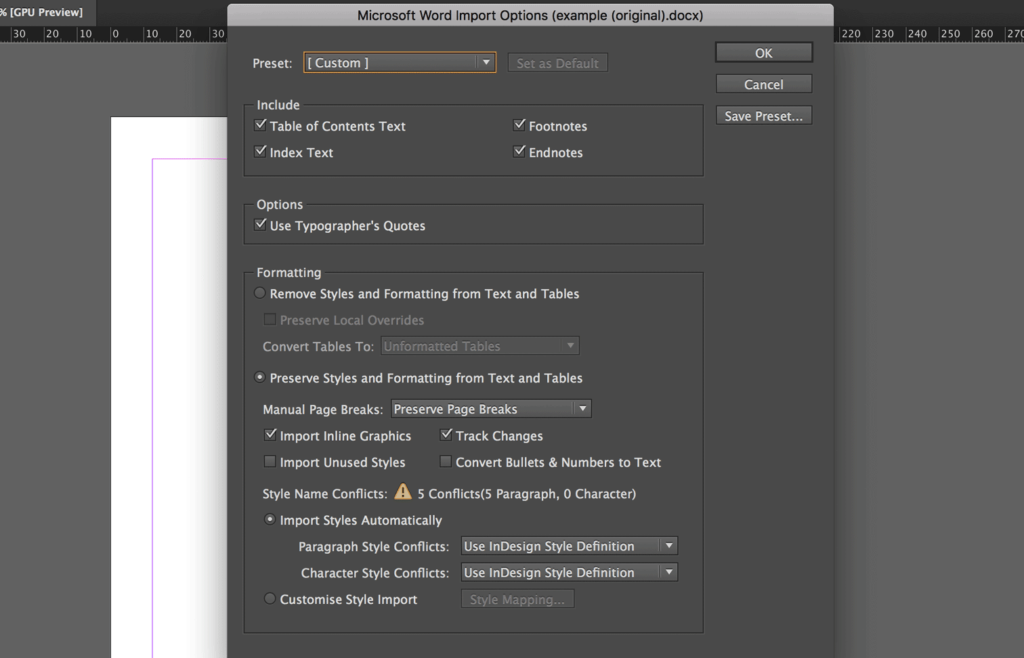
InDesign tells us that there are Style Name Conflicts. Under Paragraph Style Conflicts and Character Style Conflicts, you can decide to:
- Use InDesign Styles Definitions: This overrides the styles of the text imported from the Word file to the InDesign document.
- Redefine InDesign Styles: This deletes the settings in InDesign that override the text imported from Word to InDesign.
- Auto Rename: This imports the text with the styles in Word and creates new styles in your InDesign document.
We select Use InDesign Styles Definitions and import the text from the Word document into InDesign as we did previously.
See, InDesign automatically set the new characteristics to the text you imported from the Word document.
How to link a file in Word to InDesign
Now that we’ve seen how the migration of a file from Word to InDesign works, we can see how to link a Word file into an InDesign document, and how this great feature can help us.
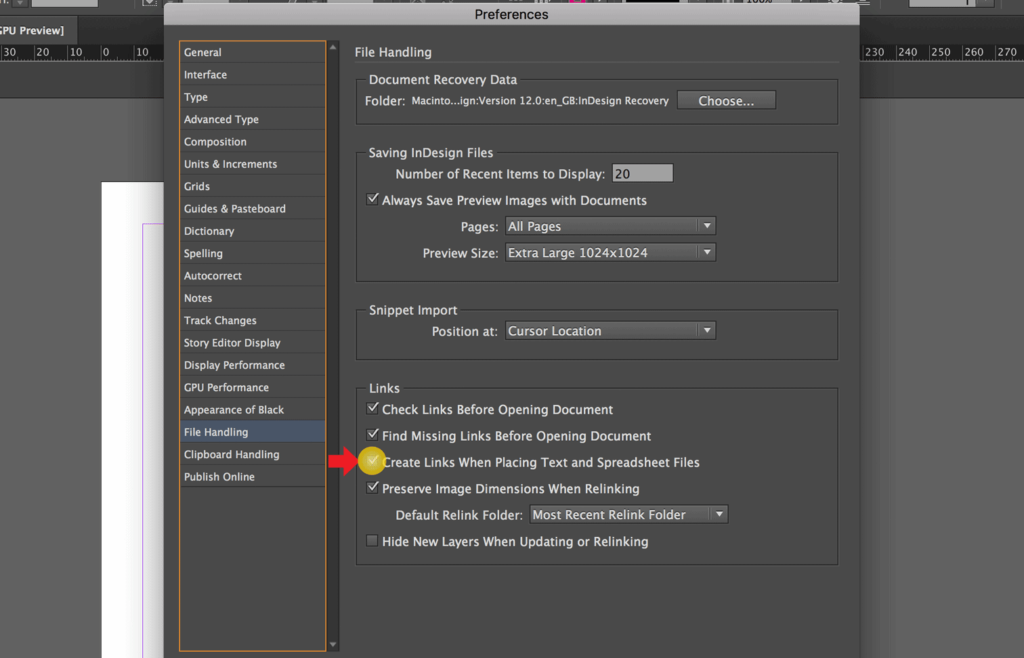
Set the preferences
- Click on InDesign (on MacOS) or Edit (on Windows) in the main menu bar, go to Preferences in the menu that opens, and click on File Handling...
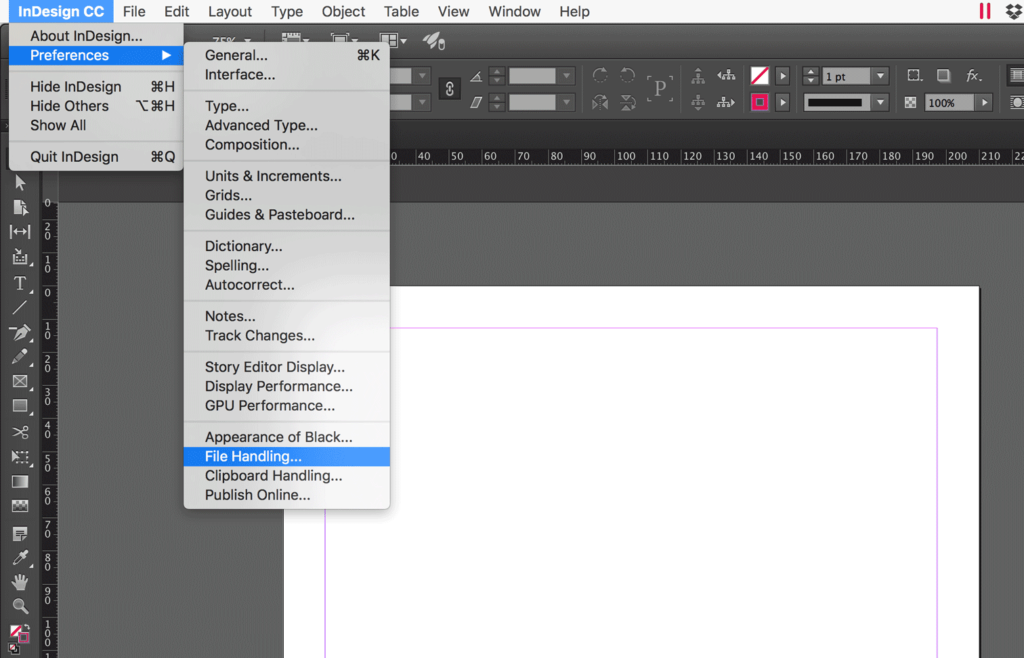
- Check Create Links When Placing Text and Spreadsheet Files in the File Handling window and click OK.
Place the Word file
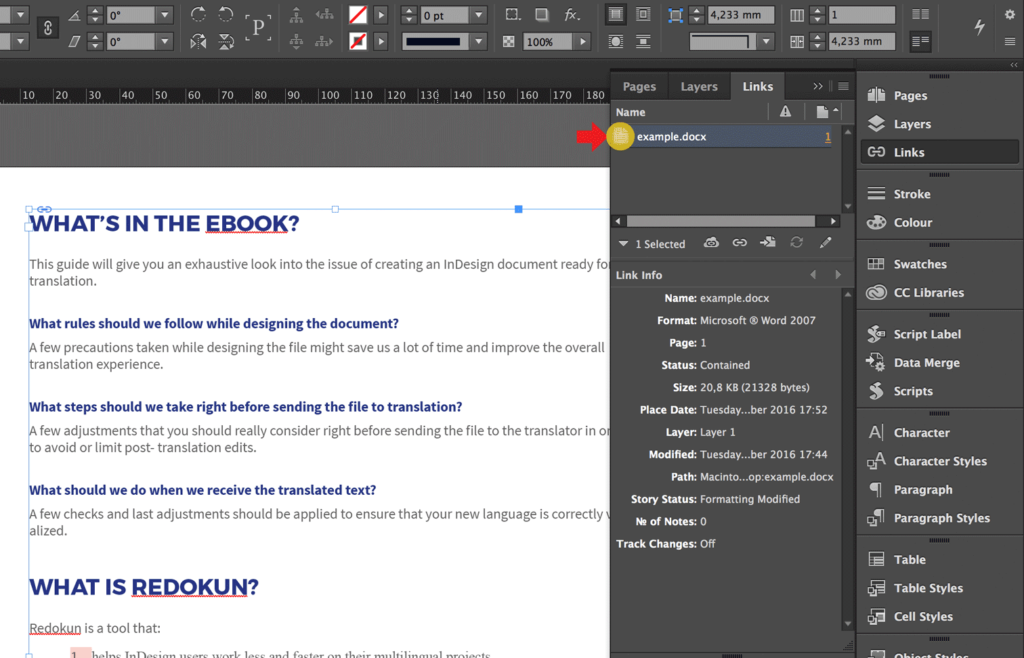
- As mentioned above, be sure that the styles in the Word document are correctly set to the text and import the text as we’ve seen before. If you already created the Paragraph Styles with the same names of the Styles in Word, InDesign will override the settings of the text imported from Word.
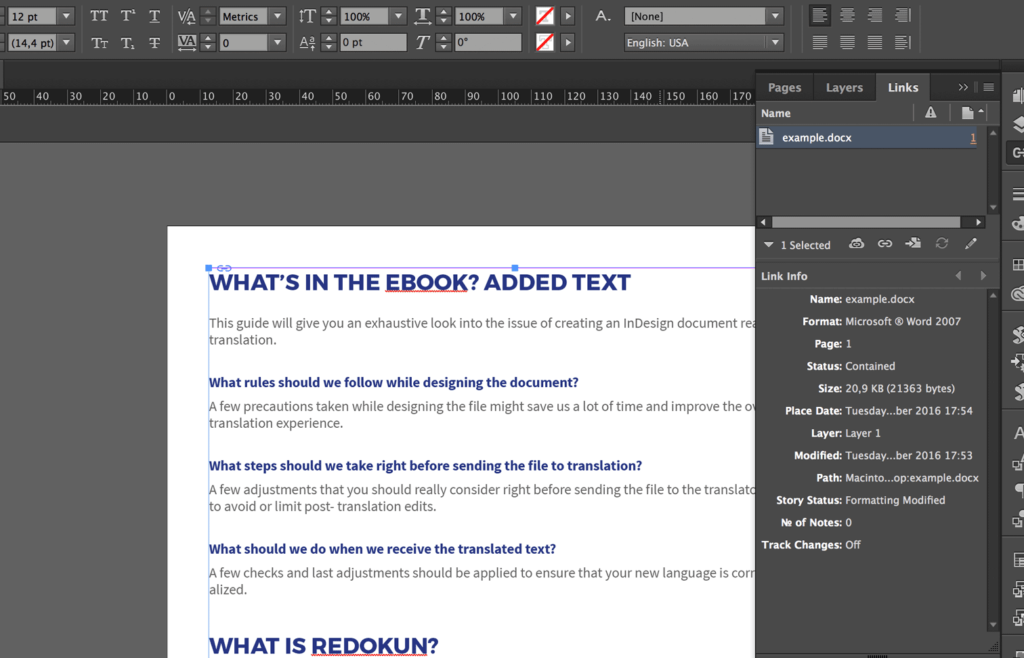
Please notice that now, in the Link menu, the link to the Word file has appeared.
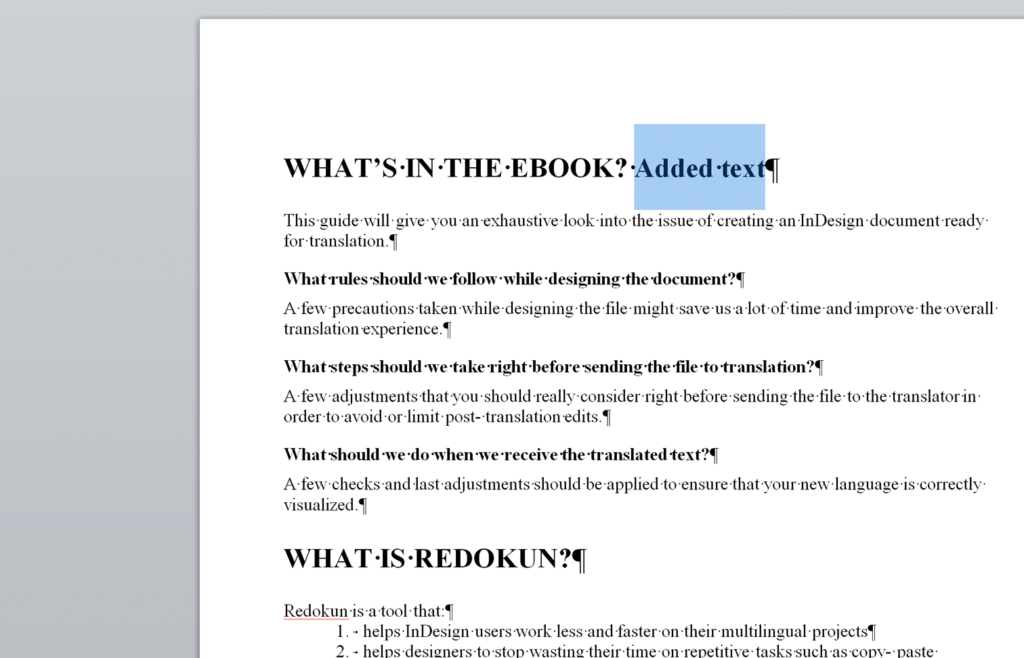
- Let’s add some text to the Word document and see what happens in InDesign.
In the Link menu, next to the name of the Word file, InDesign shows a warning triangle that indicates that the linked file has been modified. If we double click on the triangle, InDesign will ask to update the content.
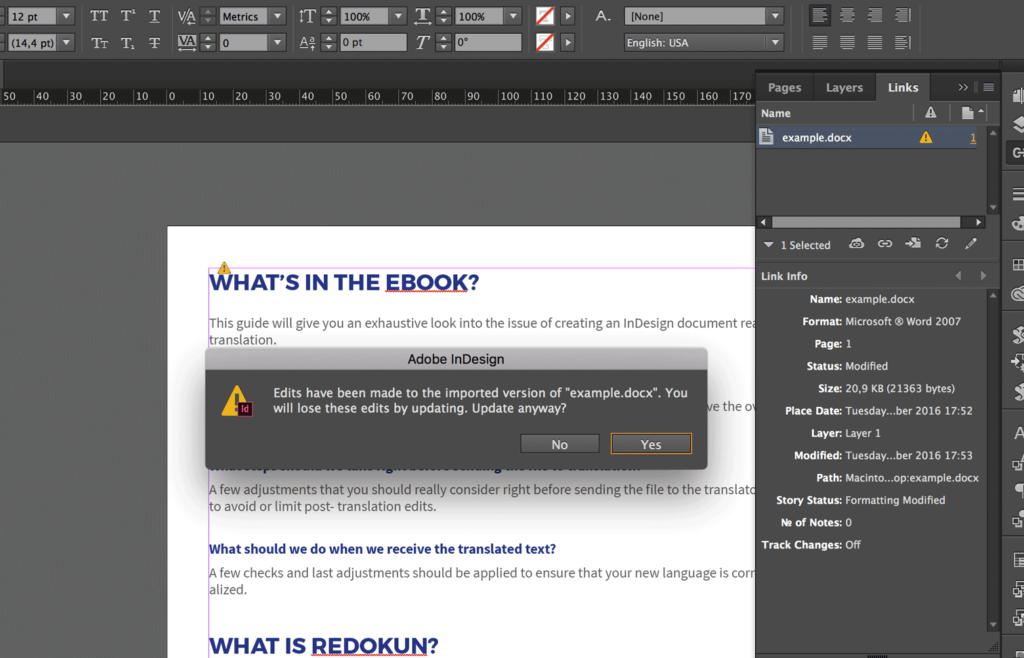
Please notice that if you update the linked content, you’ll lose all the changes made to the same text previously imported in InDesign (either graphic or textual).
Here is the result of the update.
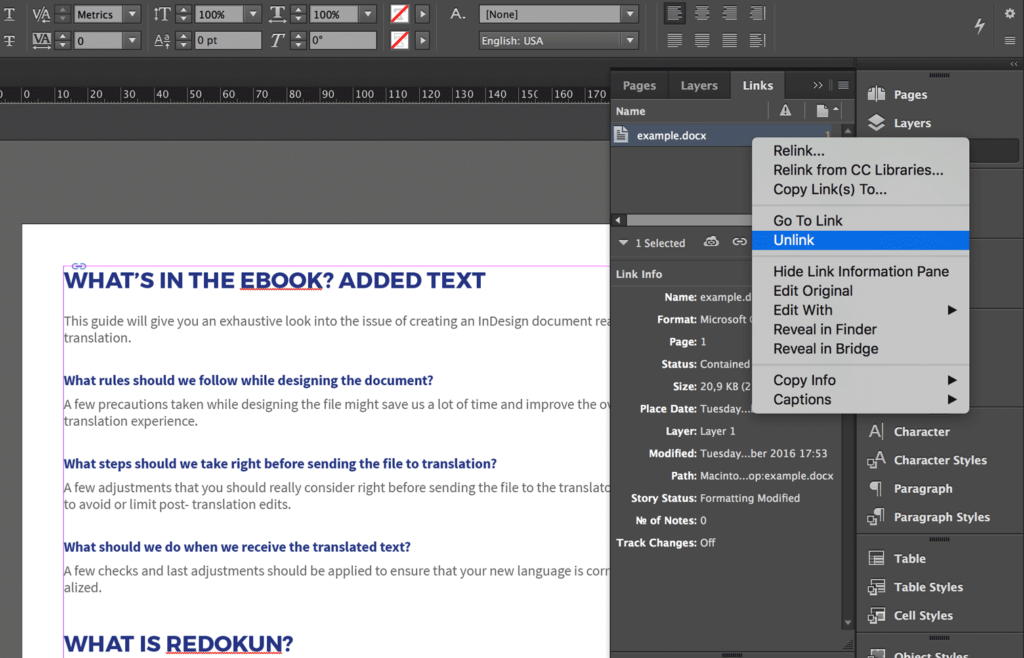
Remove link with an imported Word document
In case you want to remove the link to the file Word in InDesign, double click above the link to the file and then select Unlink.
Import a Word file with a table to InDesign
You can import into InDesign a Word file that contains one or more tables. However, InDesign doesn’t set a Table Style to imported tables, as it does with normal text, even when the tables inside the Word file have a Table Style applied. Instead, inline style applied to the tables in Word are kept.
If you want to import a Word file that contains tables into InDesign, and quickly lay out the imported table, you should use InDesign Table Styles (see here to learn how to use InDesign Table Styles). The best way to deal with an external table, however, is by using a spreadsheet in Excel (see how here).
A few caveats
Footnotes: They work, but you can’t control the style inside InDesign so be very careful with using them and set the style you want in the Word file, so that you’ll keep it that way when you import the Word document to InDesign.
Images: If you place images inside a Word document, InDesign will import them as embedded images. I’d highly discourage you from doing so because once an image is embedded, you won't be able to edit it (here is how to properly insert images in your documents). Linking images is always the best solution because it keeps the file size down and makes work more efficient (allowing you to update the image).
Shapes: Who needs to import shapes from a Word document to an InDesign file? That’s what InDesign thinks. If you use shapes in your Word file, InDesign won’t import or convert them.
Translating a word document? Here is a free e-book about how to optimize your Word documents.

[Pro Tip] Use master pages to automatically flow a Word document (update)
InDesign master pages are very handy and powerful, but many users surprisingly don’t know their full potential.
InDesign can load an entire story from a Word document automatically, creating pages and threading text-frames. This, combined with what we’ve just seen together, can save you loads of time and almost completely automate the process.
How do you do that? Check out this blog post to see how to use InDesign Master Pages to flow your Word document automatically.
In addition to this feature, here are a few other posts related to becoming the "master" of the text in your documents:
- Best tips to fixing overset text in your documents
- How to turn off hyphenation in InDesign
- How to create beautiful Drop caps
Be more efficient with plugins
Link documents in the cloud
I recently wrote this article about plugins (40 Essential InDesign plugins, add-ons, and utilities) and found a very nice one called WordsFlow. This plugin makes it possible to link a Word with InDesign. It enables you to edit both the InDesign story and the documents in Word or Excel independently, without losing work on either side. WordsFlow maintains a dynamic link so it can intelligently merge external document changes into the InDesign story contents on each link update, rather than just replacing the story. You can find WordsFlow – and try it for free – here.
Import the Word file using automatic semantic structuring
I found another extension that is worth checking out if you want to import your text from the Word file in a clean and semantically structured way to then apply your styles in InDesign.
The plugin uses the Bookalope web services, which work with an AI to strip away all visual styles and cleans up the document automatically, and then exports a semantically structured document to InDesign.
The InDesign document will of course have all styles that you can quickly edit and layout the document. Even better, all styles are already mapped to HTML tags for your ebook export as well.
Until next time,
Stefano


