


For years I’ve been fighting with this feature only to finally realize that it was actually not that difficult after all.
Overview
In this tutorial, I want to help you understand the logic behind InDesign and how page numbers work. I’ll teach you how to change the numbering, start from a different number, create sections, and some best practices.
You can jump to other parts of the article by clicking on the links below:
- The right place for your page numbers
- How InDesign page numbers work
- How to add page numbers in InDesign
- Change page numbers’ style
- InDesign page numbering: skip first page/pages
- Add the Section Marker
- Add a Section Prefix
If you use InDesign frequently, you can find other great InDesign tutorials here.
The right place for your page numbers
We talk about layers here. If you don’t know layers, you should check out this video tutorial from Adobe.
Layers are quite important in InDesign because they help you manage your content and avoid mistakes. They are not mandatory, but it’s better if you know the best practices.
I quote Lukas Engqvist here. He is a professor and an InDesign expert.
I tell students you will need layers: (bottom to top) Background, images, text, page numbers+header/footers. If you are doing interactive add animations, interactivity, navigation.
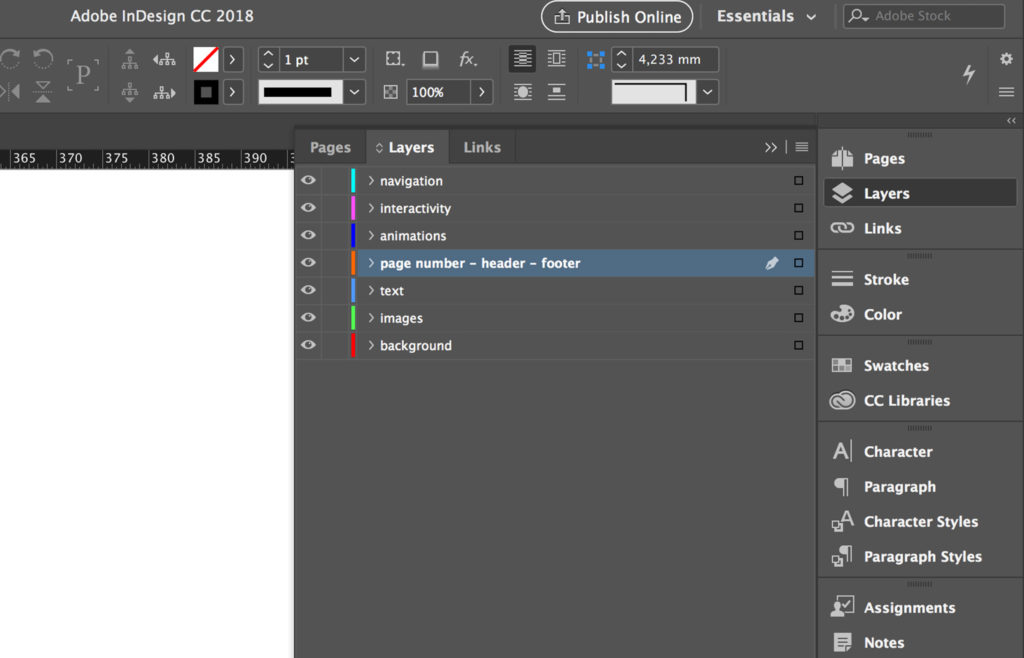
Layers work as containers. The containers on the top have more “priority” than the ones on the bottom – elements inside top layers will be displayed above (and cover) elements inside bottom layers.
Page numbers should be in a top layer because nothing (background, images, etc.) should cover them.
How InDesign page numbers work
To insert page numbers in InDesign, you have to use a placeholder called “Current Page Number.”
You can place it on any page or on the master page of your document. The placeholder will display the number of the page where it sits or the master page prefix.
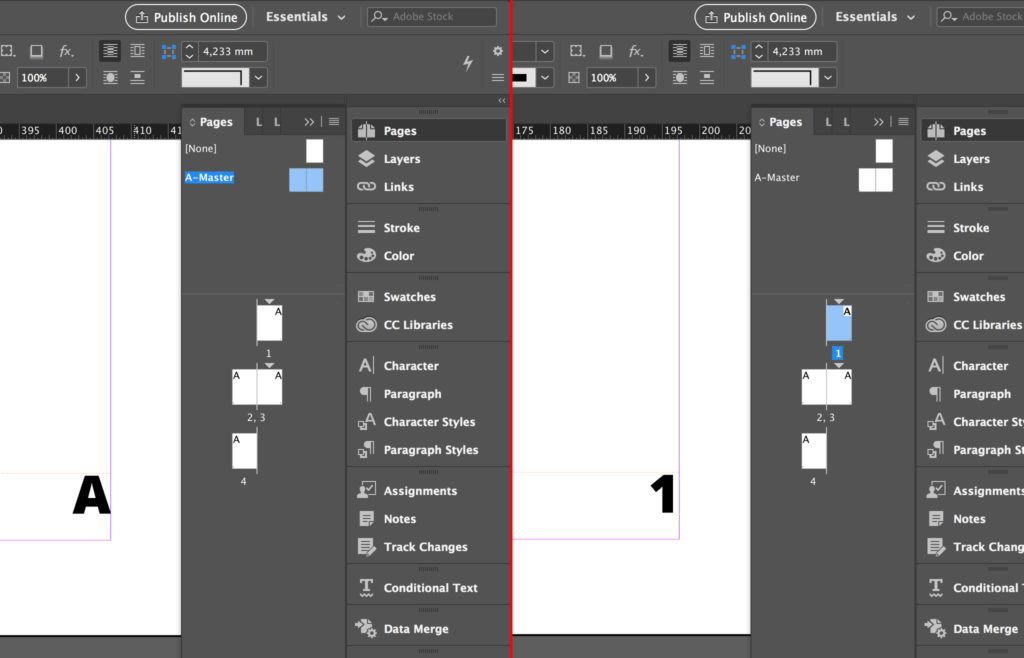
When the “Current Page Number” placeholder sits on a master page, every page to which you assigned that specific master page will display this variable – the number will change automatically on every page. If you change the style assigned to the placeholder on the master page (let’s say you set it to bold), all page numbers will update to that style (all numbers will become bold).
Is everything clear up to this point?
You should insert your page numbers:
- in the proper layer
- on master pages
How to add page numbers in InDesign
After this long introduction, you have a clear picture of how page numbers work and why we should place them on the master pages.
Open the Pages panel and double-click on a master page.
If you cannot find it, open the panel by clicking on Window > Pages.
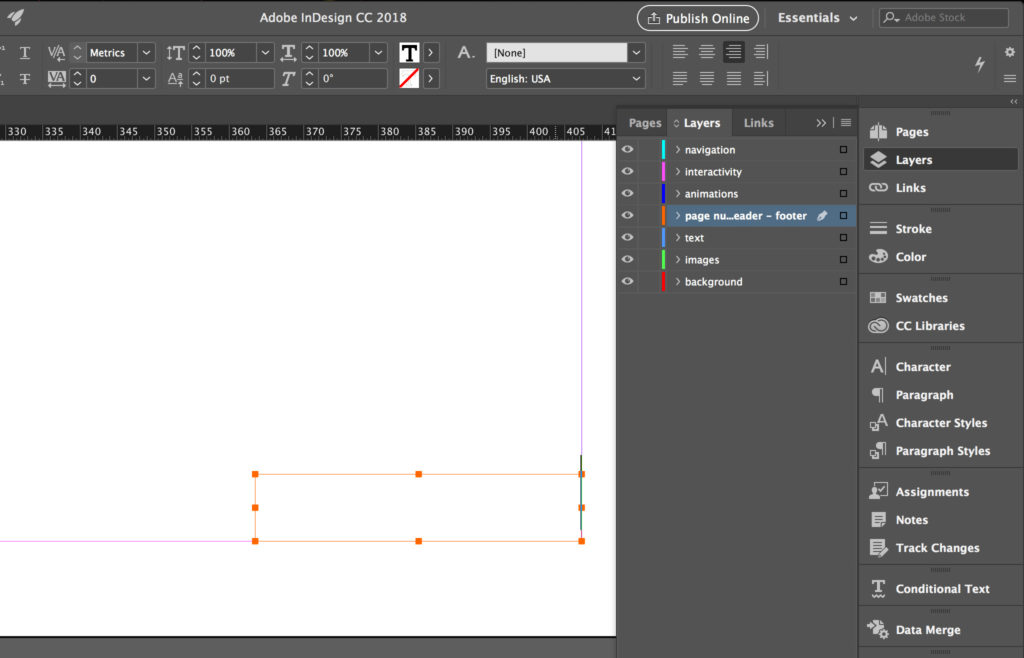
Remember to select the right layer if you are using the system we’ve seen above.
Draw a text-frame on the master page.
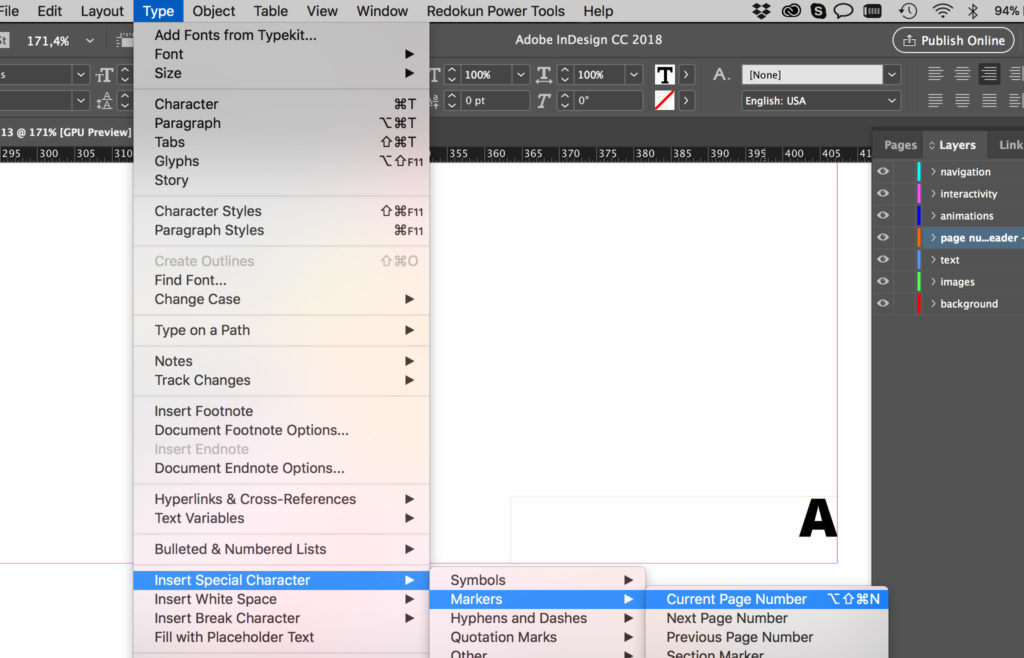
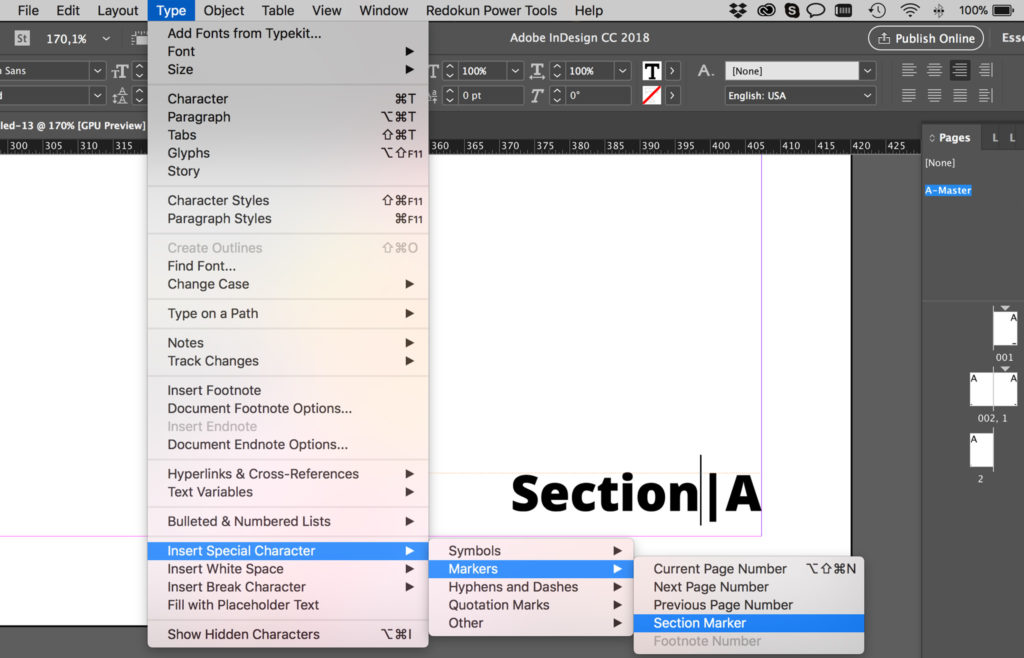
Click on Type > Insert Special Character > Markers > Current Page Number. The placeholder will display the master page prefix as you see in the image below.
If you have facing master pages, copy the text-frame we just created on the other page. Then apply the Master Page to the pages of your document.
If you need help with Master Pages, visit this user guide.
We successfully insert the page numbers into the InDesign document.
In the parts below, we’ll see all the specific cases you might encounter.
Change page numbers’ style
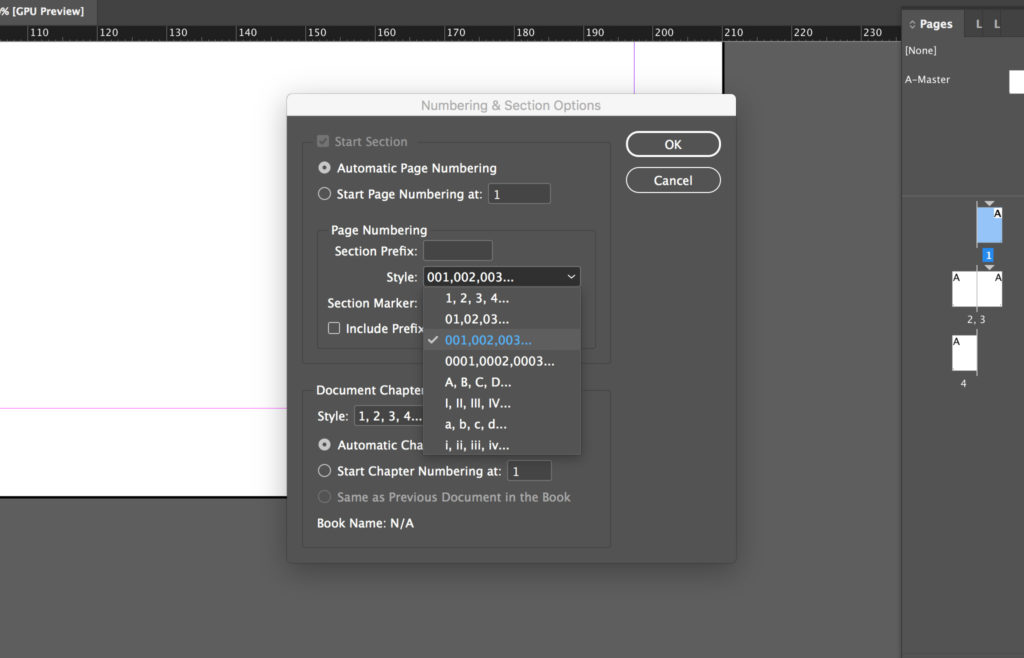
InDesign offers different types of page number styles (Arabic, Roman, Letters).
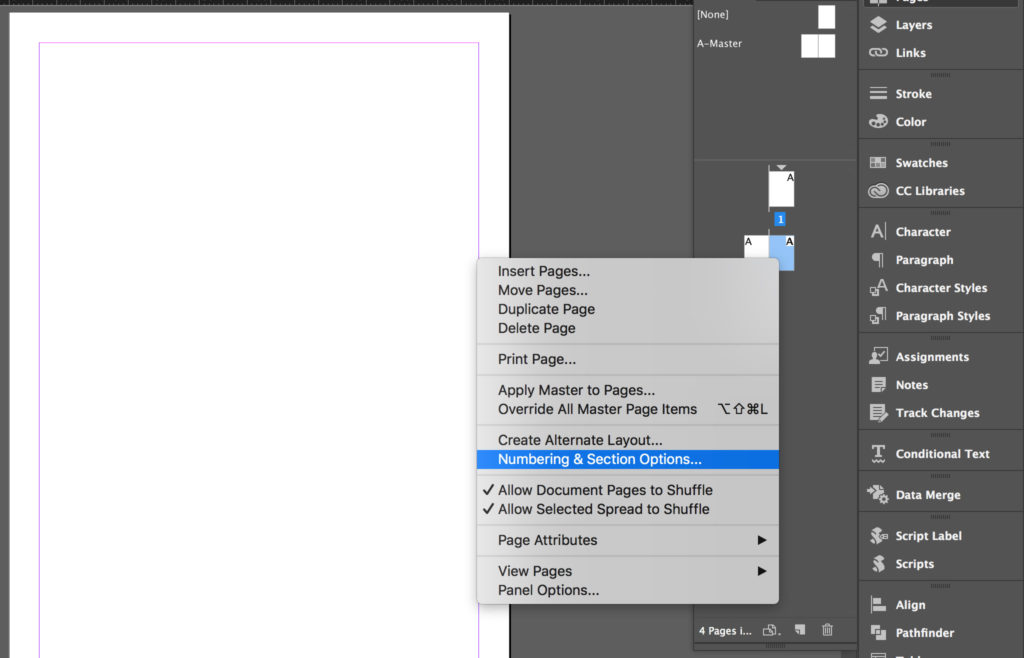
In the Pages panel, select the first page of the document. Right-click on it. And select Numbering & Section Options...
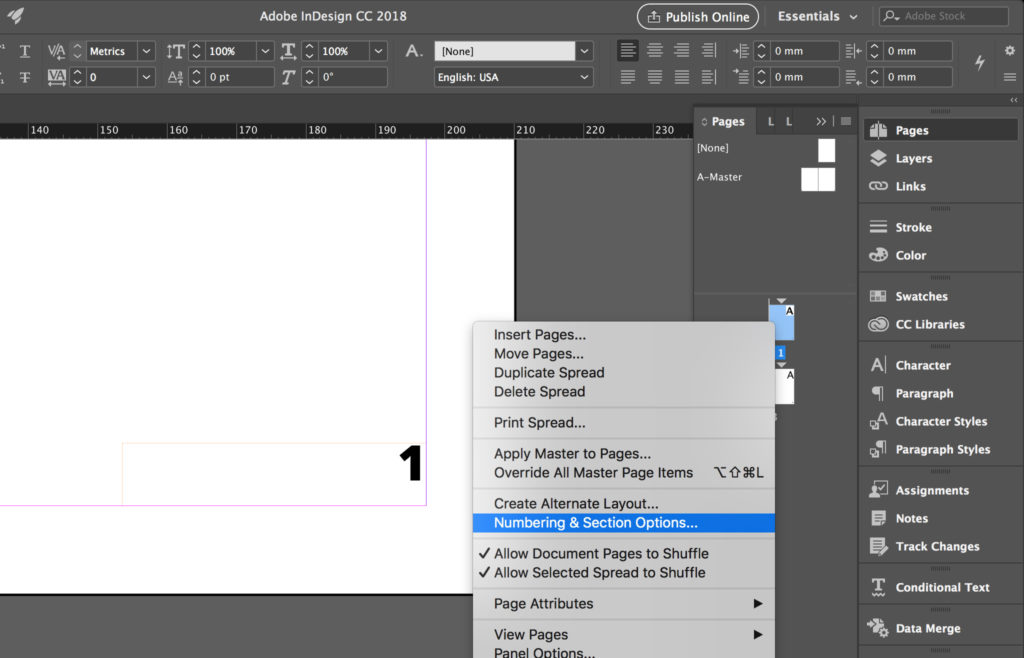
Change the page numbering Style and click OK.
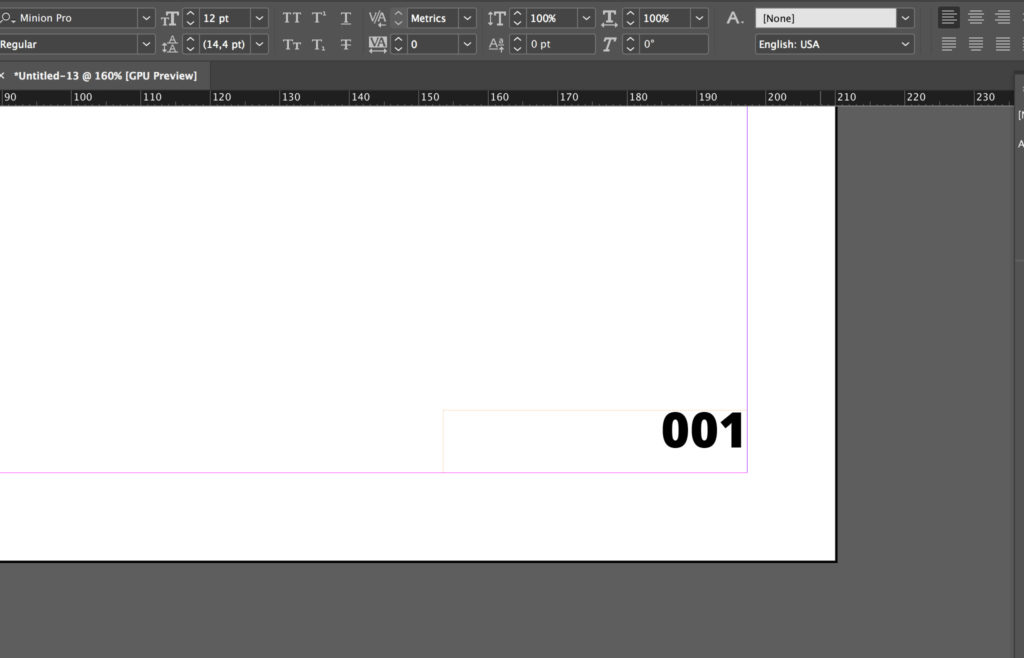
The numbers in your InDesign document now have a new fancy style.
We haven’t talked about sections, yet. We’ll do so a little later. However, notice that you should always select the first page of your section when changing the numbers’ style.
InDesign page numbering: skip first page/pages
By default, InDesign starts numbering a document from page 1. But in many cases, you want to start the numbering from a different page – for example, when page 1 is the cover of your document.
How do you do that?
As we’ve seen before, the “Current Page Number” shows the number of the page where it sits. So, what we need to do is to change the number of the page in InDesign – we do that by creating sections.
Create a section in InDesign
If you create the new section right away and force numbering to start with the number 1 on a page different from page 1, InDesign will display a warning.
Notice that your document already has a section – it starts from page 1 – and you will create a second section within the document.
To avoid this warning, you should:
- create the new section
- change the numbers’ style in the first section
- make numbering start with number 1 from the new section
Let's see how to do that:
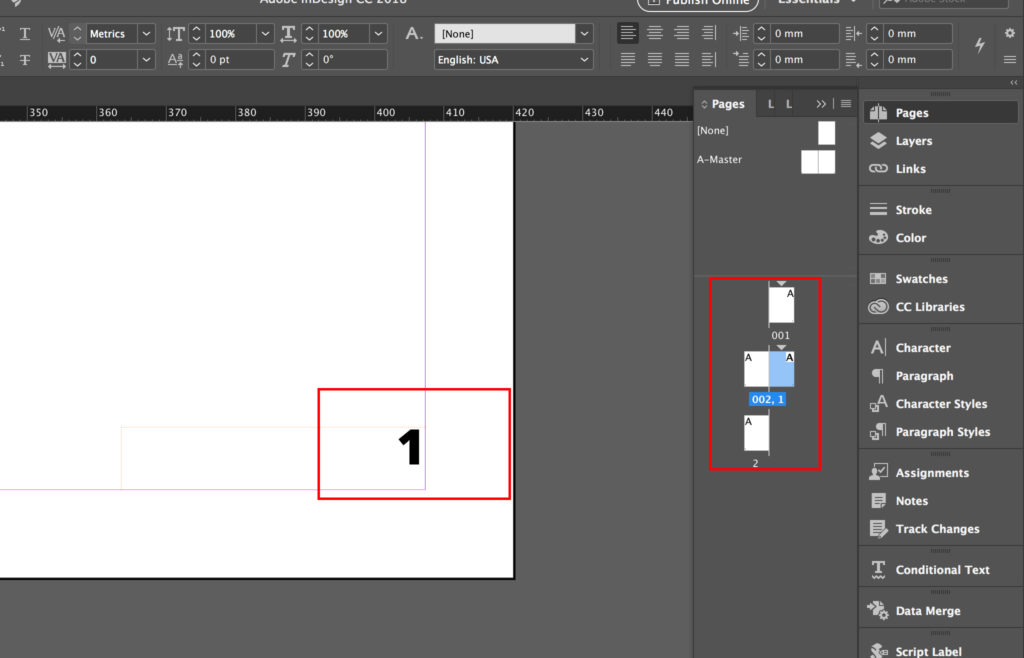
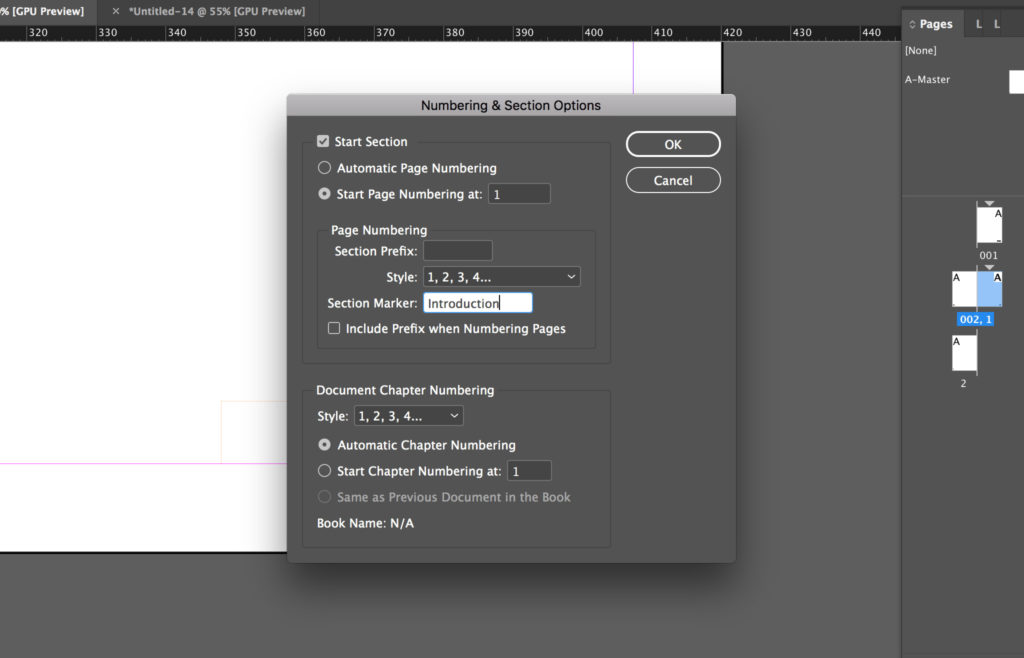
In the Pages panel, select the page from which you want to start the numbering (I select page 3 because page 2 will be the back of the cover). Right-click on it. And select Numbering & Section Options...
Let’s not bother about these options for now. Click OK. We just created a new section.
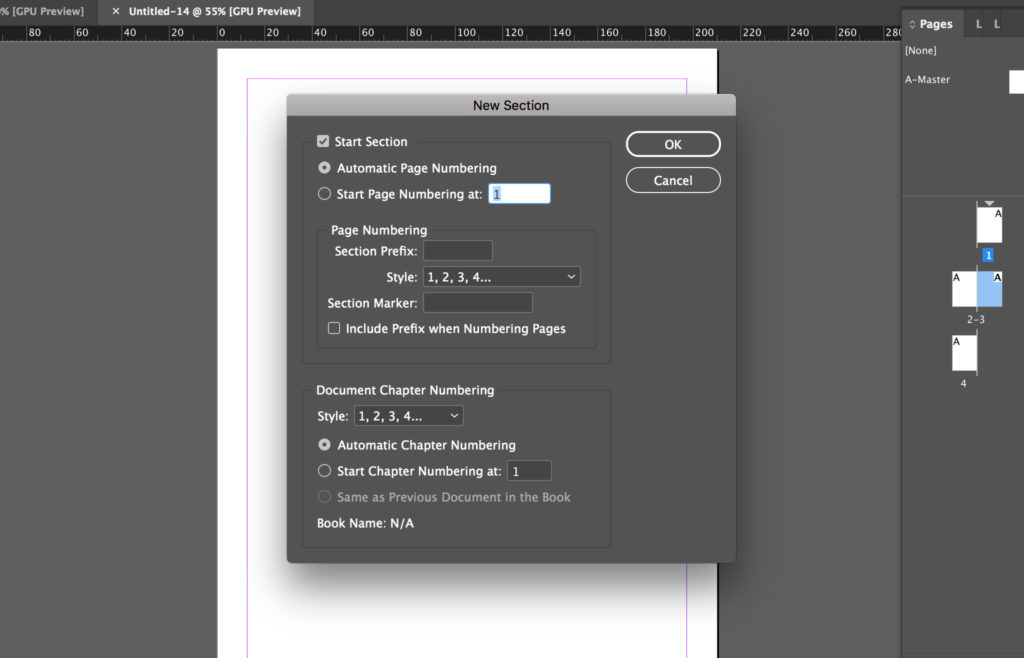
Let’s change the numbers’ style in the first section. Select page one. Right-click on it. And select Numbering & Section Options.... Change the page numbering Style and click OK.
if you prefer the step-by-step tutorial go back to the “Change page numbers’ style” section (click here).
Again, in the Pages panel select the page from which the second section of the InDesign document starts. Right-click on it. And select Numbering & Section Options....
Flag Start Page Numbering at and change the number to 1. Click OK.
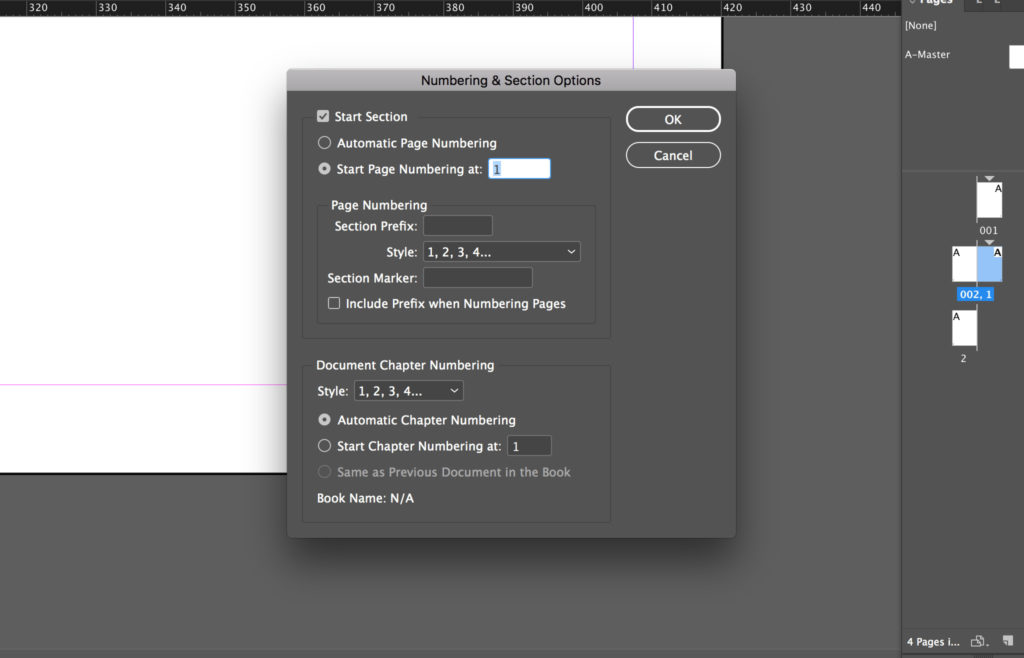
We successfully changed the numbering of our InDesign document.
Add the Section Marker
You might want to use Section Markers to indicate to readers what parts they are looking at (what part of a catalog, what chapter of a book, and so on).
To achieve that, you should:
- Edit the Section Marker value (of each section)
- Add the Section Marker placeholder in front of the number
Let’s edit the Section Marker first.
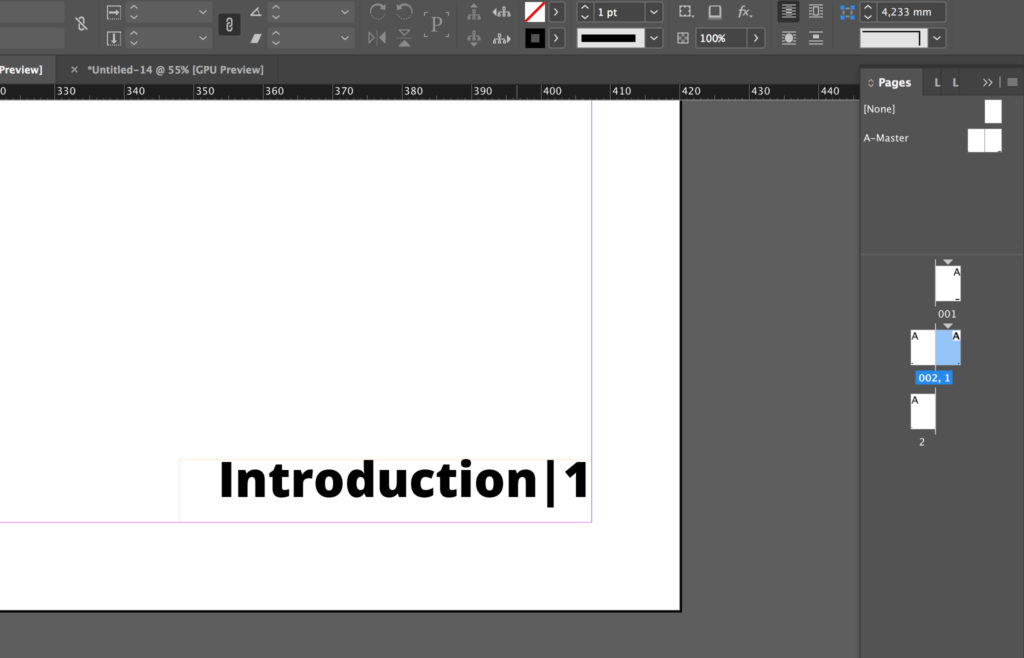
In the same window that opens when you click on Numbering & Section Options.... Edit the Section Marker. You’ll have to do the same thing for each section of your InDesign document.
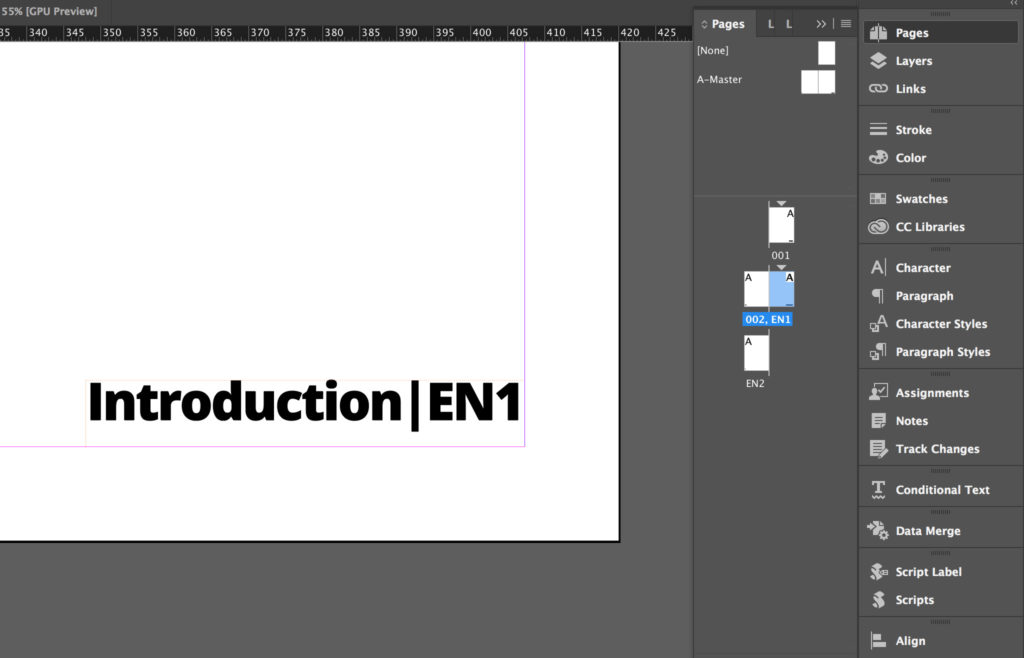
Now we have to add the Section Marker placeholder in front of the page number. In the master page, select the box where the “Current Page Number” placeholder sits.
Click on Type > Insert Special Character > Markers > Section Marker. The Section Marker placeholder is in front of the page number.
Add a Section Prefix
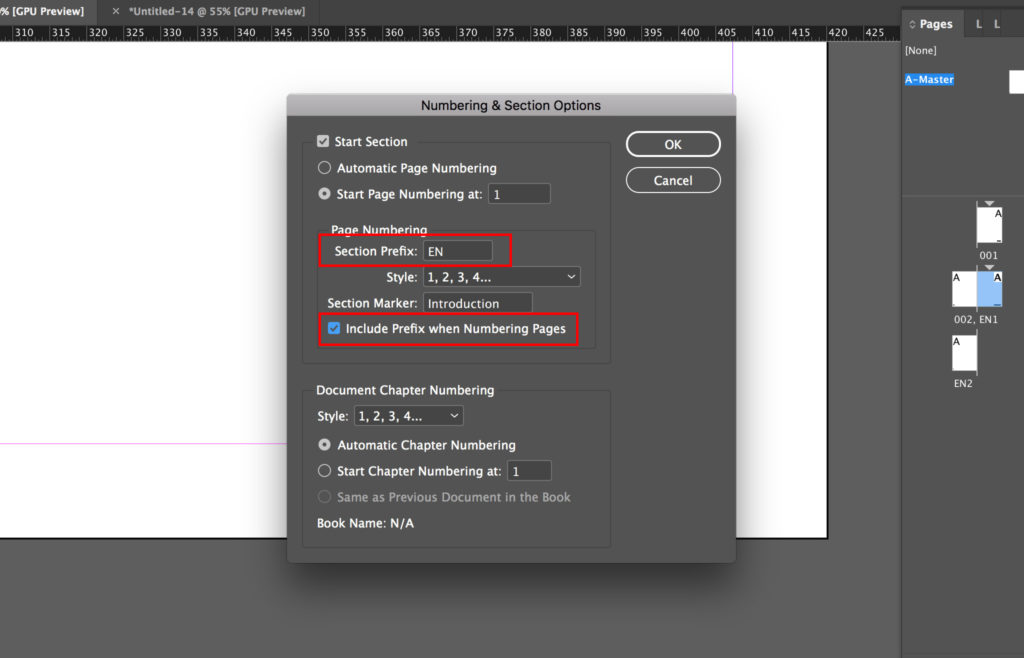
You can add a Section Prefix in front of the page number. In the example below, I’ll add the prefix 'EN' to indicate that this part of the document will be in English.
In the same window that opens when you click on Numbering & Section Options.... Edit the Section Prefix and flag Include Prefix when Numbering Pages. Click OK. In front of the number, there is now also the prefix.
Conclusion
In this tutorial, I tried to explain all the main things a user has to do when placing InDesign page numbers.
If you are facing specific issues, feel free to write your questions in the comments below, and I’ll try to help or improve the tutorial.
If you’re looking to improve your InDesign skills, then you should subscribe to our newsletter to receive new InDesign tutorials every week.


