


In this post we will see how to:
- Make InDesign show hidden characters
- Solve an issue that may not show any invisible text character
- Change the color of the hidden characters
Are you looking for an invisible text symbol?
What are hidden characters?
InDesign uses special text characters that are invisible to your eye and in the printed version of your document. These characters are called control characters. They are used, for example, to wrap lines, break paragraphs, space words in a specific way, etc.
Why do I have to activate hidden characters?
If you want to have complete control over your text while creating or editing your document, you want to see any invisible text characters because, as we mentioned, they control how your text is formatted.
For example, as we have already seen in another post, using a specific control character (soft-return or hard-return) to wrap your text may influence the way your text behaves when you apply a paragraph style.
What are the advantages of control characters correctly?
Being careful while using these special characters in InDesign will make a big difference in your experience with using the software. It also increases your ability to spot eventual mistakes made while creating the document (here is a list with the 20 most common InDesign mistakes) or hidden characters mistakenly pasted in your file from other sources.
Let’s see how to show invisibles in InDesign.
{{banner-component}}
How to show paragraph marks in indesign or any hidden text characters?
To show hidden characters in InDesign, you need to check the hidden characters setting.
Click on Type in the main menu bar and then turn on Show Hidden Characters
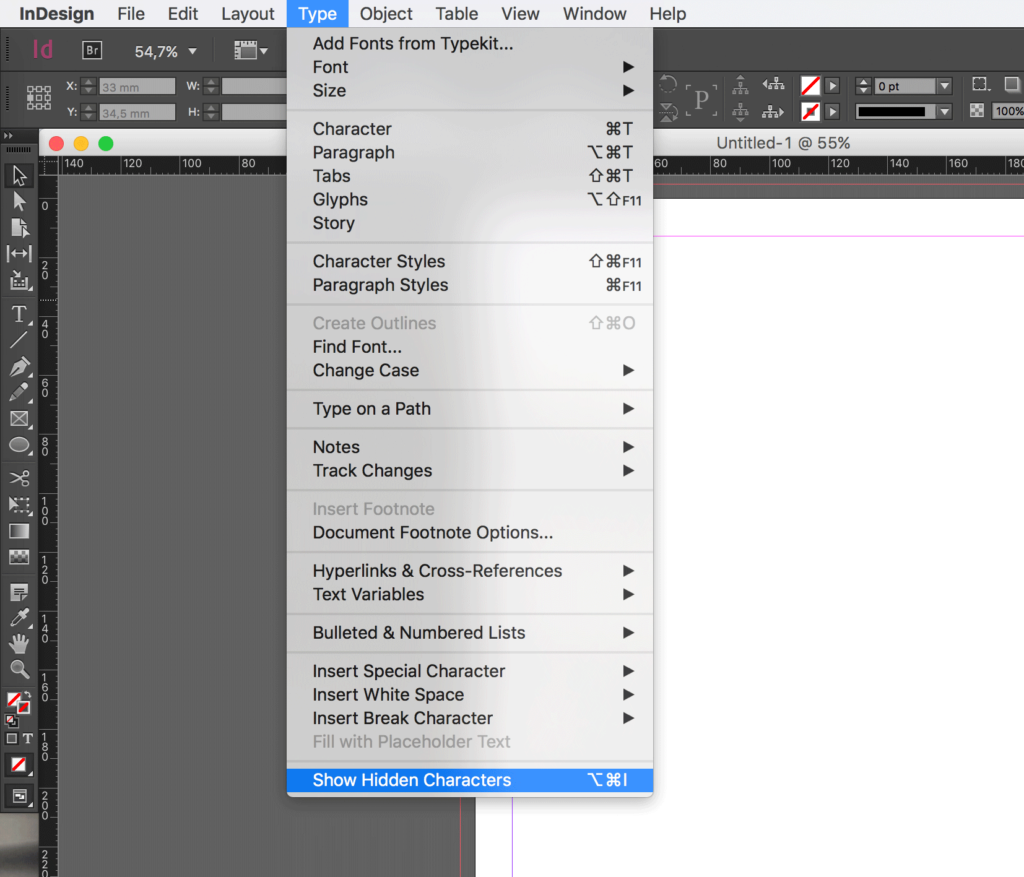
This will force InDesign show hidden characters.
Be aware though that these InDesign special characters are visualised only when the Screen Mode is set to Normal. If your Screen Mode is set to Preview you won’t be able to see any invisible character text.
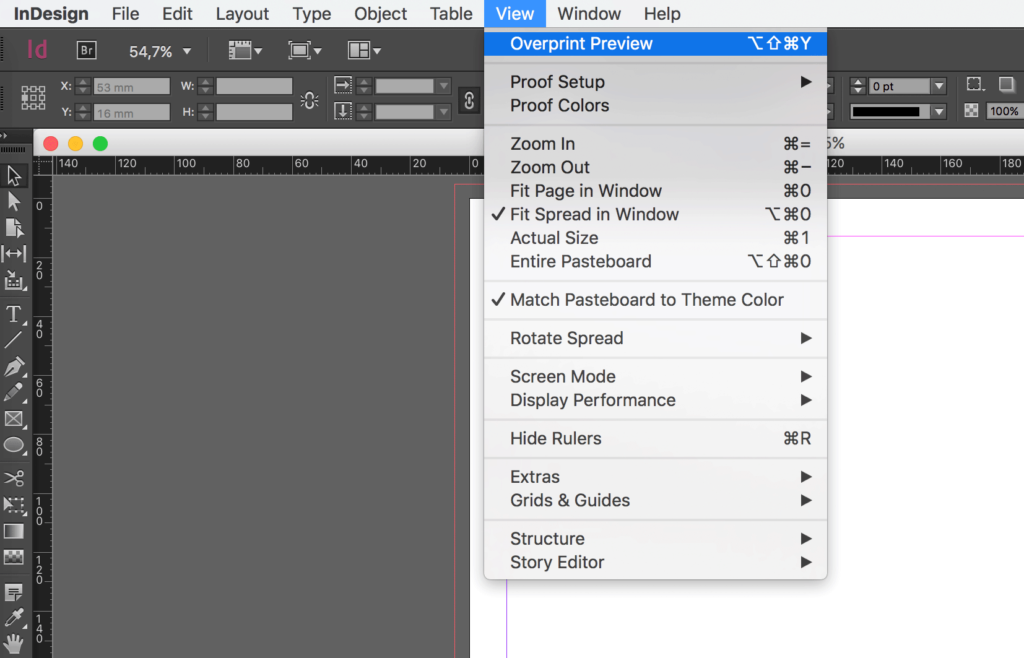
Is your screen mode set to Normal, but you still can’t show hidden characters?
If you activated the setting “Show Hidden Characters,” but for some reason you can’t see any special characters in InDesign, it might be that you turned on “Overprint Preview.” If this is the case, you will see [Overprint Preview] written next to the title of the document.
To turn off this feature and make all the hidden text characters visible:
Click on View in the main menu bar and then turn off Overprint Preview
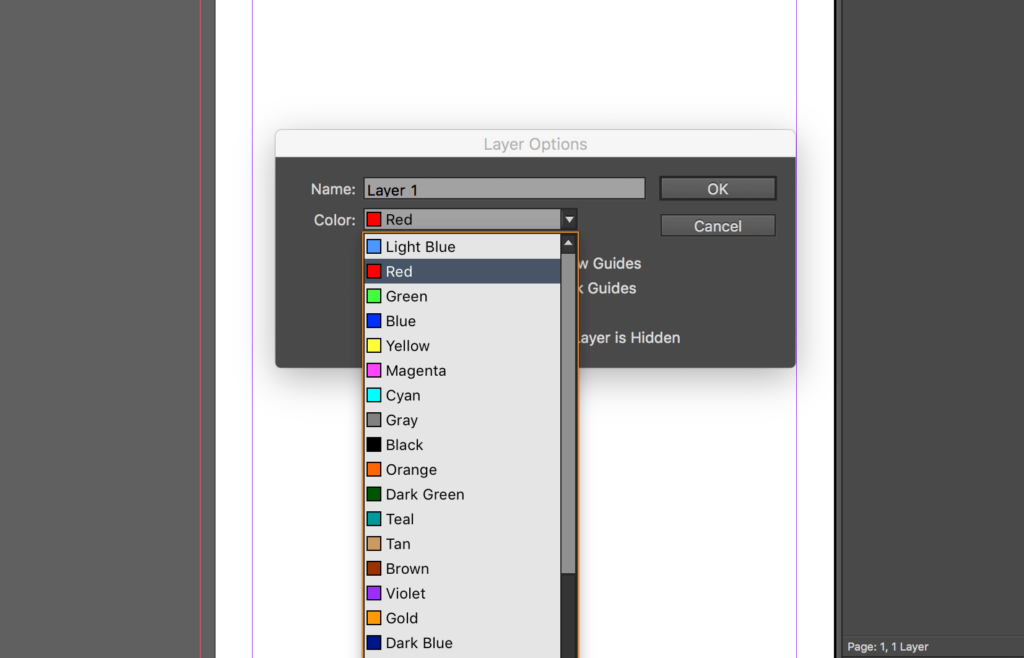
How to change the color of the Hidden Characters shown in InDesign?
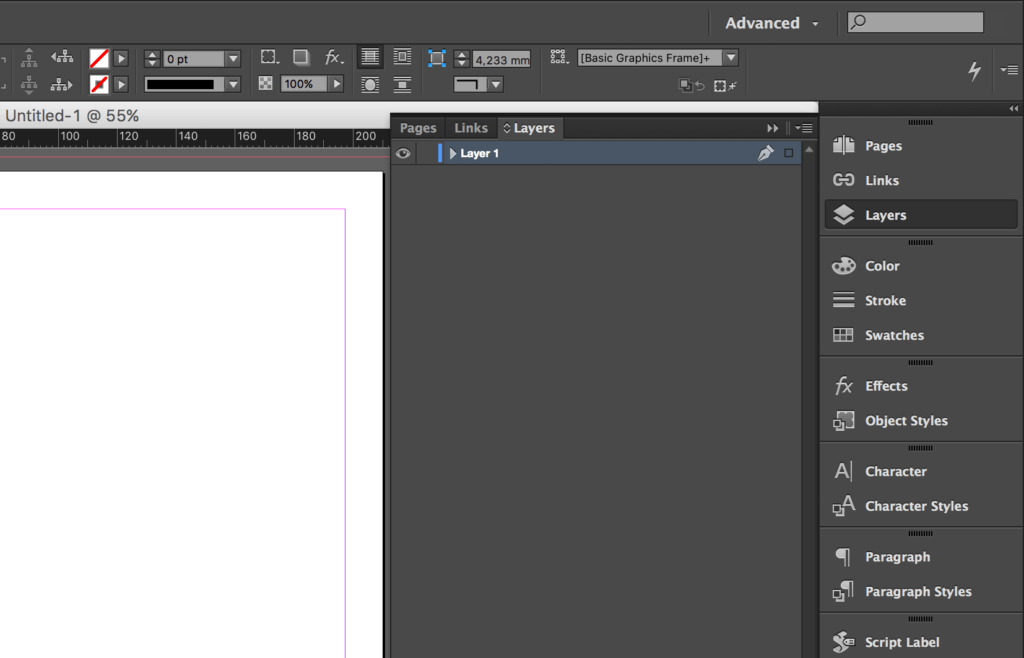
The special characters InDesign shows are generally in this blue #4f99ff. Let’s say that you want to change that color. It's very simple. To change the color of the hidden characters, you just have to change the Layer color. To do so:
- Click on the Layers menu in the panels to the right
- Double-click on the layer name, so that this menu opens
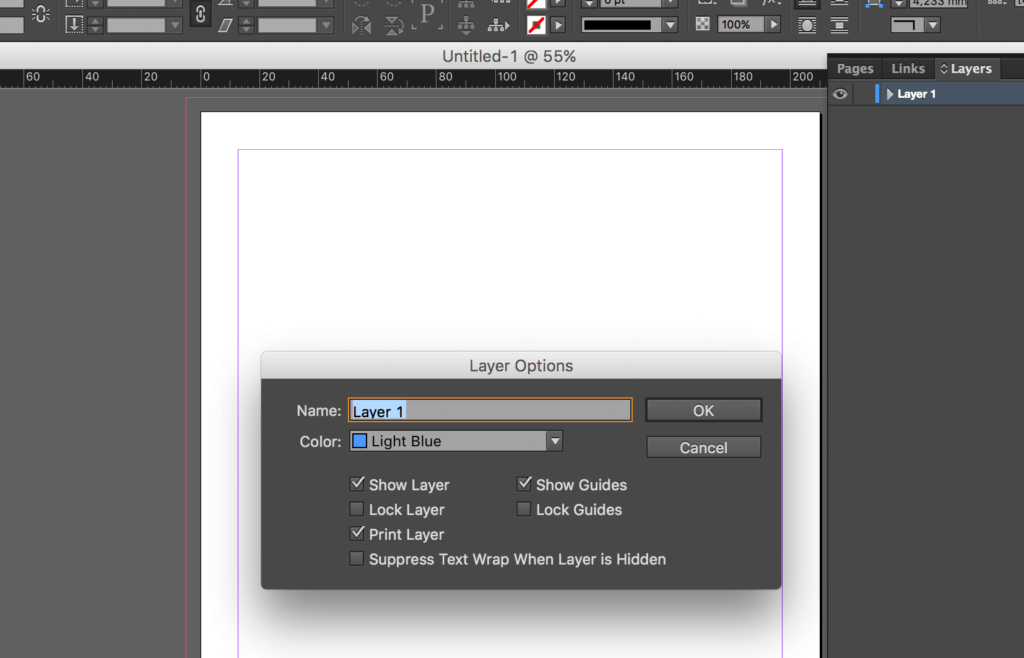
- Change the Color value and press OK
Must-know InDesign Keyboard Shortcuts
Complete list of InDesign hidden characters
InDesignSecrets has the perfect list of all (or at least most of) the InDesign hidden characters in a pdf that you can download from this page.
In the following tables the most common ones are shown.
White space
| Hidden Character name | InDesign | macOS | Windows |
|---|---|---|---|
| Normal Space | |
Space bar | Space bar |
| Em Space | |
Alt + Cmd + M | Alt + Ctrl + M |
| En Space | |
Alt + Cmd + N | Alt + Ctrl + N |
| Third Space | |
- | - |
| Quarter Space | |
- | - |
| Sixth Space | |
- | - |
| Thin Space | |
Alt + Cmd + Shift + M | Alt + Ctrl + Shift + M |
| Hair Space | |
- | - |
| Nonbreaking Space | |
Alt + Cmd + X | Alt + Ctrl + X |
| Nonbreaking Space (fixed width) | |
- | - |
| Punctuation Space | |
- | - |
| Figure Space | |
- | - |
| Flush Space | |
- | - |
Text Flow Breaks
| Hidden Character name | InDesign | macOS | Windows |
|---|---|---|---|
| Paragraph Break (Return) | |
Enter | Enter |
| Column Break | |
Fn + Enter | Fn + Enter |
| Frame Break | |
Fn + Shift + Enter | Fn + Shift + Enter |
| Page Break | |
Fn + Cmd + Enter | Fn + Ctrl + Enter |
| Odd Page Break | |
- | - |
| Even Page Break | |
- | - |
Line Breaks
| Hidden Character name | InDesign | macOS | Windows |
|---|---|---|---|
| Forced line break | |
Shift + Enter | Shift + Enter |
Other Specials
| Hidden Character name | InDesign | macOS | Windows |
|---|---|---|---|
| End of text in the story | |
- | - |
| Tab | |
Tab | Tab |
| Right Indent Tab | |
Shift + Tab | Shift + Tab |
| Indent to Here | |
Cmd + \ | Ctrl + \ |
| Custom Anchored Object | |
- | - |
Be sure to subscribe to our newsletter to keep up with future posts or major updates. If you have questions feel free to post them in the comments. If you liked the post, I'd really appreciate you sharing it!


