


A well organized document is sign of a winning product.
For this reason, after our tutorial post on bulleted lists, let's find out how to create an InDesign numbered list. After all, what's better than a list to organize your document?
How do you go about creating an InDesign numbered list?
The process is not much different from what we saw in the previous post on bullet points.
Again our list can be created in two ways:
- Using local formatting
- Using InDesign paragraph styles
I, as some of you may know, prefer the use of paragraph (and character) styles rather than the use of local formatting.
Styles allow you to have consistency within your document. Plus, they save you a lot of time if you need to go back to your document and edit your work at a later time.
In this article, however, I will show you both ways of creating the InDesign numbered list. Here's a practical overview of everything we'll cover:
Overview
- Why choose a numbered list instead of a bulleted list?
- Create an InDesign numbered list with local formatting
- Create an InDesign numbered list with styles
- Chapters and sub-chapters with automated numbering
Why choose a numbered list instead of a bulleted list?
Numbered lists can be used in the same way as bulleted lists are used. But the InDesign numbered list has one special feature that makes it stand out.
Using a numbered list, you can create chapters and sub-chapters in your document that rely on automated numbering.
So let's get down to business.
Create an InDesign numbered list with local formatting
In this section I will show you how to create an InDesign numbered list without using styles. We will see, in order how to:
- Turn text into a numbered list.
- Change the indentation value for the numbers.
- Change the numbering style.
Transform the text into a numbered list
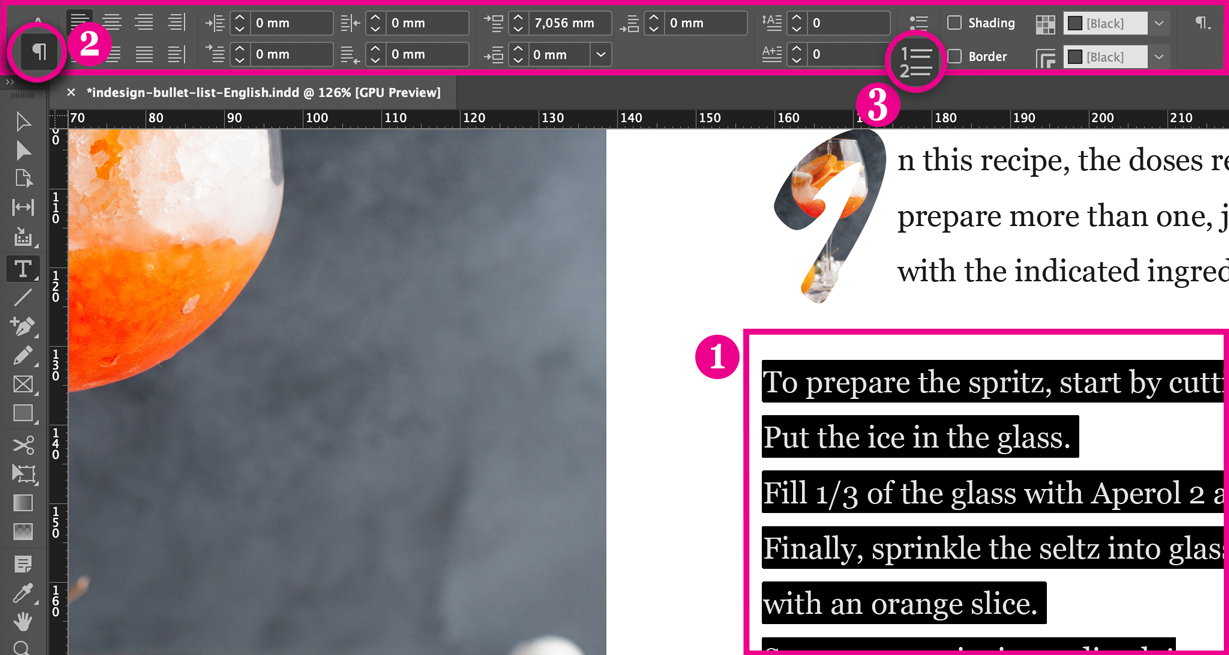
- Select the text you want to transform into a list.
- Now turn your attention to the control bar at the top. Make sure that the icon on the left with the paragraph symbol is active, if it isn't, click on it.
- Click on the numbered list symbol to turn the text into a list.
Change the indentation value of the numbers
Now that you've turned the text into a list, you need to set the distance between the numbers and the text.
- Keep your selection on the numbered text.
- Change the values on the control bar (as pictured below).
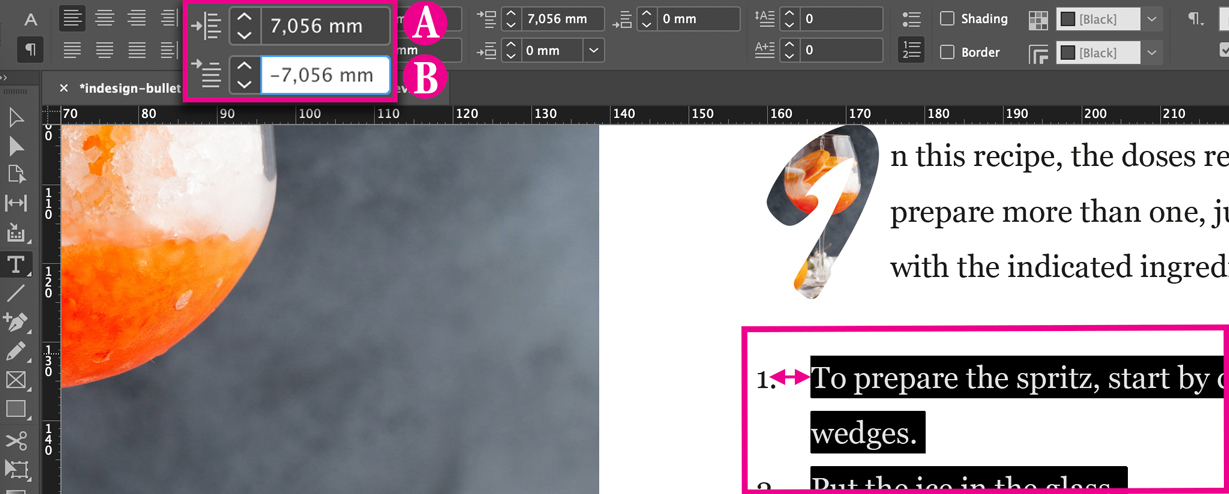
- The first value at the top (A) indicates how far the text should fall within the margins of the text box that contains it (in the example the space is indicated in millimeters).
- The second value below (B) indicates how far the number is from where the text begins (that's why the value in this case is negative).
Change the numbering style
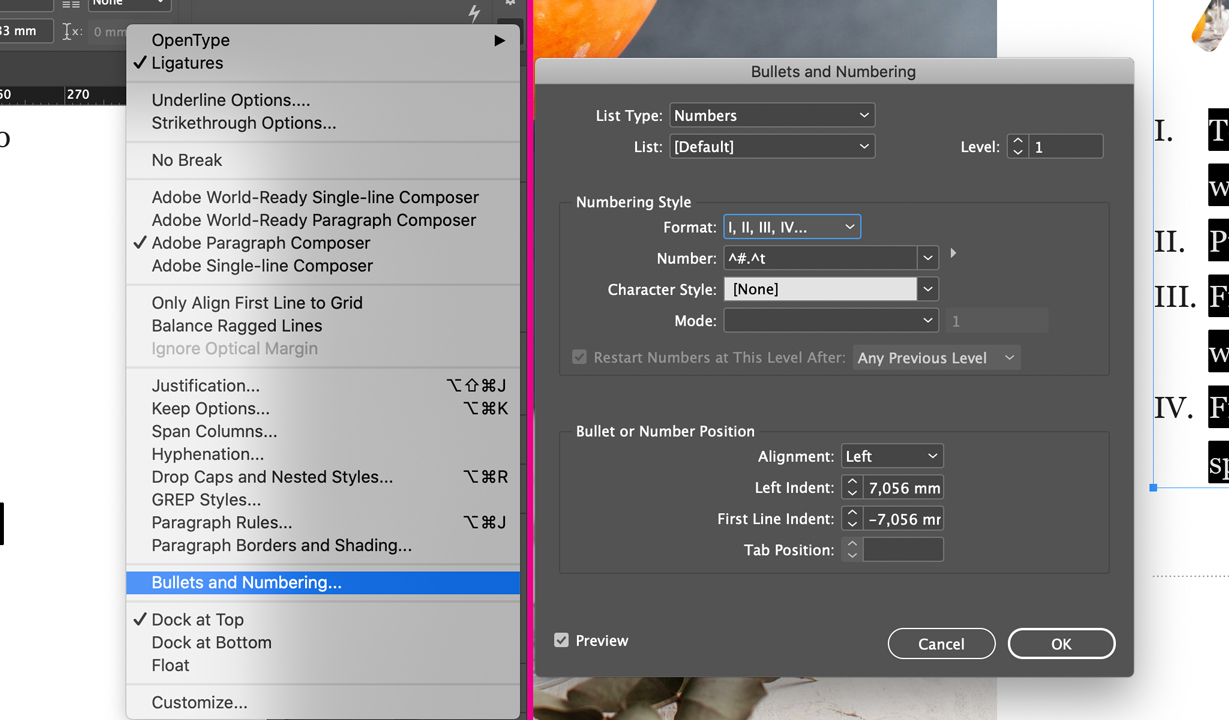
- Keep your selection on the numbered list. At the far left of the control bar at the top, inside the tools dedicated to the paragraph, click on the icon with three vertical lines.
- Click on the option Bullets and Numbering ....
- In the panel that opens you will find the section Numbering style.
- Here you can change the format (numbers, letters, Roman numerals, etc.), by clicking on the Format option and selecting the one you prefer.[image]
Create an InDesign numbered list with styles
You will see that the instructions we have just seen above will come in handy in this second part.
Finally let's talk about paragraph styles.
There are two ways to create numbered lists using styles:
- Using the Redefine style option (after setting the list as we saw in the part above).
- Using the Bullets and Numbering tab.
See here how to create a Paragraph Style in InDesign.
Use the Redefine style option
This option is also useful for saving any style settings you have given locally to the text.
In my document, before changing the style of the numbered list, I had already assigned a paragraph style to the numbered list called p-numbered-list.
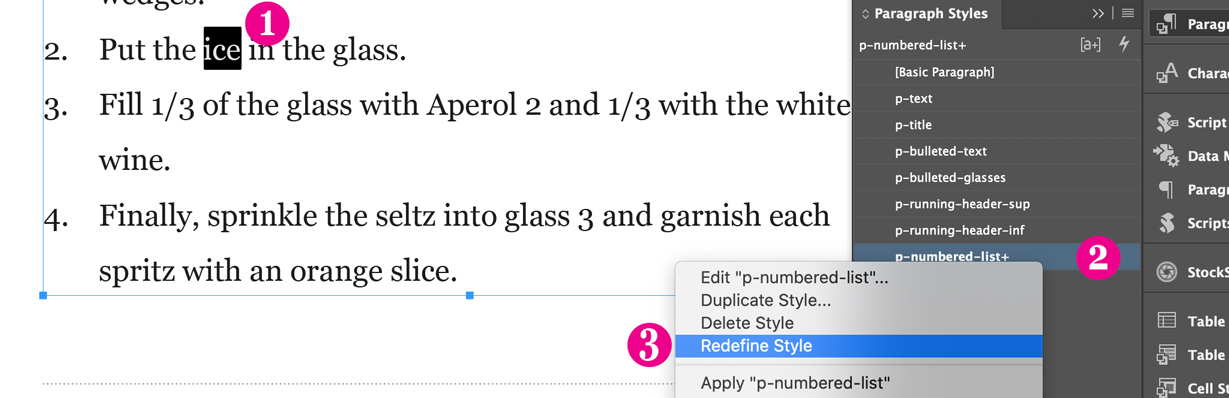
- At this point, with p-numbered-list assigned to the list, place the pointer inside the list (for safety avoid the paragraph with the number 1).
- In the Paragraph Styles panel, right-click on p-numbered-list.
- Select Redefine style.
From this moment, every time you associate p-text-numbered with a paragraph you will create a list like the one set in the section "Create a numbered list with local formatting" of this tutorial.
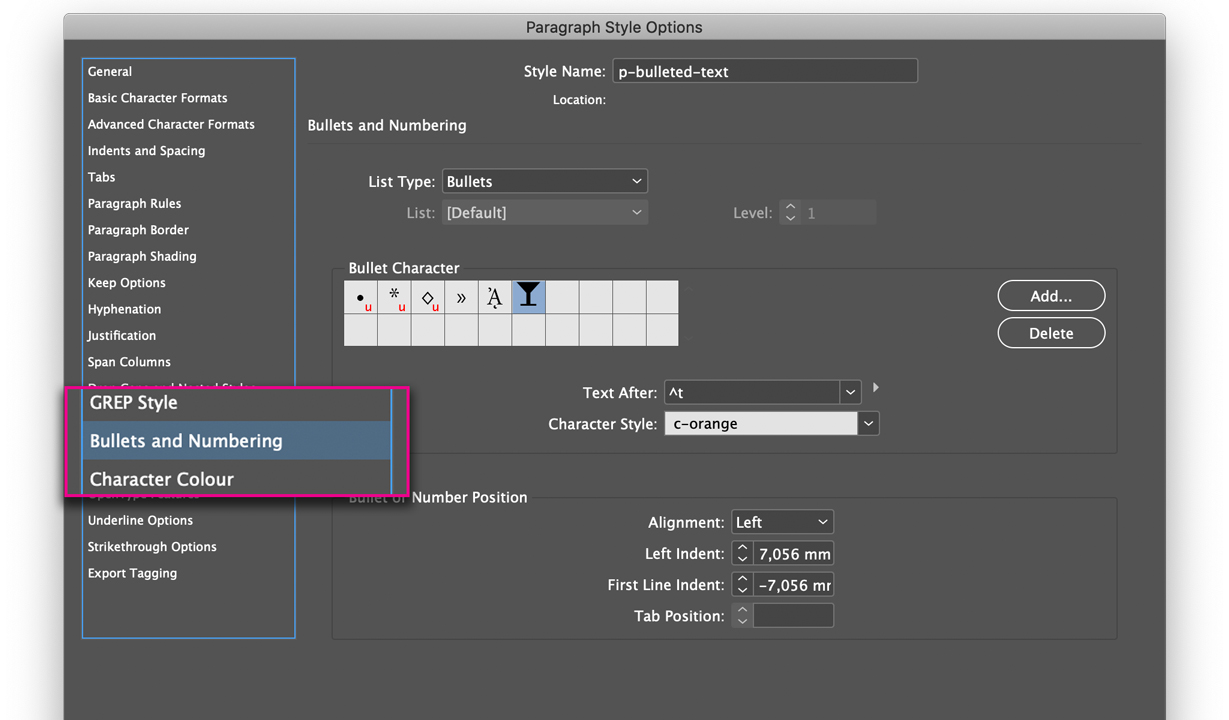
Use the Bullets and Numbering tab
This is for you more experienced folks using InDesign that would prefer to set the numbered list directly within the paragraph style.
You can go, in the Bullets and Numbering tab to find all the settings necessary to create your list with a paragraph style.
Chapters and sub-chapters with automated numbering
Here we are at the interesting part. How can you use the InDesign numbered list to create chapters and sub-chapters with automated numbering?
Let's clarify what chapters are in InDesign
You may find settings in InDesign that refer to "Chapters". In that case they are talking about Books.
The use of books is a topic that I have not yet covered in these tutorials, and it is also very specific.
In fact, you're not going to want to use books for all your documents. Even when you may theoretically want to use books you may find yourself opting not to.
This may seem absurd to some of you, but for a user in love with automation like me (GREP, scripts, etc.) books can be an obstacle rather than an assistance.
Create chapters and sub-chapters with numbered lists
Let's see how to use the InDesign numbered list to our advantage so as to manage chapters and sub-chapters.
The secret is to use simple tiered lists.
Let's start, as in my case, with a list. I have already applied styles to this list: p-chapter, p-sub-chapter, p-title-third-level.
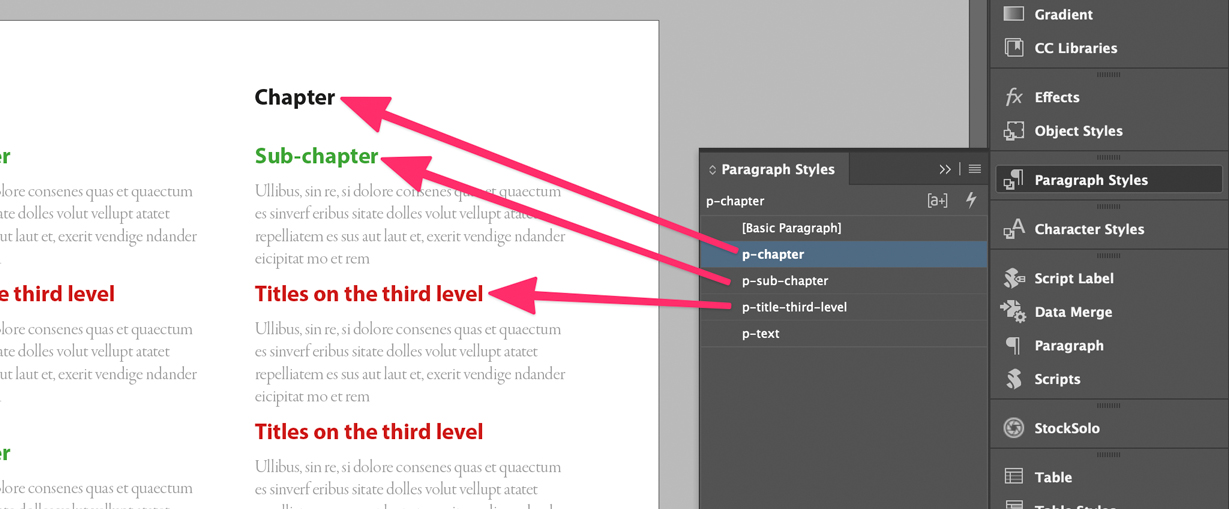
NB: the two "sub-styles", p-sub-chapter, and p-title-third-level, both depend on the first style, p-chapter.
We transform the list into a numbered list
Let's turn this list into a numbered list.
- From the style panel enter p-chapter.
- In the Paragraph Style Options, choose Bullets and Numbering.
- Choose the Numbers option as the List type.
- Now your titles are a continuous numbered list.
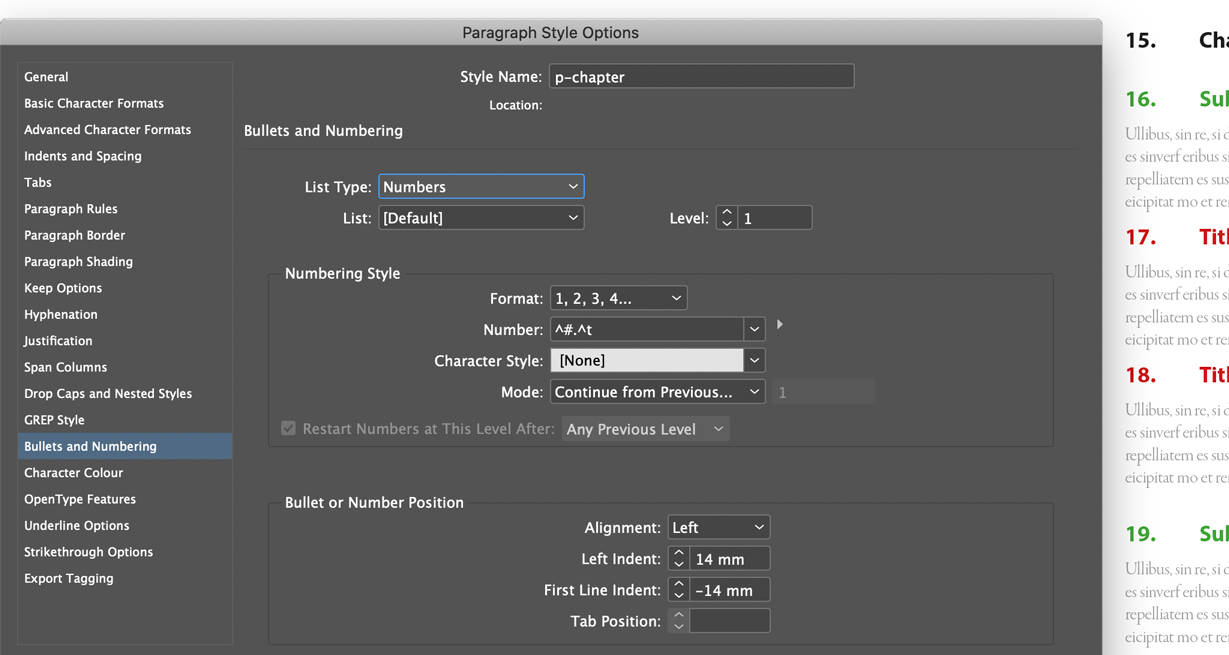
- Now focus on the Bullets and Numbering panel. Next to the List type choice you can see the Level box. Leave your list at Level 1.
- Below is the Number box that reads ^#.^t. Highlight the first part, which is: ^#
- Click on the arrow next to the selection and choose Insert number placeholder.
- Choose Level 1.
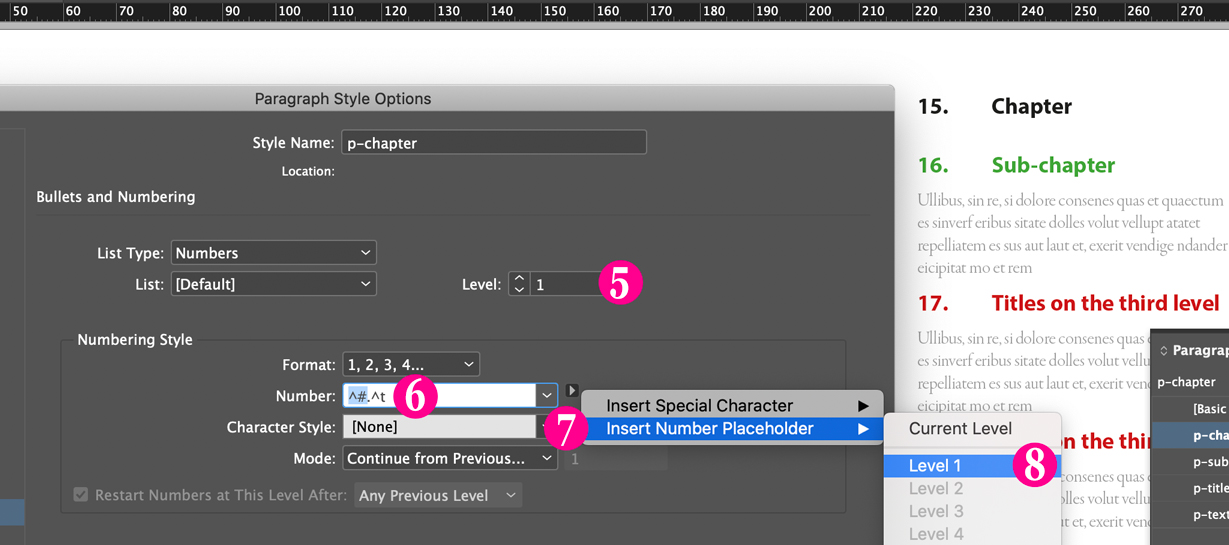
After completing this first part we have set the style that we will use for the chapters. In the next sections we will see how to set the sub-chapters and other titles that we will use within the sub-chapters.
We distinguish the sub-chapters
Once the chapter style is done, you need to move on to setting sub-chapter and third level title.
- Enter p-sub-chapter, and go back to Bullets and Numbering.
- Here you have to bring the level of your list to 2.
- The Number box, in this case will read ^1.^t. Click in the box and place the cursor after ^1..
- Click on the arrow next to the number box and choose Insert number placeholder
- Choose Level 2.
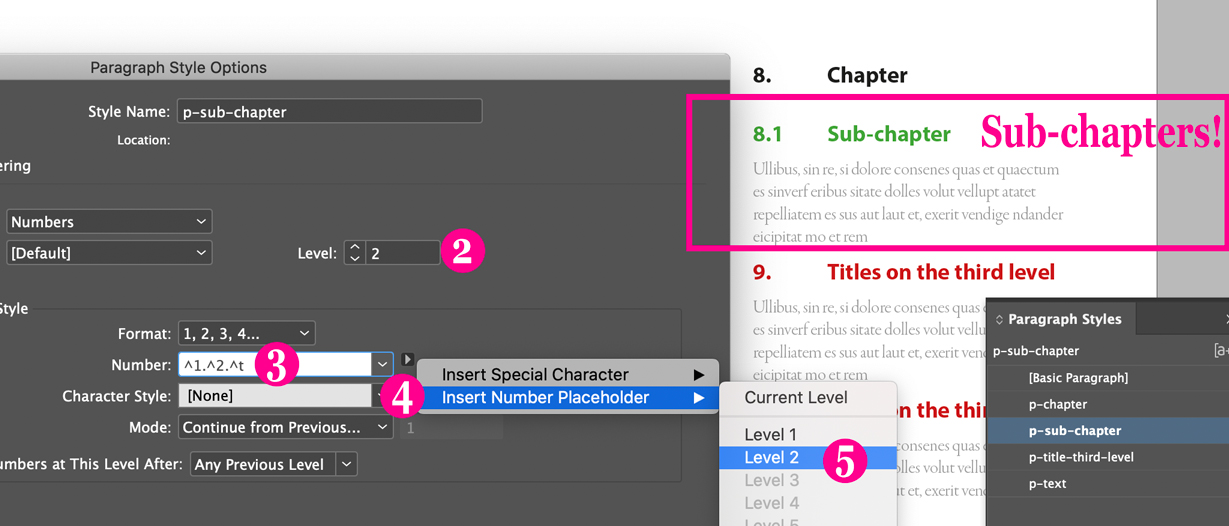
Now the list has changed, and the Number box reads ^1.^2.^t. In addition, sub-chapters have appeared within our document.
We distinguish the titles on the third level
To set the p-title-third-level style the procedure is the same.
- Enter p-title-third-level, and go to Bullets and Numbering.
- Bring the list to Level 3.
- Change the Number box to read ^1.^2.^3.^t as we have seen at the top.
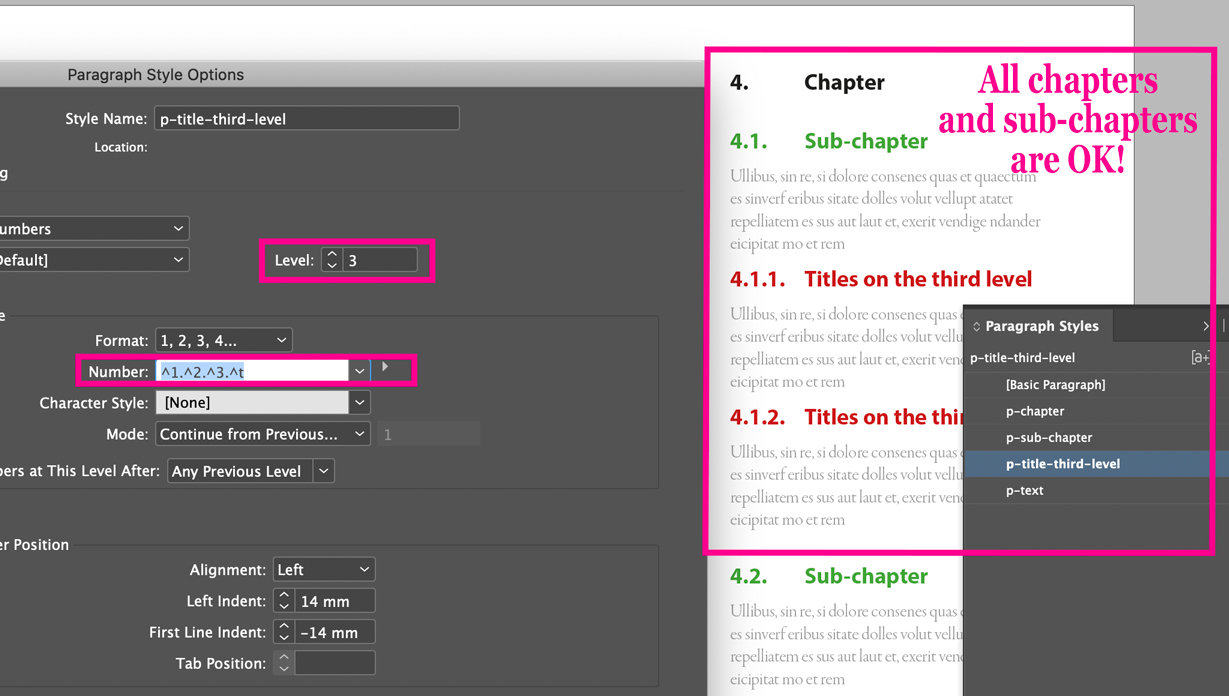
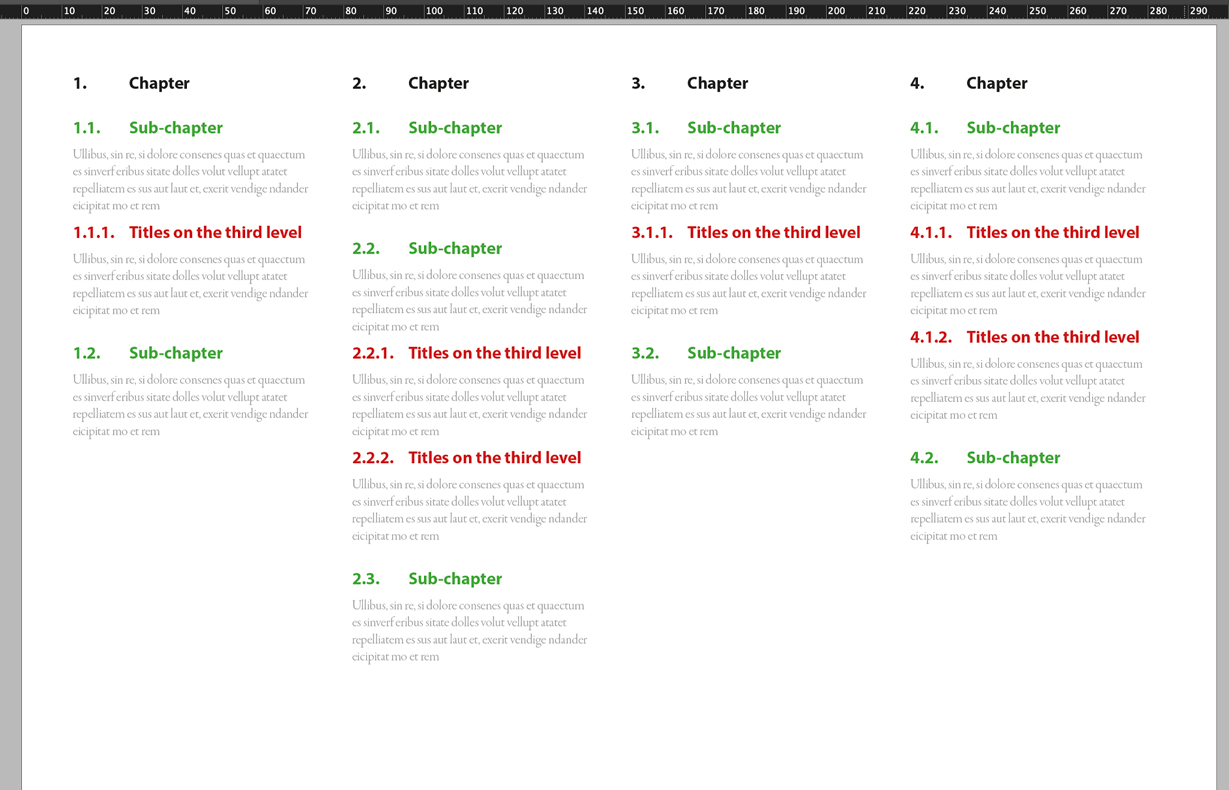
Here is a layered list with automated numbering.
If you now add or remove items from your list, the numbering will update itself, so you don't have to do it manually.
This simple trick will save you a lot of time!
Conclusion
Perfect! Now you know all the ways to create an InDesign numbered list, and you also know how to use it to create chapters and sub-chapters with automated numbering.
Of course, there are tons of things to discover in InDesign. Check out our tutorials to find out more!
Until next time,
Stefano.


