


InDesign Paragraph styles are your best friends!
They look scary, but in fact, they are very easy to use and can save you lots of time.
If you had a bad experience with learning them, this tutorial is here to erase your bad memories and help you make peace with this amazing feature.
Paragraph Styles in InDesign
My goal with this tutorial is not just to teach you how to create a paragraph style in InDesign, but to help you understand the logic behind the software and share with you the tricks that the PROs use when working on their documents.
Use these links to quickly go to each section of the post:
- InDesign paragraphs styles: what they are, why you should use them, what are the advantages
- How to create a paragraph style in InDesign?
- Quickly modify a paragraph style
- Based On Styles (Linked Styles)
- Fight overrides (aka don’t use local/inline styles)
- Download the Style Sheet
- Other useful Styles features
- How do I copy paragraph styles in InDesign to another document?
- How to: Import Word to InDesign
- Scripts for paragraph styles
InDesign paragraphs styles: what they are, why you should use them, what are the advantages
Paragraph styles are a collection of rules that define the way your text behaves and looks.
They contain formatting for both the characters (fonts, color, scale, etc..) and for the paragraph (Indents, align, hyphenation, etc.).
They can save you time, simplify your work, help keep your formatting more consistent and professional and deal with last-minute edits.
Also, many InDesign features are linked to the use of paragraph styles (The most relevant is the creation of the Table Of Contents).
Is it mandatory to use paragraph styles?
No, it’s not – but I would highly recommend you apply a paragraph style to any text in your InDesign document because when you start using them, you won’t stop.
They will improve your job dramatically and will also help you avoid mistakes!
Once you’ve set your styles, with only a few clicks, you’ll be able to format an entire document and you’ll literally fall in love with styles.
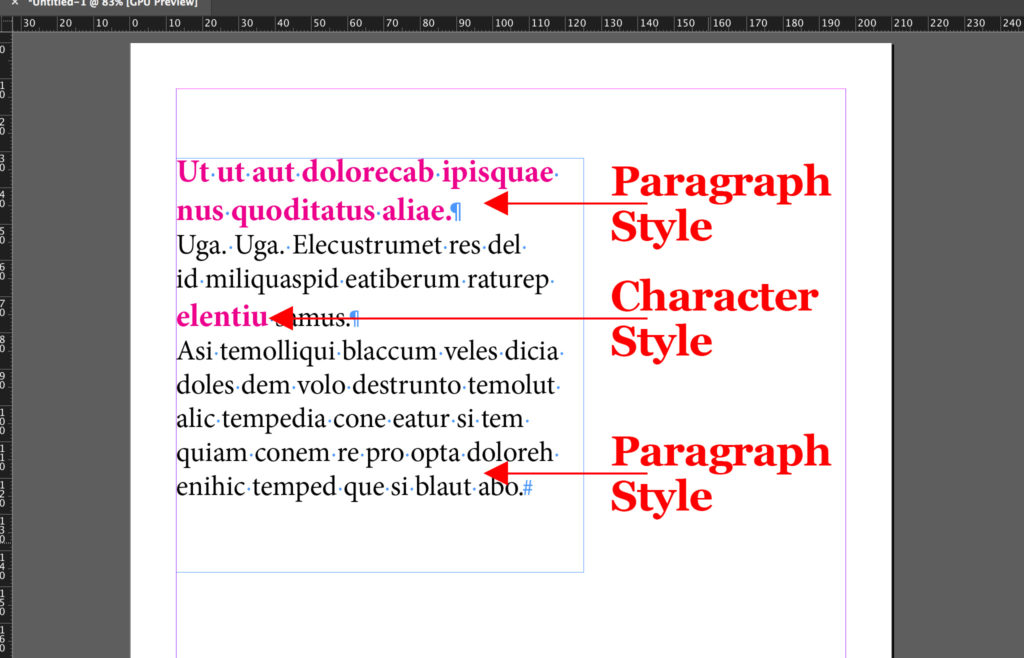
What is the difference between paragraph styles and character styles
I found this funny and great analogy in the Adobe Forum that perfectly clarifies the difference:
Walking the dog:
Paragraph styles dictate what your route is, how fast you are going, and the frequency of breaks.
Character styles handle picking up the poop and holding the chain tight if you see another dog or shiny car during the walk.
Do not confuse InDesign Character Styles with Paragraph Styles.
If you had to add a character style to an entire sentence, you should consider creating a new paragraph style.
Important: You should apply a character style only to a character or few words, not more than a sentence.
How to create a paragraph style in InDesign?
There are two ways of creating paragraph styles in InDesign:
- from the Paragraph Styles Panel
- from already formatted lines of text
Create a paragraph style from the Paragraph Styles Panel
Make sure you are not selecting any text. In the Paragraph Styles Panel, click on the "Create new style" icon.
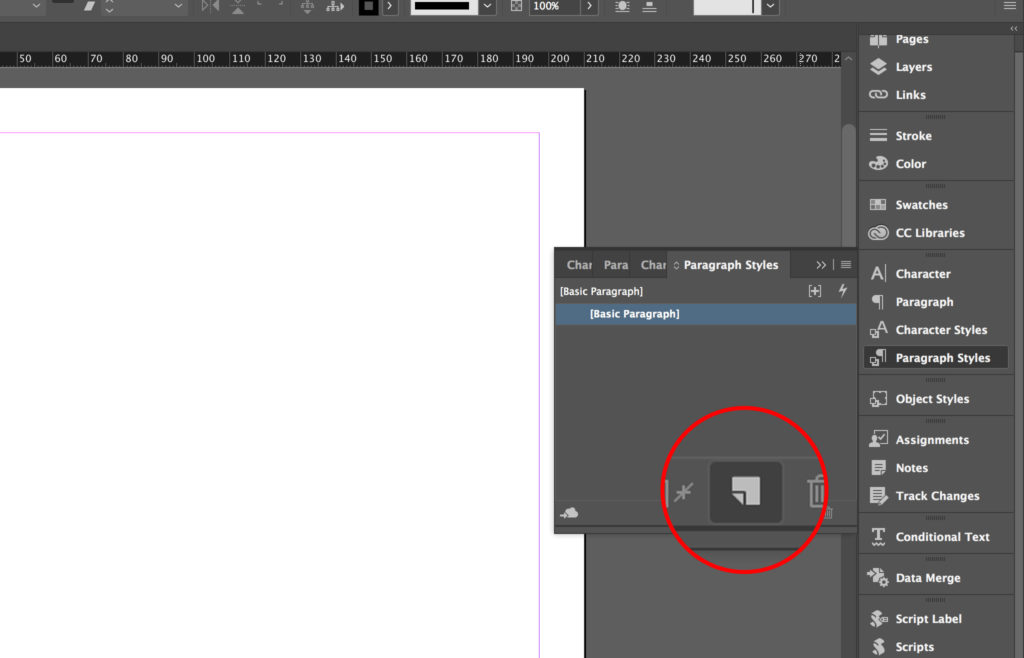
If you don’t see the Paragraph Styles Panel, click on Window > Styles > Paragraph Styles
Double click on the new paragraph style: Paragraph Style 1. InDesign opens the Paragraph Style Options window.
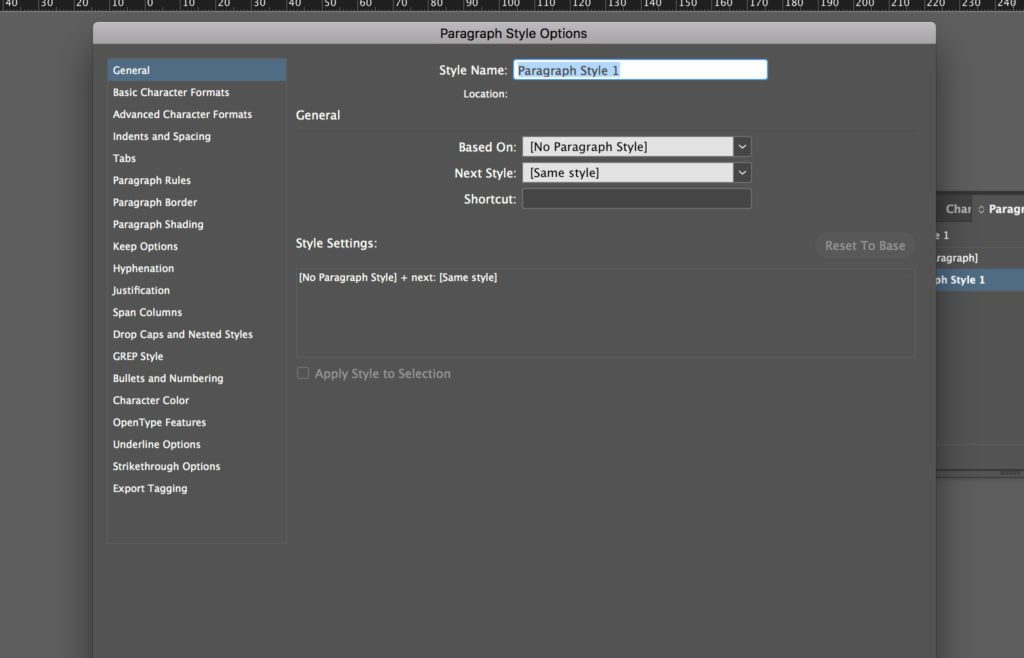
If you keep the Alt key pressed while clicking on the Create new style icon, you’ll create the style and also open the Paragraph Style Options window with a single click.
I am not going into the details of every option you have here because they are too many and it wouldn’t make a lot of sense to explain them all here.
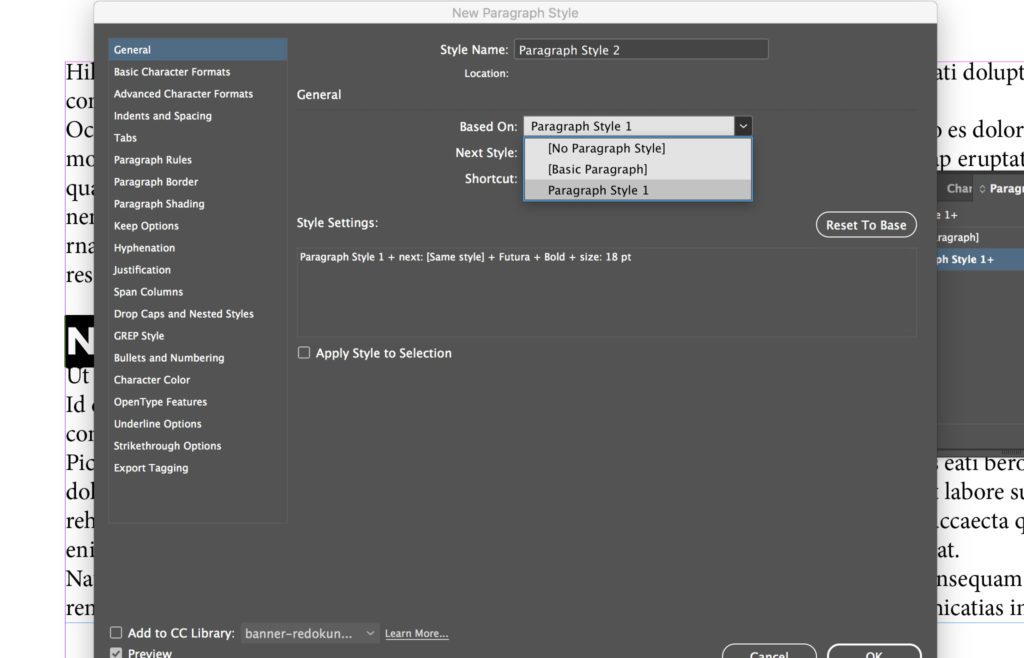
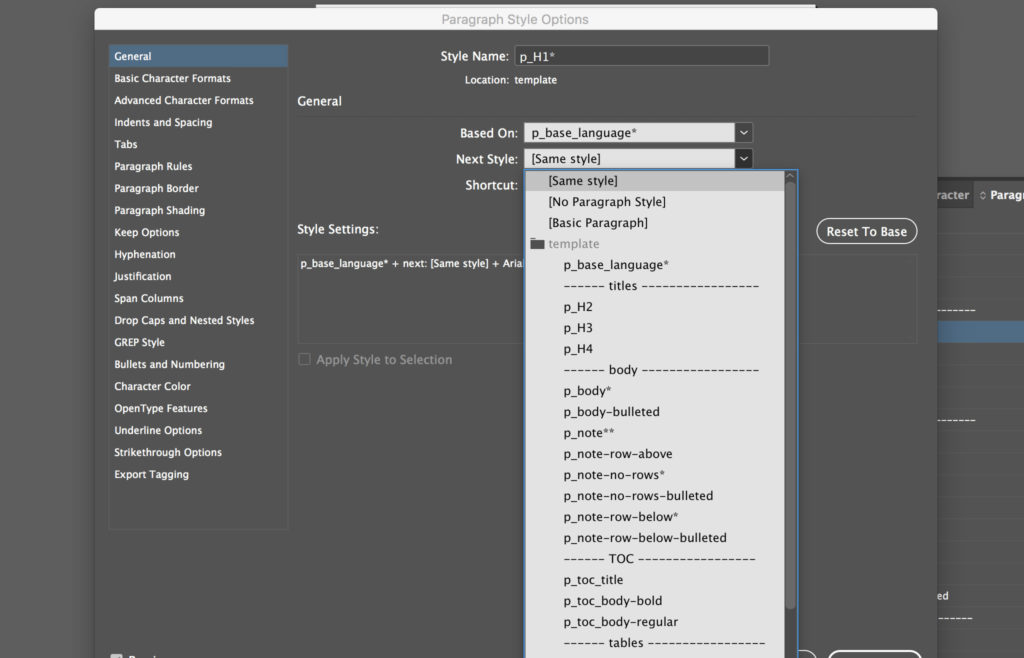
But let’s explore this new window. Style name is pretty clear, Location indicates if the style is in a folder, Based on can be used to link the style to another one (It will be useful later in the tutorial), Next Style you can set the style that will follow when you hit Enter or Return.
Style settings is a summary of the new style settings.
The first thing I do when creating a new style – even before naming it – is to check this summary and make sure there is no dirty information. If the summary is not clean, I click on Reset to Base and then create the paragraph style.
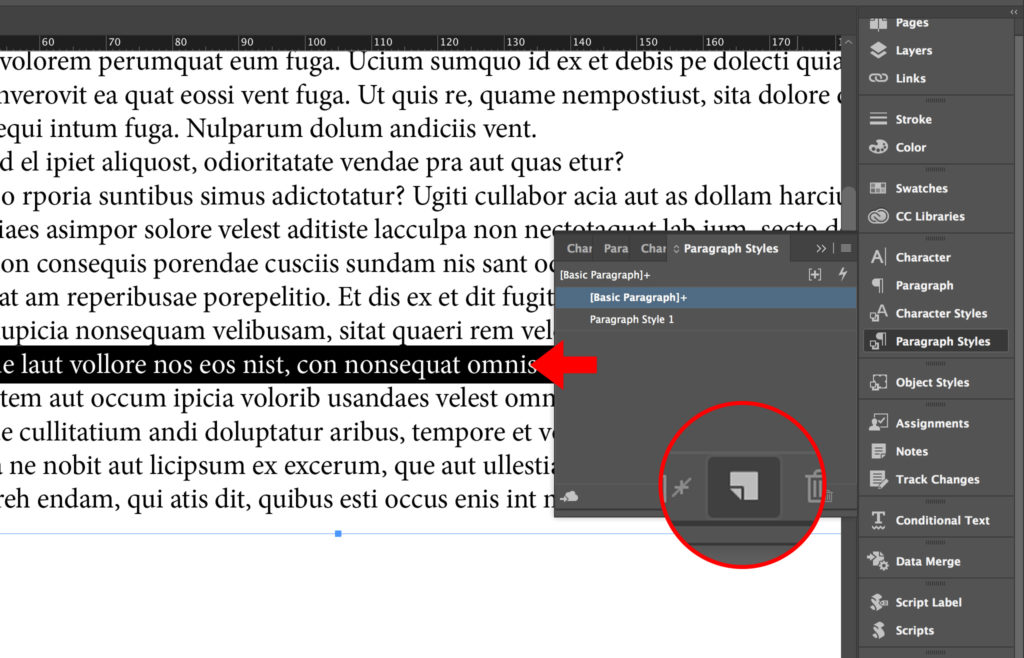
Create a paragraph style from formatted text
You can create a new paragraph style also from a line of text already formatted.
Select the text and click on the "Create new style" icon. That’s it. You created the new style and can now edit it as you like by double-clicking on its name.
Quickly modify a paragraph style
Let’s say you created all your beautiful styles, but then you change the style of a title. Maybe you change its color, and you want to apply the same formatting to all the titles that had that same style.
How do you do that?
Very simple and quick!
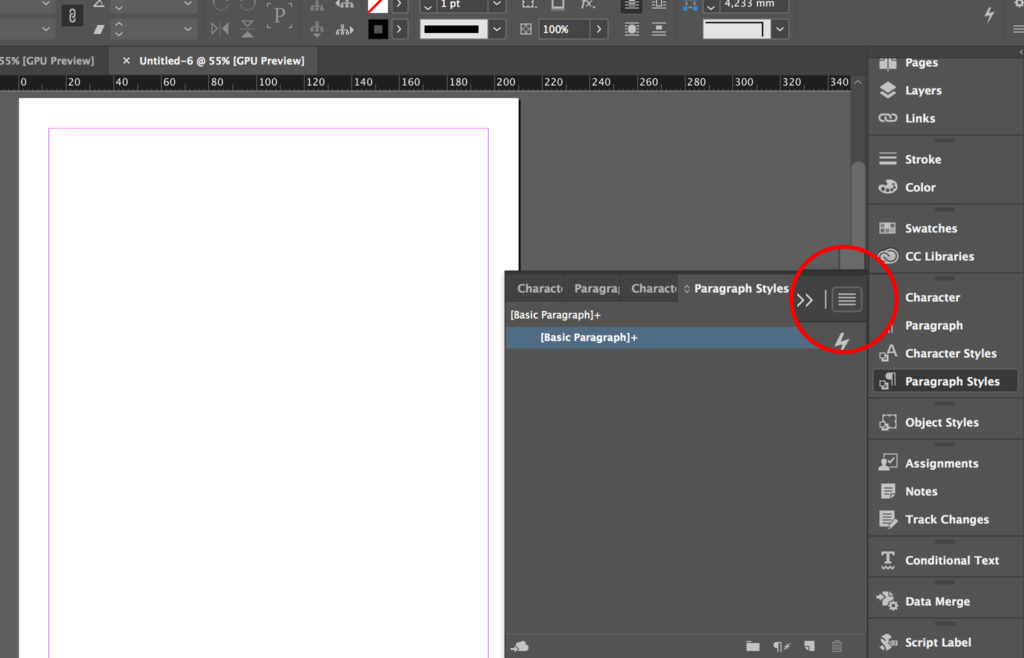
Select part of the new style and click on the icon in the top-right corner of the Paragraph Styles panel. Then select Redefine Style.
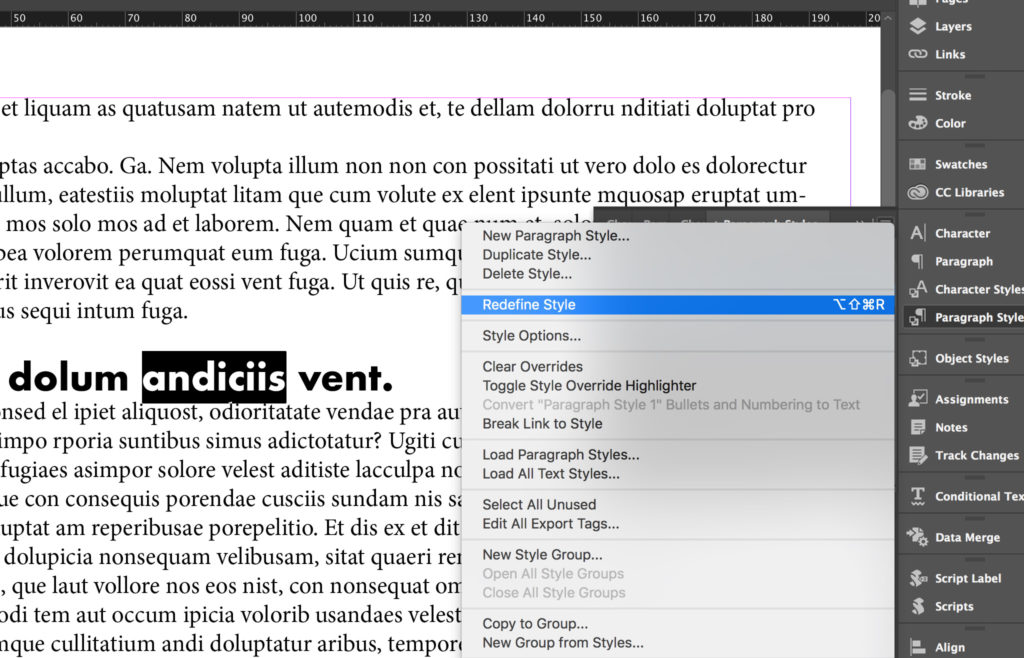
All the paragraphs that had that Paragraph Style applied are instantly updated like magic.
Based On Styles (Linked Styles)
Among all of the functionalities offered by InDesign paragraph styles, the “Based on” one is my favorite.
You can create a paragraph style based on another so that the new style inherits the qualities and any changes you make to the main one.
I like to use this feature to:
- quickly change the appearance of documents (by playing with different fonts combinations)
- deal with multilingual projects in seconds (more of this below).
Select the main style in the Based on drop-down menu in the Paragraph Style Options window, and you’ll have based your style on an already existing one.
Fight overrides (aka don’t use local/inline styles)
Local styling is an error! Yes, I am harsh. But by changing the formatting locally, you lose control over your layout, you make it harder for other people to work on your documents, and you might introduce mistakes or style discrepancies to your text.
You should always use Paragraph Styles and Characters Styles and avoid local formatting.
And don’t be worried about having too many styles. If you could see an InDesign file built by the some of the most famous InDesign consultants, you would see tons of styles in their documents. As I said at the beginning of the post, styles are an InDesign user’s best friends!
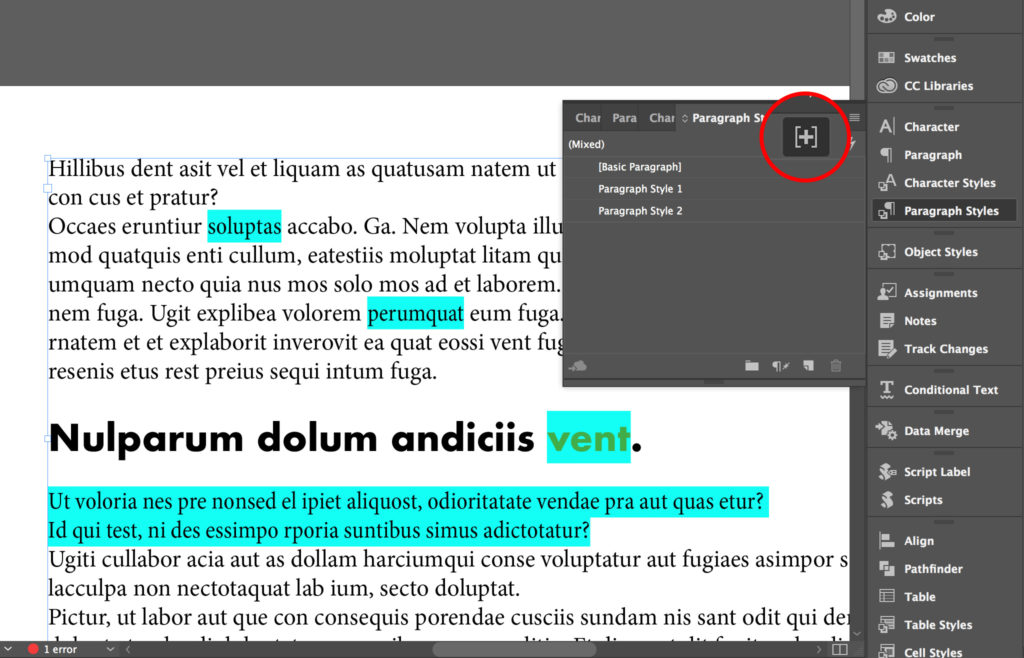
Find overrides with a click
Click on the “Style Override Highlighter” icon to see all the text in your document that has dirt formatting. The text with overrides will be highlighted with blue.
Clear overrides with a click
Click on the “Clear overrides in selection” icon to delete all the overrides applied to the selected text, paragraph, or text box.
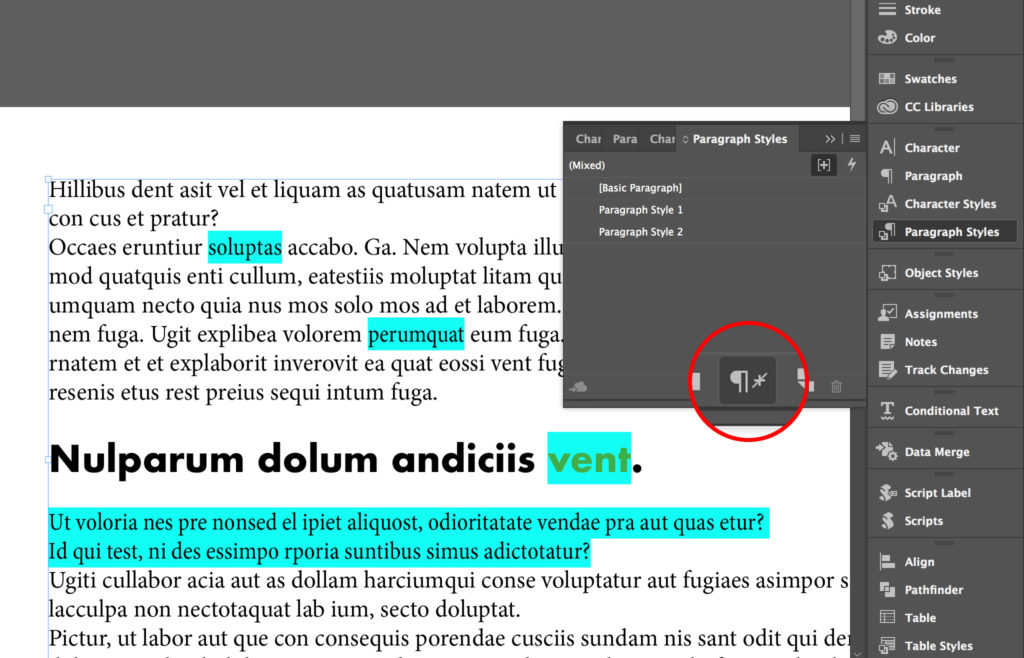
Note that if there are Character Styles applied to the text, you’ll have to manually remove them.
Download the Style Sheet
When I started working as a designer, I thought I'd be spending my time creating beautiful layouts, organizing my work, and taking care of my relationship with clients. Well, it turns out for the most part not so much.
On complex projects, I’d spend so much time fixing layout and style issues that I almost couldn't finish the project on time and started missing the fun part of my job.
I was overwhelmed by things to do and didn’t have time for the things I really loved. Time is precious. And you want to spend it on creating value for your clients, your company, and especially yourself.
After working on the first few projects, I realized that I was using the same style of organization on every file and thought to myself: “Why not make some kind of boilerplate that I can reuse over and over?”
That has surely saved me a lot of time over the years! And I am going to share this boilerplate with you.
But before doing so, I need to explain some fundamental rules and tips you’ll find used in the boilerplate.
1. Group Styles? Learn another trick!
This trick is something I recently learned from Kai Rübsamen.
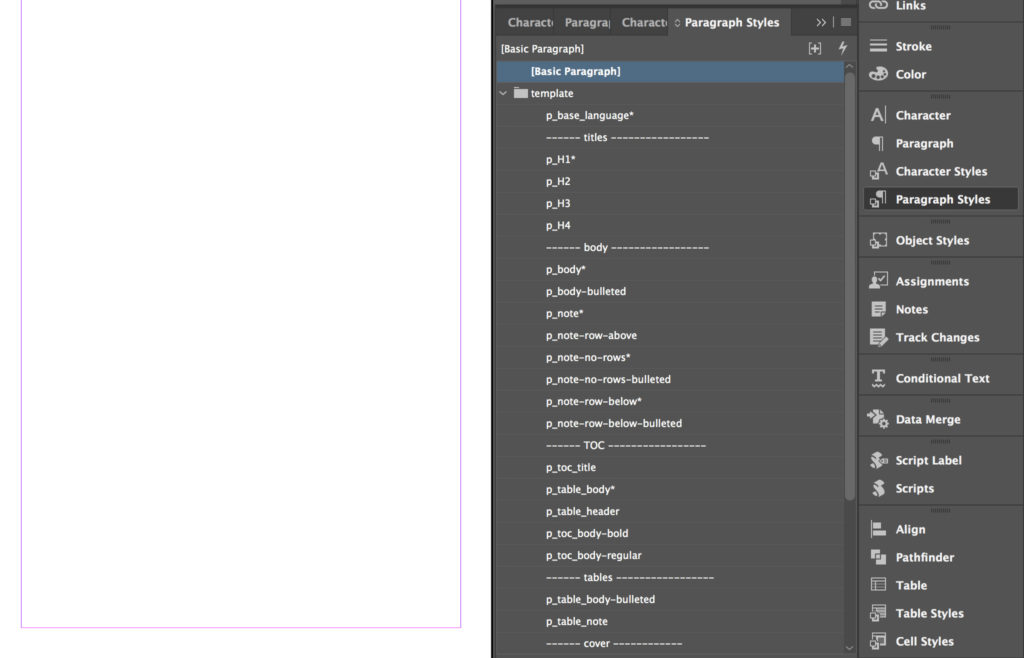
Kai uses empty Paragraph Styles with a folder name instead of real folders.
The asterisks after the name of a few entries indicate that there are other styles based on them. This provides a clear overview of all the styles and their structure.
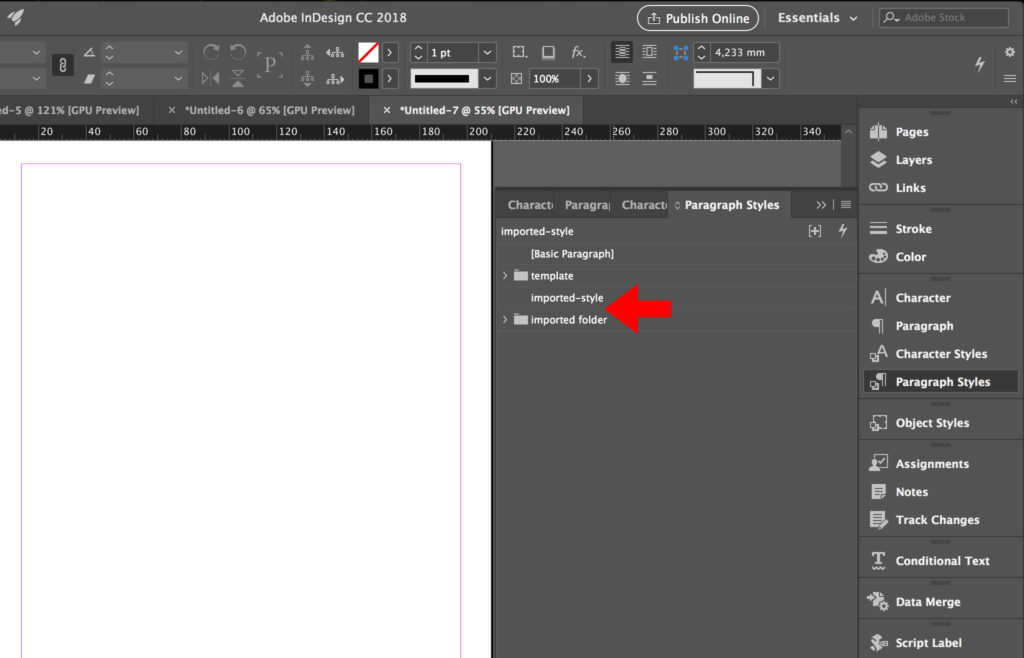
The styles are grouped in a folder – you should name that folder with your project name. Assume you copy some text from an old document. That text would carry some styles in your document that you probably want to replace or delete. The imported styles won’t be part of the folder but placed outside. That way you’ll be very quick at identifying them!
2. How to name and structure your styles: pick a naming convention
Naming styles is an art, and these are the rules I decided to use myself:
- Put all the styles in a folder
- Use “empty” paragraph styles to indicate groups of styles
- Start names with “p_”
- Use asterisks to indicate the main styles (Styles to which you linked other styles)
DO NOT: You shouldn’t start style names with numbers because CSS styles can’t begin with a number, so if you’ll work on EPUBs or you’ll export the document in HTML, you’ll have to rename your styles.
The p_base_language style is my base style to which I link p_H1 and p_body.
To this style, I set only the text language and the horizontal-scale of the text (100%). That allows me to quickly control hyphenation and spell-check, and to use the horizontal-scale to understand the space a hypothetical new language would take in my layout.
Some languages take more space than others. Take German for example, it’s generally 140% of English. I use the horizontal-scale to stretch the text in the base language (English) so that I can see how much space the German will take. I adapt the layout (enlarge text boxes, place “Column brakes”) and then set the text back to 100%.
I like using a Font family for the Headers and a different one for the text in the body. It’s one of those simple tips that makes your design look better.
So I generally link all my headers’ styles to p_H1 and all the styles I’ll use in the body to the p_body-style.
In that way, I can quickly play with different font families in order to improve my layout.
About font pairing, here is a great list you might want to check: The Ultimate Guide to Font Pairing.
Here instead you can download my boilerplate.
Other useful Styles features
Next Style
For any Paragraph Style, you can set the style that will follow when you hit Enter by using the Next Style option. This is very useful for when you type the text directly in InDesign.
Drop Caps and Nested Styles
These two functions allow you to automatically achieve something like the paragraph you see in the pic below. Check out this Video to quickly learn how to create drop caps and nested styles.

How do I copy paragraph styles in InDesign to another document?
You can easily copy paragraph styles from another document (or more).
Click on the icon in the top-right corner of the Paragraph Styles Panel.
Click either on Load Paragraph Styles… or Load All Text Styles…
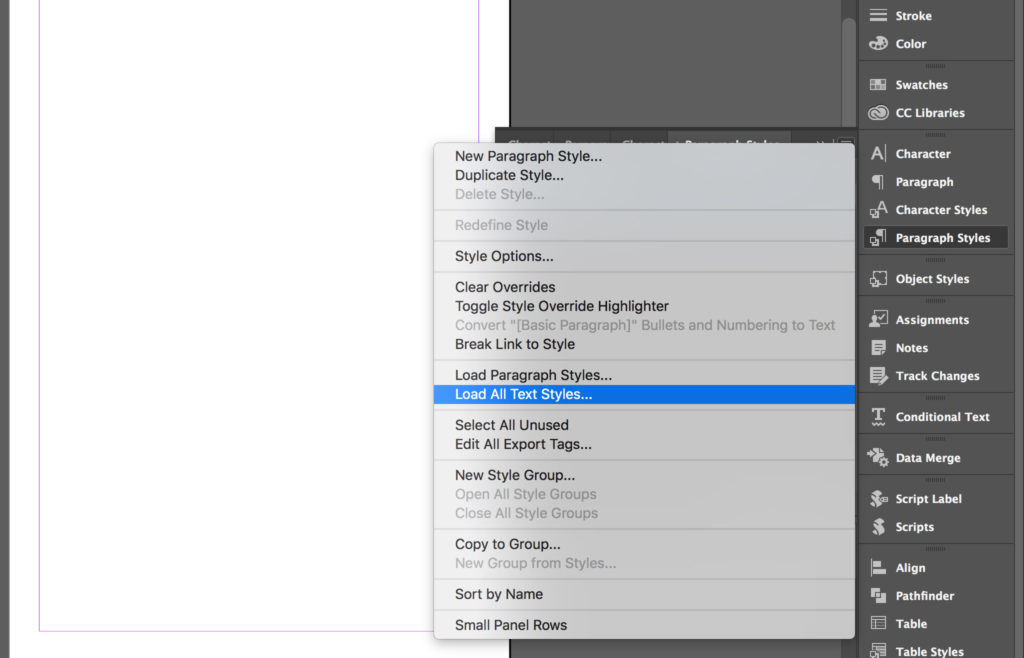
Choose an InDesign file, and click OK.
How to: Import Word to InDesign
You can import a Word document in InDesign and retain its text styles.
Follow this link to see our tutorial and learn:
- How to import a Word document into InDesign
- How to link a file Word into InDesign
Scripts for paragraph styles
Some time ago, we made a list of the best InDesign scripts.
That list has been shared by so many people that I am pretty sure you have probably already seen it.
In there, there is also a section about scripts related to styles.
Click here to go directly to that section and check what scripts can help you with InDesign Paragraph Styles.
Until next time,
Stefano


