


InDesign, as always, rushes to save us with a simple, yet necessary, feature: spell check.
In this post I will explain everything you need to know about the InDesign spell check. Firstly, you will learn how to set the language correctly. Then, you will find out the three ways to correct your text: spell check, dynamic spelling, and autocorrect. And by the end, you will know how to activate and benefit from these functions.
Did you know that there are also several other resources to check a document? You will find some of my favorites in this post. Below is a list of the sections of this article.
Overview
- Set the Language in InDesign
- Spell Check in InDesign
- Dynamic Spelling in InDesign
- Autocorrect in InDesign
- Scripts for Checking Documents
Set the Language in InDesign
There are three ways to make sure you avoid typos in InDesign: Spell Check, Dynamic Spelling, and Autocorrect. But before I can reveal their secrets, I need to talk to you about language.
Of course, because the spell check relies on the language set to the text. And this helps to manage spelling, and also hyphenation (read more about how to properly manage it in this content). So how do you set the language in InDesign? There are 4 different ways to do it:
- Set Language for All New Documents
- Set Language for the Current Document
- Through Styles
- Through Find/Change
Set the Language for All New Documents
There is nothing easier:
- Make sure there are no open documents.
- In the top menu, click on Window > Type and Tables > Character.
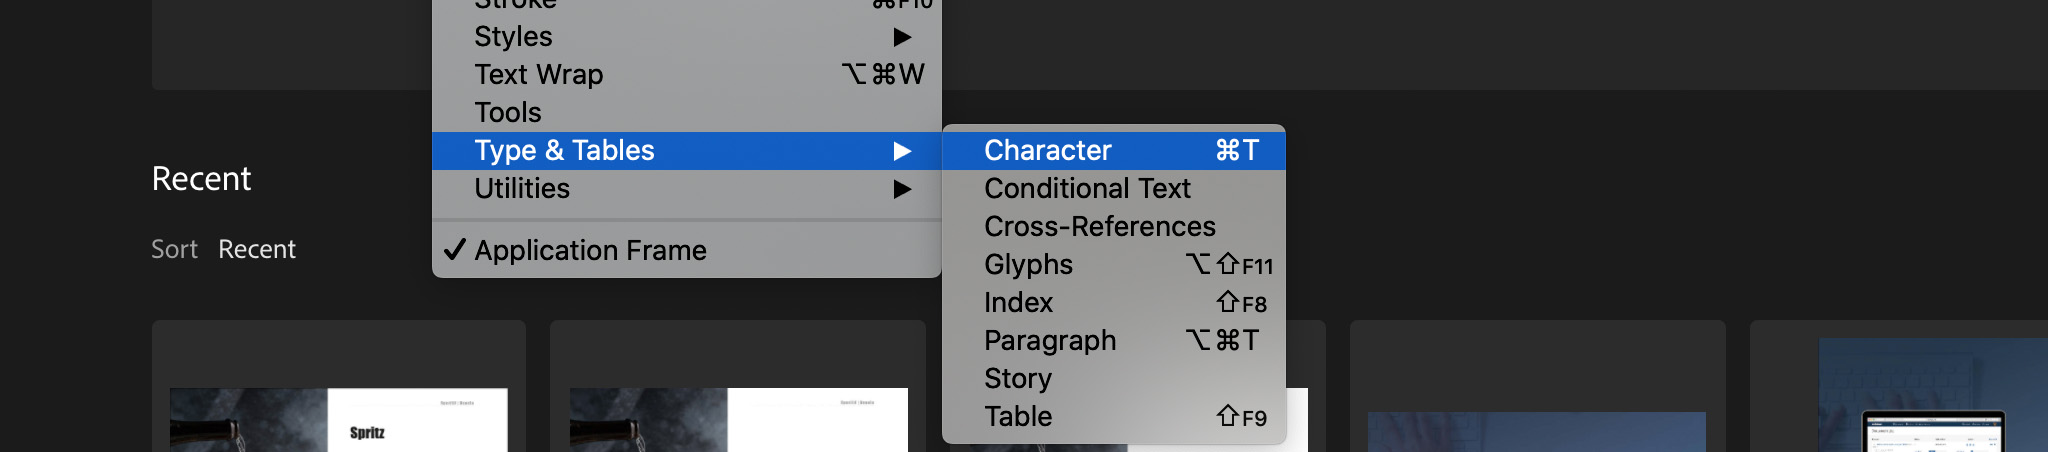
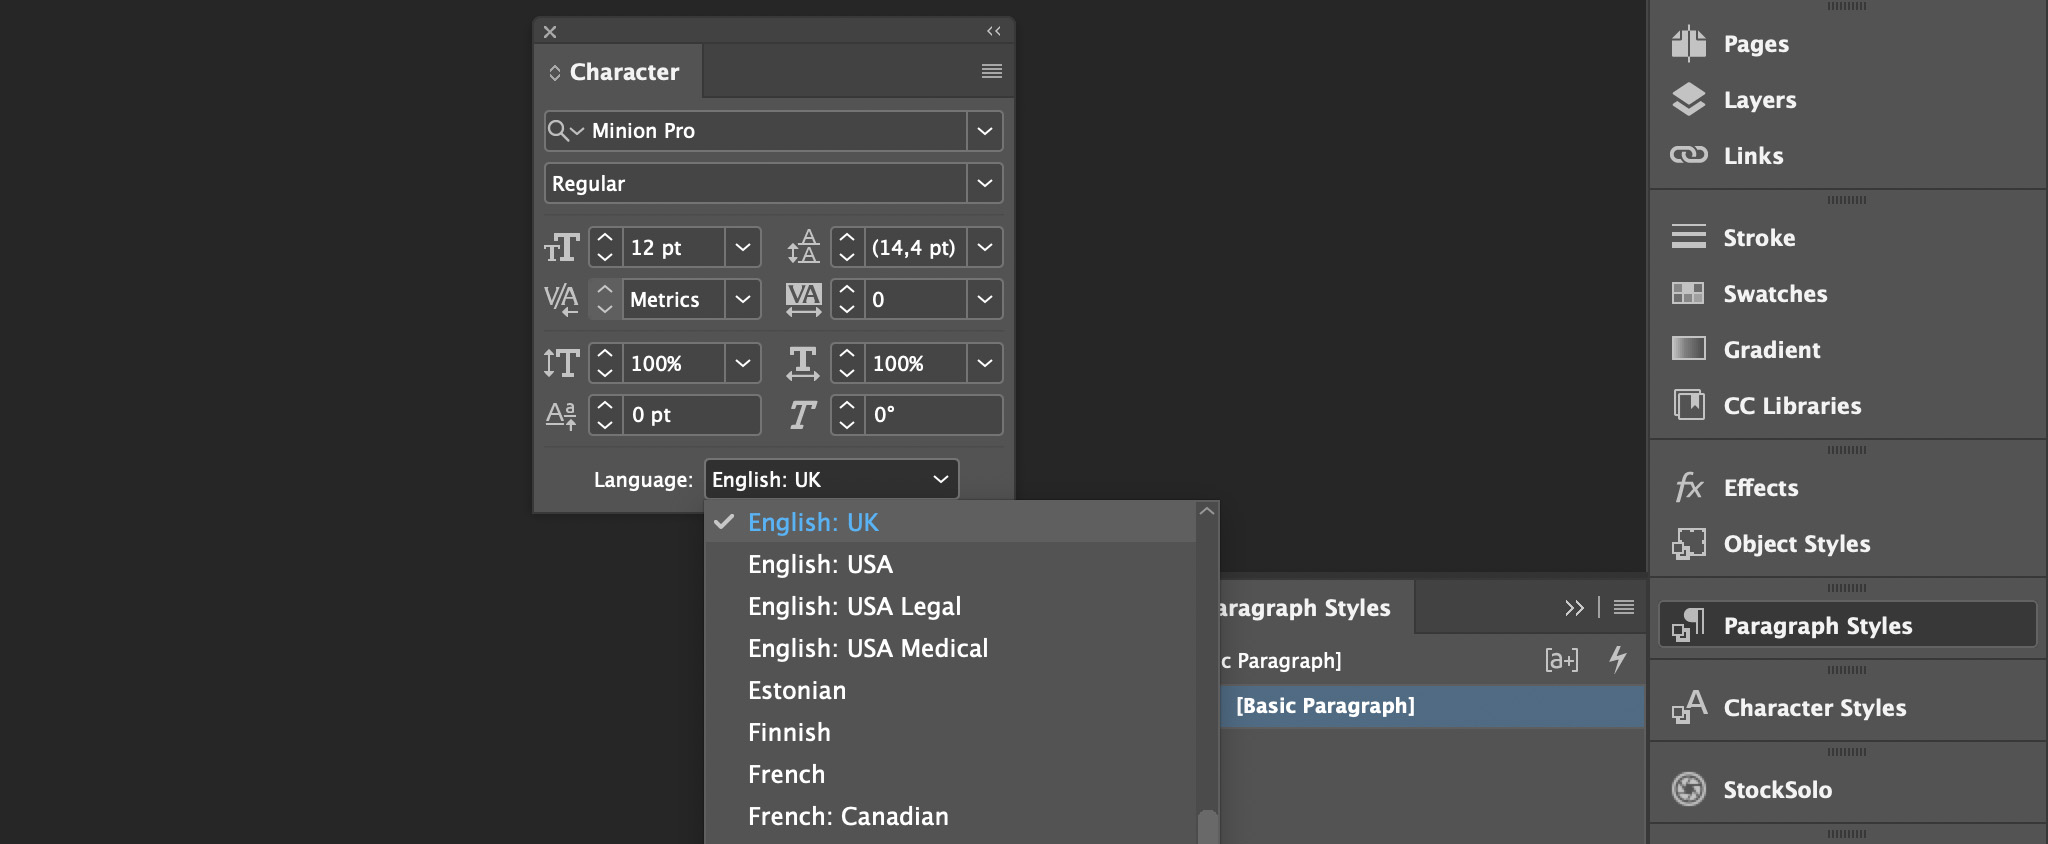
- In the Character panel go to the Language menu. (If you don't find the Language option, click on the top-right icon with four horizontal lines and select Show Options).
- Select the language you want.
From now on, any document you create will have, by default, the set language you have selected. If you only need to change the language of a specific document, you will find out how to do it in the next section.
If, instead, you simply have to change a piece of text, you can always select that text and change the setting from the Character panel or associate a Character Style with it (recommended).
Set the Language on the Current Document
If you want to set the language for the current document only, you must follow these steps, similar to the ones above. This time, though, you will have an opened document. You should:
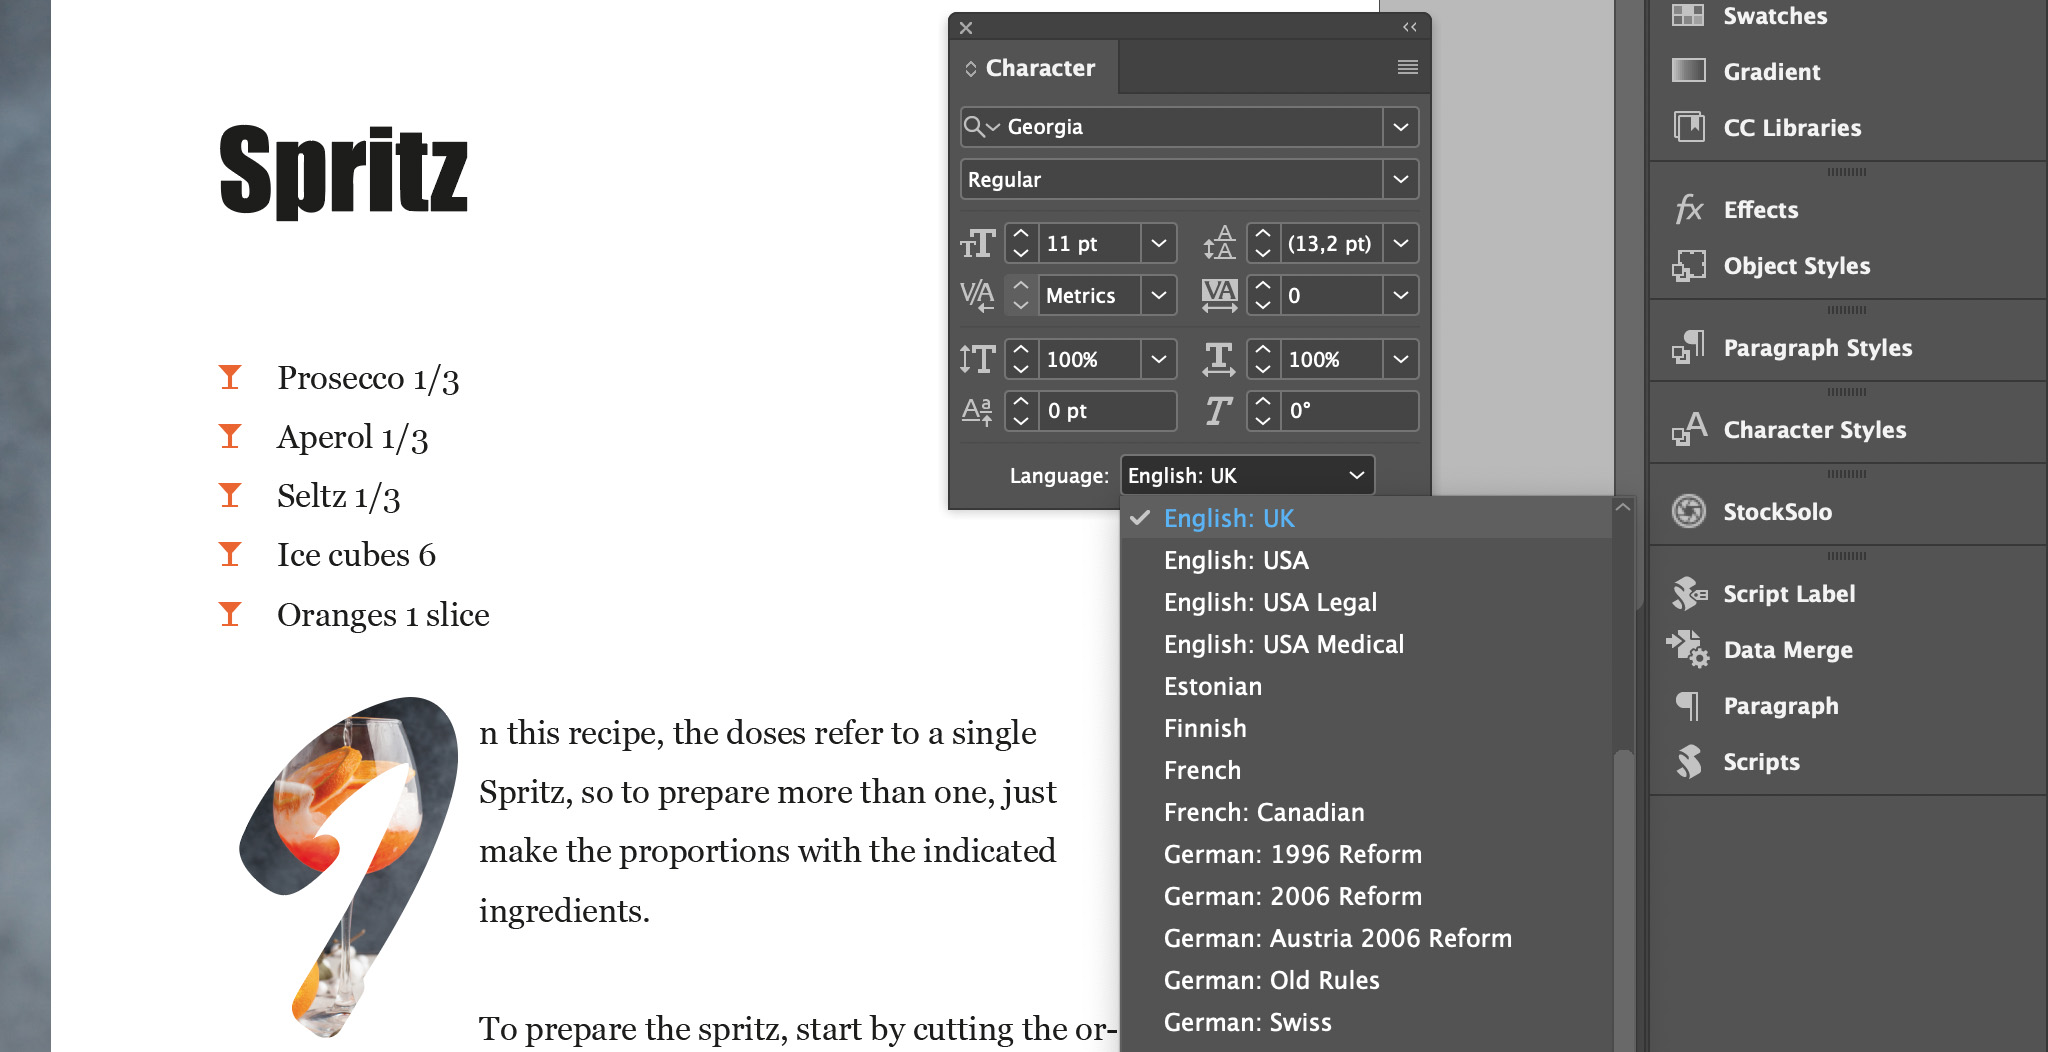
- In the top menu, click on Type > Character.
- On the text panel that appears, you can select the language.
Make sure to change this option before inserting text into your document. Otherwise, you will have to set the language later by associating a style with the text or using Find/Change as I will explain later on.
Set the Language Through Styles
If you have already read some of my tutorials, you will know that to me this is the correct option.
Paragraph and Character Styles give you more control over your document, making it balanced and consistent. Plus, once you've set up a style, it will save you a lot of time. This is especially true if you need to make changes to the document's formatting.
So, how do you set the language with styles?
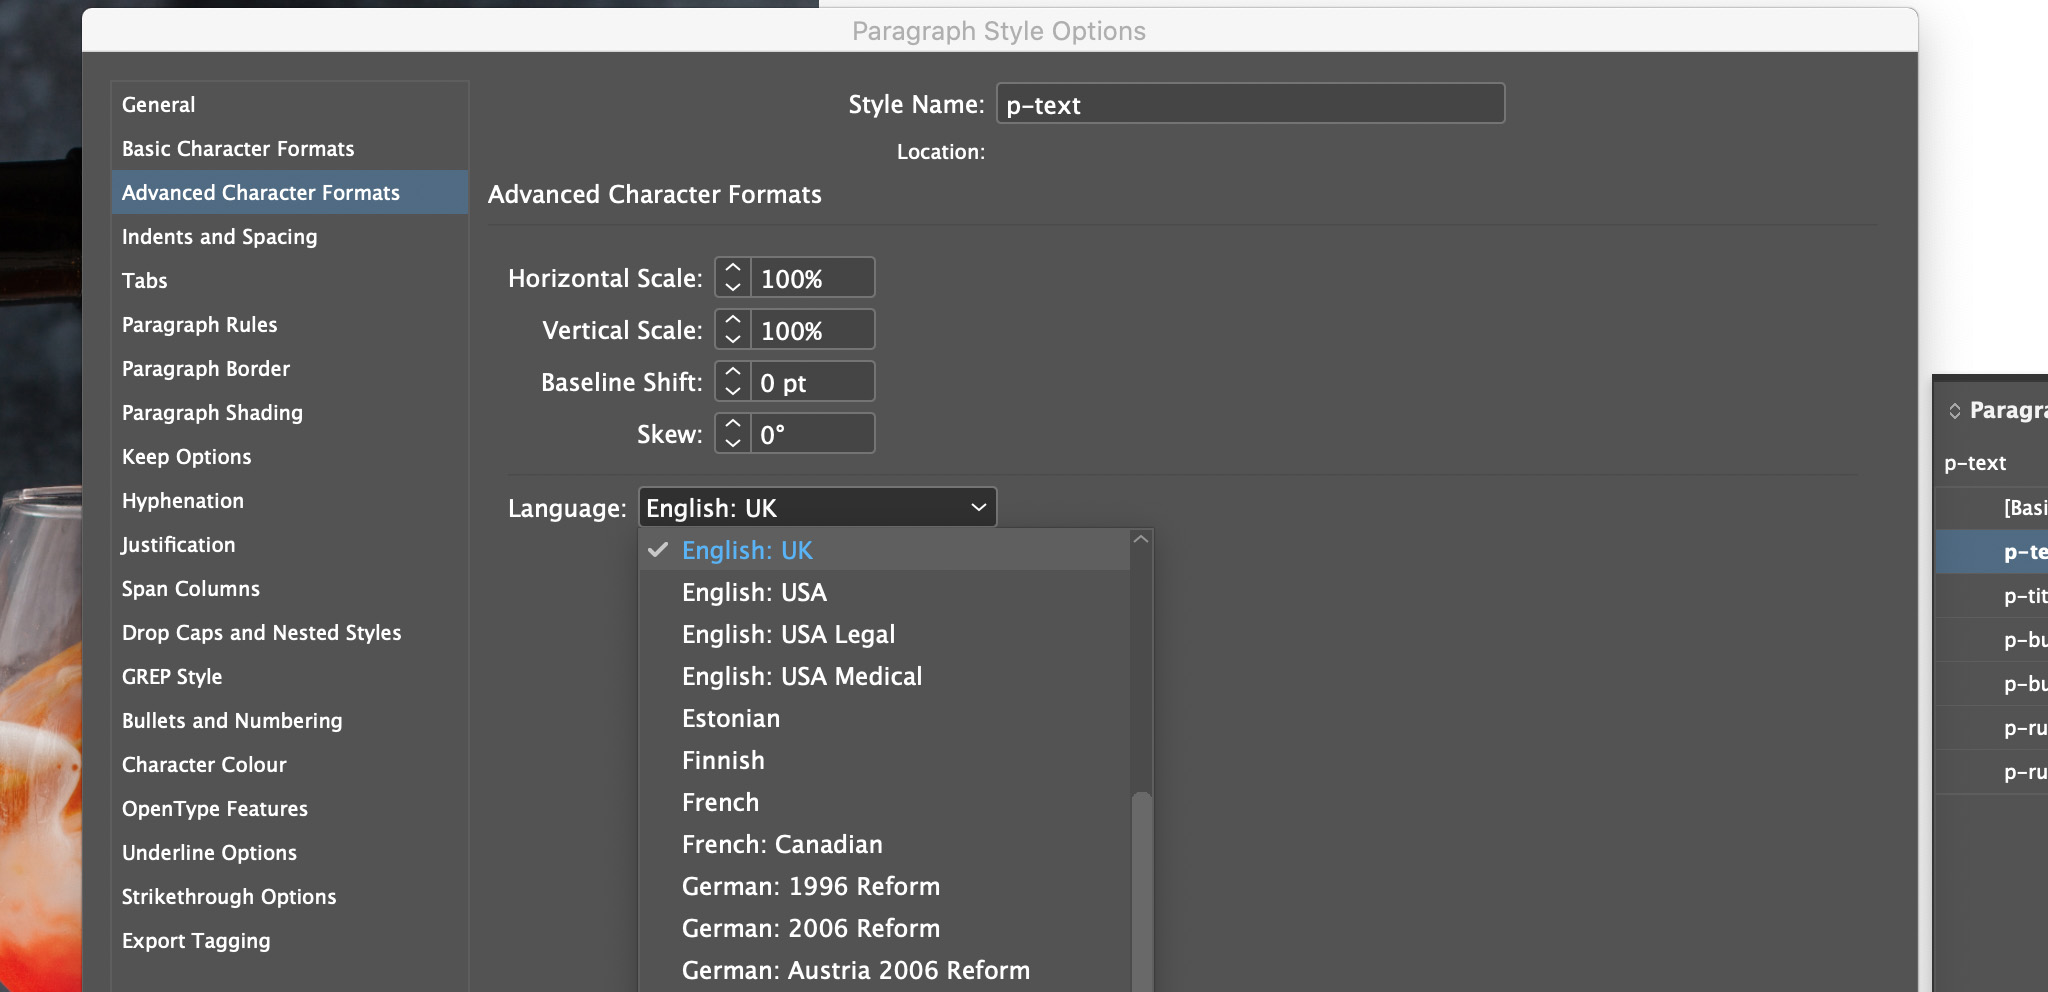
- Make sure no text or text box is selected, and double-click on a Character Style or a Paragraph Style.
- Go to the Advanced character formats section.
- Here you will find the Language menu.
Set the Language Through Find/Change
This is a trick that I suggest to all Redokun customers when they download a translated document.
If by chance you have not set the language before entering the text, or you need to change it quickly, you can use Find/Change.
A note before starting, if you have set styles (as you should always do) and you have to change the language quickly, I suggest you follow the procedure that I explain below and then Redefine the style - this way, the update will be super fast!
Let's see how you can use Find/Change to set the language of your document:
- Make sure you have nothing selected and in the menu at the top, click on Edit > Find/Change.
- Click in the Find Format box, and an additional panel will open - Find Format Settings.
- In the left menu, select the Advanced Character Formats tab.
- Here you can select the language. Select [No language] (or the language that is currently associated with the text of the document).
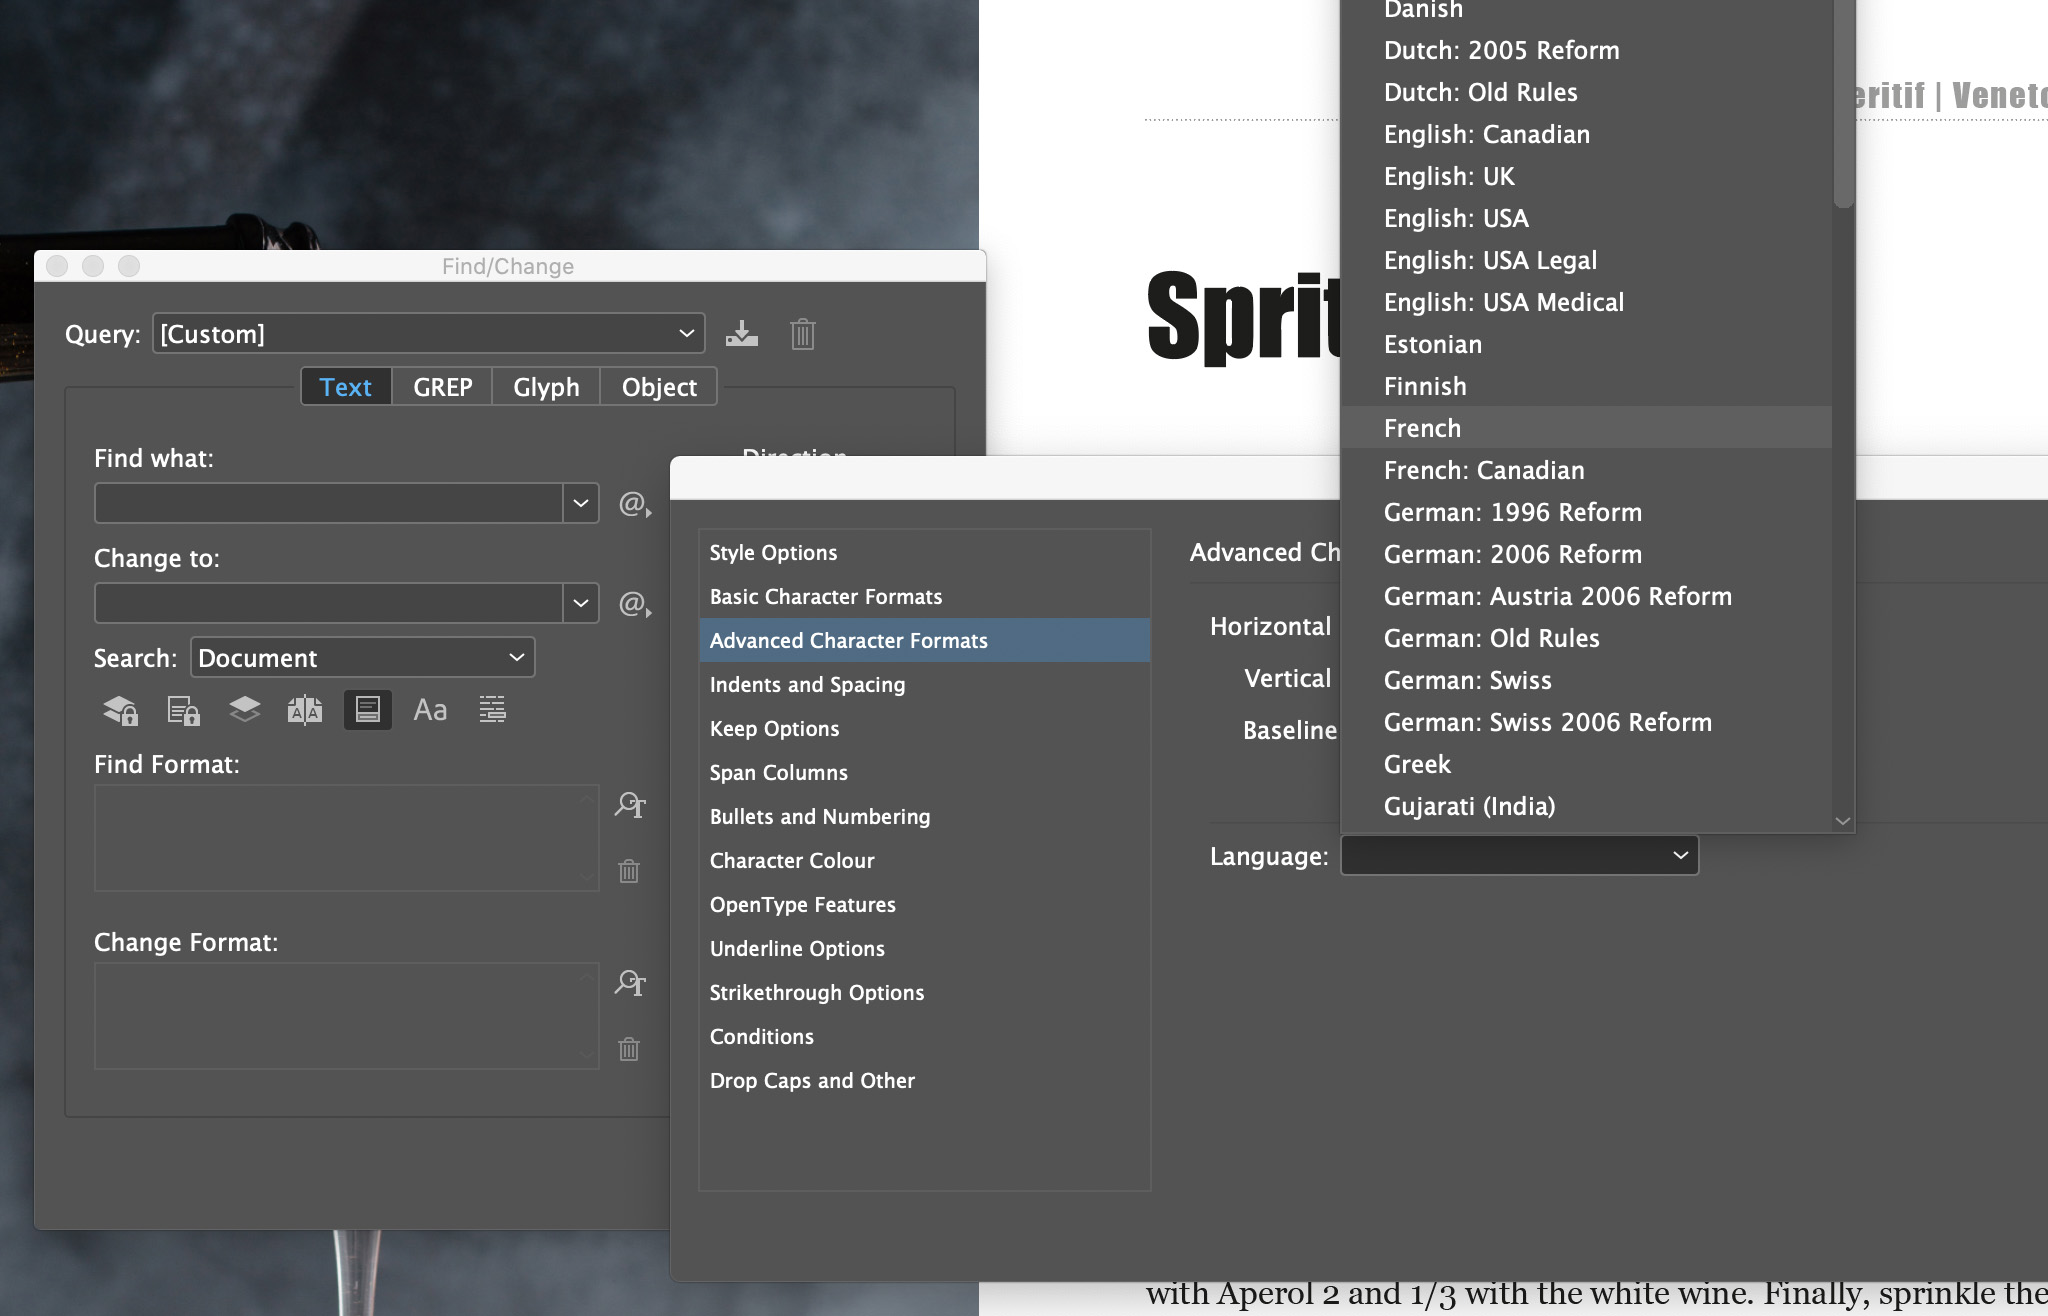
- Repeat the same procedure for the Change Format box, but when you get to select the language, select the one you want for your document.
- Click Change All to update the language of the whole document.
Be careful: with this procedure you will edit all the text. The only parts that will remain unchanged are those that had a different language in the first place. By this, I mean a different language than the one indicated in the "Find Format" box.
Ok, you've have set the right language for your document. Now you can move on to the spelling. We can proceed!
Spell Check in InDesign
This is the most "manual" way to check for errors in your document. You can apply it to a selected block of text, a complete story, all the stories in a document, or all the stories of all open documents.
To apply the spell check you must:
- Make sure you are in "Normal" view. Click Edit > Preferences > Spell Check
- In the panel that appears select all the boxes (Words with spelling errors; Repeated words; Lowercase words; Lowercase phrases).
Once these preferences are set, select what part of the text you want to check. Once it's selected, you have to:
- Right click on the text.
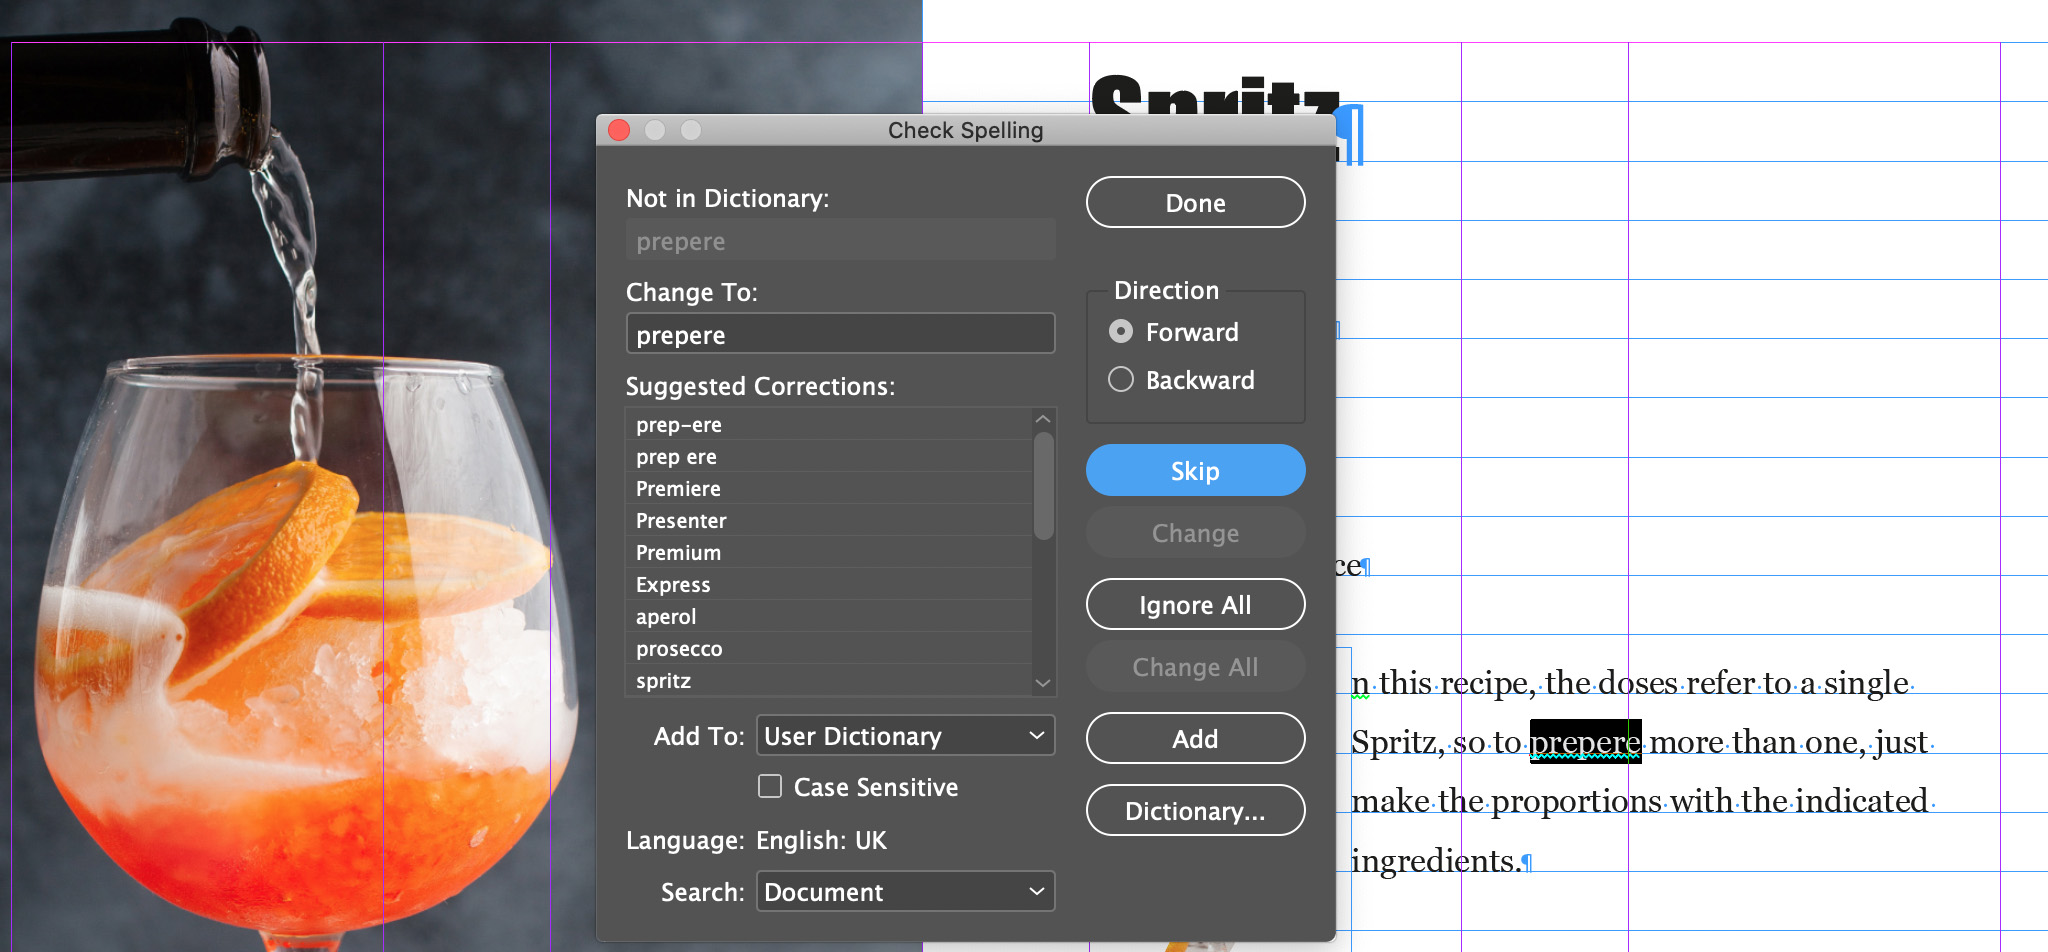
- Select Spelling > Check Spelling...
- In the panel you can go through the misspelled words one by one
- Choose whether to change to a Suggested Correction, add to User Dictionary, or Ignore All.
Dynamic Spelling in InDesign
Dynamic spelling is the function that allows you to see errors as you write. As you work on your document, any typo will be underlined. This is a function we are all used to, as it is the default in all word processors. Therefore, I recommend that you set it as the default in InDesign as well.
This is what you have to do:
- Close all open documents.
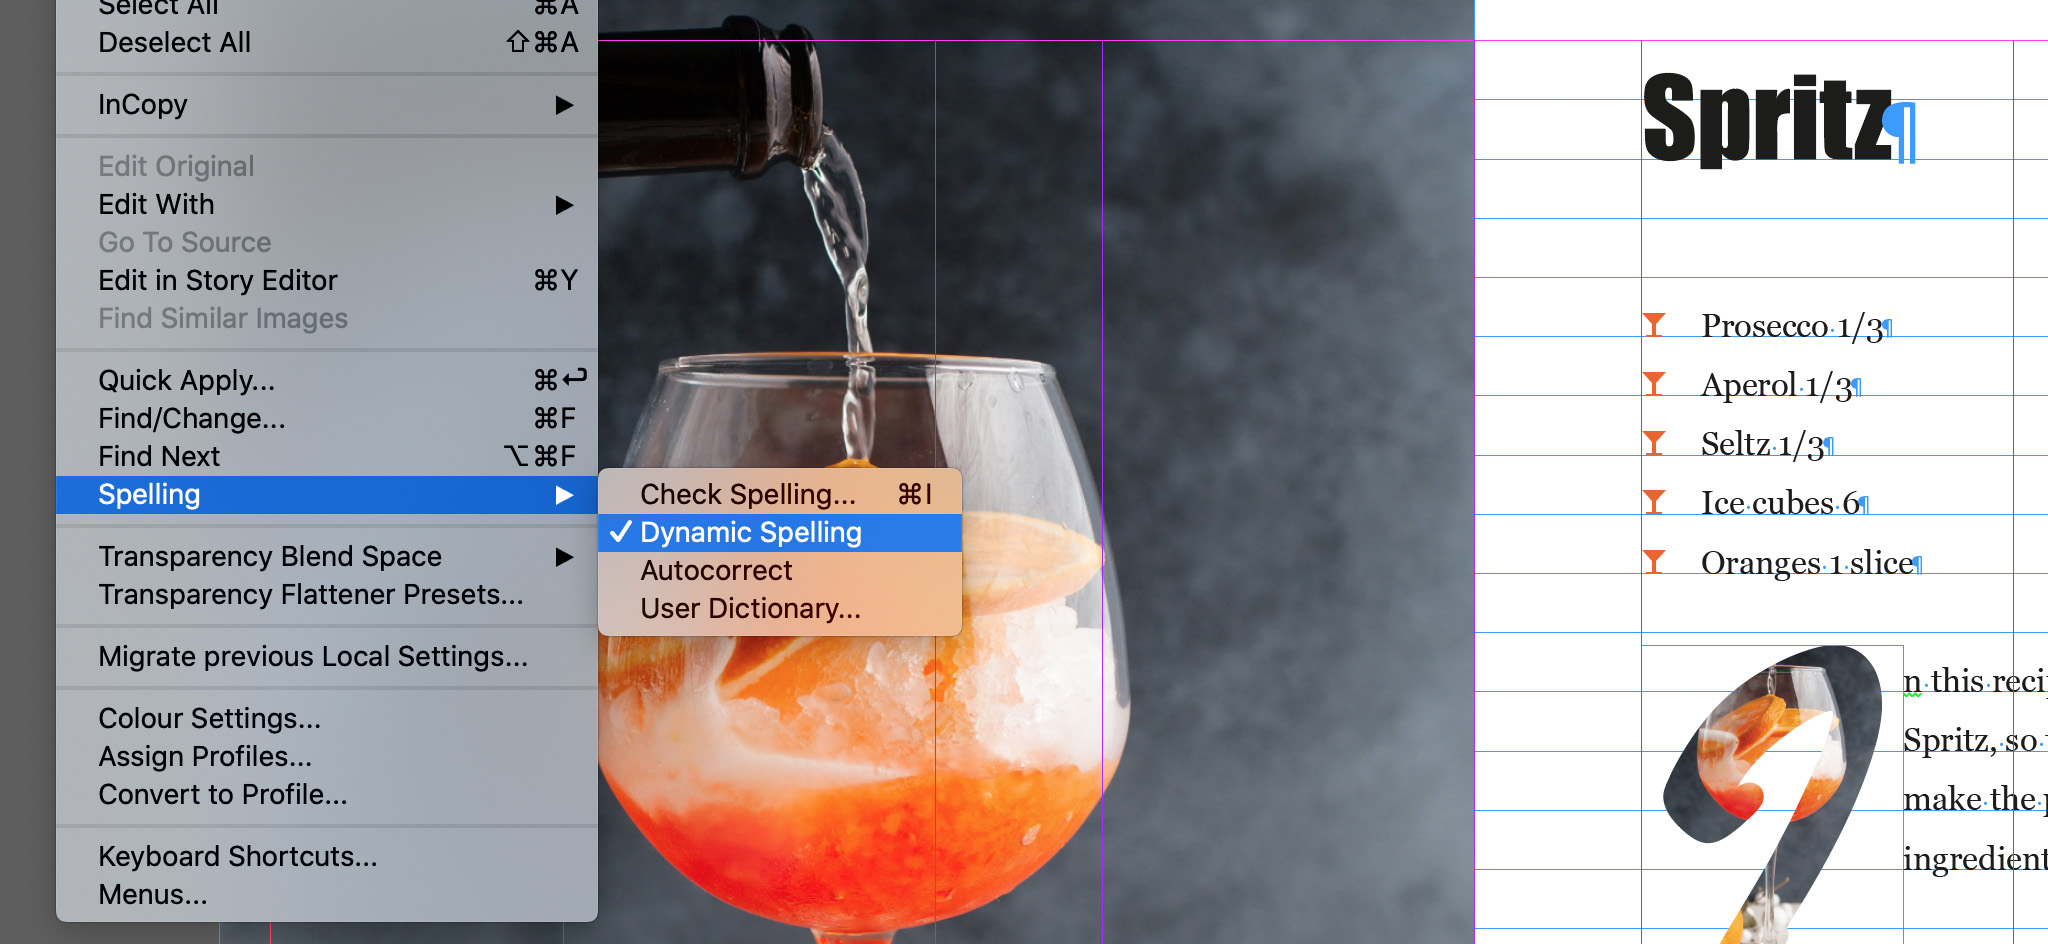
- In the top menu, click Edit > Preferences > Spell Checking > Dynamic Spelling.
From here on out, the mistakes in your documents will be underlined in different colors. These colors go according to the types of errors. Words that InDesign does not know or that contain errors are indicated with a red underline. Green, instead, it indicates what could be grammatical errors - it is up to you to decide whether to change this text. These, of course, are the default colors, but in the same panel you can change them freely.
Autocorrect in InDesign
This is also a feature that we know well, thanks to our phones. And personally, in the case of my iPhone, it's a very frustrating feature.
For every message I write, I am terrified that it will correct me in the most absurd way, making me seem like an idiot. And looking like an idiot in my work is unacceptable. Because of this, I myself prefer not to use the InDesign autocorrect.
Setting aside my personal fears, I still suggest that you refrain from using this feature if you want to have full control over your document.
However, as promised, I will explain what autocorrect is and how it works in InDesign.
Being a very advanced software, and not a phone, InDesign developed the autocorrect in a slightly different way. In fact, to avoid wrong or unnecessary adjustments, the autocorrect "fixes" only specific errors.
How do I activate the autocorrect and what does it "fix"?
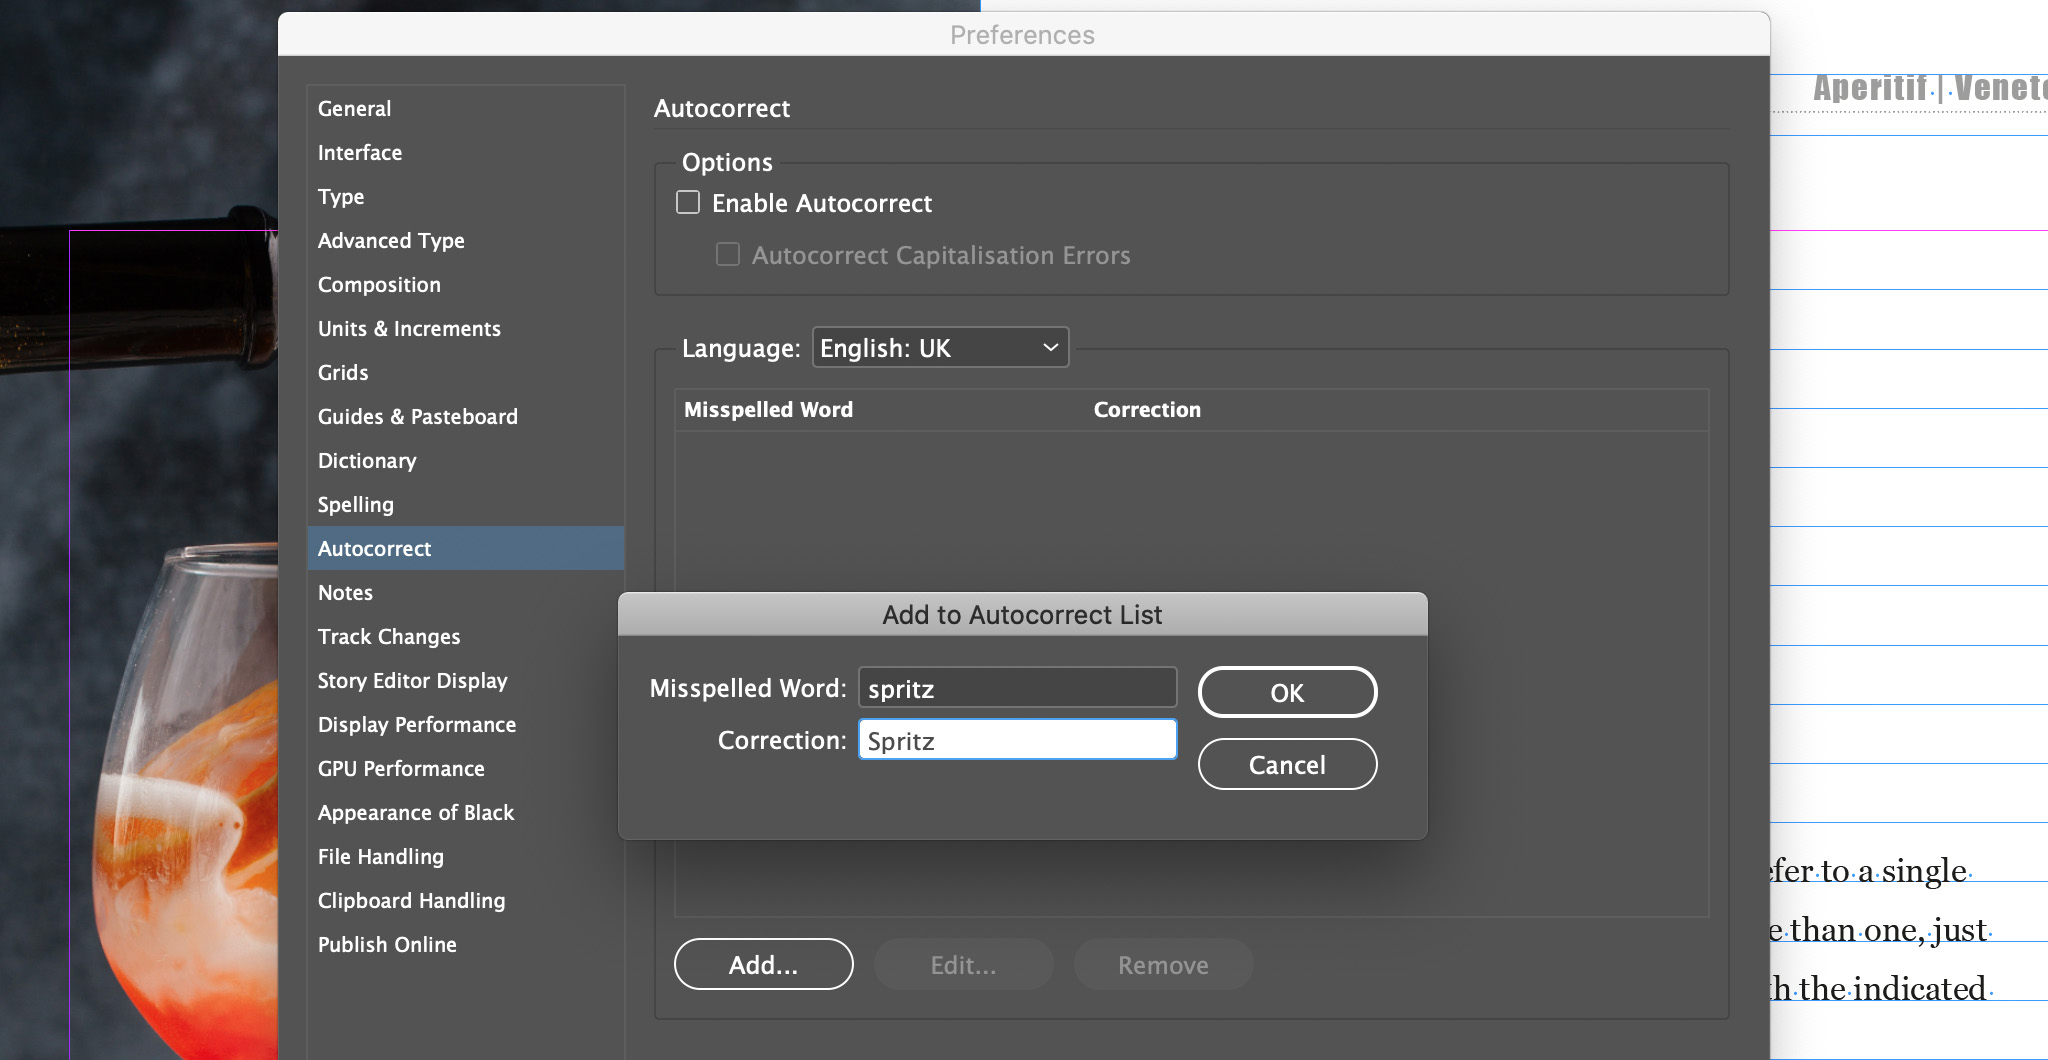
- If you are using Mac, click on InDesign > Preferences > Autocorrect...
- If you are using Windows, click on Edit > Preferences > Autocorrect...
- In the panel you will find the options Enable Autocorrect and Autocorrect Capitalization Errors.
- Once enabled, a list of "errors" will appear below. These are the errors that InDesign will autocorrect.
- You can add all the words you want to this list by clicking on "Add" and entering the wrong words and their respective correction.
So it will be clear by this point that my distrust of the autocorrect feature is perhaps exaggerated. It is a practical and useful function, which has nothing to do with my phone! As for me, I will still not use it, to have total control over my documents and corrections.
Scripts for Checking Documents
Now that you know all the spell checking functions already present in InDesign, I will show you some equally useful scripts for checking your document.
List of misspelled words
Theunis DeJong developed this script that creates a list of all the words in your document that don't exist in the InDesign dictionary.
Find hyphenation
in-tools.com offers a script finds all the hyphenate words within a story.
Text counter
Useful for when you outsource proofreading jobs, this Kasyan Servetsky script counts the number of text boxes, paragraphs, words, characters, and shows them in a panel.
Adjust price
This Peter Kahrel script allows you to adjust the prices within your document. You can change the currency, format, separator, add a character style, etc.
Swap thousand and decimal indicators
This Peter Kahrel script allows you to swap thousand and decimal indicators (commas/periods in numbers) so you can switch between English and non-English styles.
There are so many scripts like these that can help you control your document. There are many more still that help you save you time and significantly improve your InDesign experience. If you want to discover them, go to our list of 200+ scripts for InDesign.
Conclusion
As with drop caps, hyphenation, numbered lists, and bulleted lists, I explained everything you need to know about the InDesign spell check. You've learned all about the three ways to keep spelling mistakes at bay. And we know, when writing a document, typos are always lurking.
Whether you prefer to set dynamic spelling by default, manually check spelling, or keep autocorrect on, it doesn't matter. What matters is that, whatever you choose, from now on there will be no more typos to distract you. You can focus on the most creative part of the wonderful software that is InDesign.
Of course, I strongly recommend that you outsource the proofreading of the document. As much as we can be careful, and as much as InDesign has more than one function to protect our work from any mistakes, it is always better to count on a pair of fresh eyes for the final check.
Until next time,
Stefano


