


In this blog, we talked more than once about how various methods exist in InDesign to achieve the same results.
We've also seen how understanding InDesign, knowing all the features, using scripts, plugins, or InDesign templates can really change your relationship with this incredible piece of software.
So, in this post, we will find out how to use the Drop Cap and Nested Styles feature, and how you can make more creative Drop Caps using automation (GREPs and Find/Change).
How to do drop cap in InDesign: 2 methods
You might remember that our article on how to create a bulleted list in InDesign dealt with two ways to go about achieving the same result. That is also the case here; there are two methods:
- The first uses local formatting to create the Drop Cap
- The second allows you to create a Paragraph Style and reuse the same "Drop cap" style anywhere.
When we talk about design, however, our result cannot always be achieved with the standard features of the program we are using.
Speaking of drop caps, for example, you may want to work with graphics that cannot be created in InDesign; you may want to create these graphics in Illustrator or Photoshop and then later add them to your document.
Let's find out below how you can fully exploit the potential of InDesign to quickly reach a more complex graphic solution, that takes into account your graphic idea.
We will discover how to:
Use local formatting to create a Drop Cap in InDesign
When it comes to text, I always suggest the use of InDesign Paragraph Styles.
This is also the case even when you need to create a single drop cap in your document. Remember: getting used to working with styles will help you avoid several mistakes.
As a first step, however, let's see how to create the drop cap locally and then we will see where you can find the same settings within a paragraph style.
Within your InDesign document:
- Position the pointer in the paragraph to which you want to add the drop cap (1).
- On the control bar at the top, open the tools dedicated to the paragraph, and click on the icon with three vertical lines (2) at the far left.
- In the selection, click on the Drop Caps and Nested Styles... option (3).
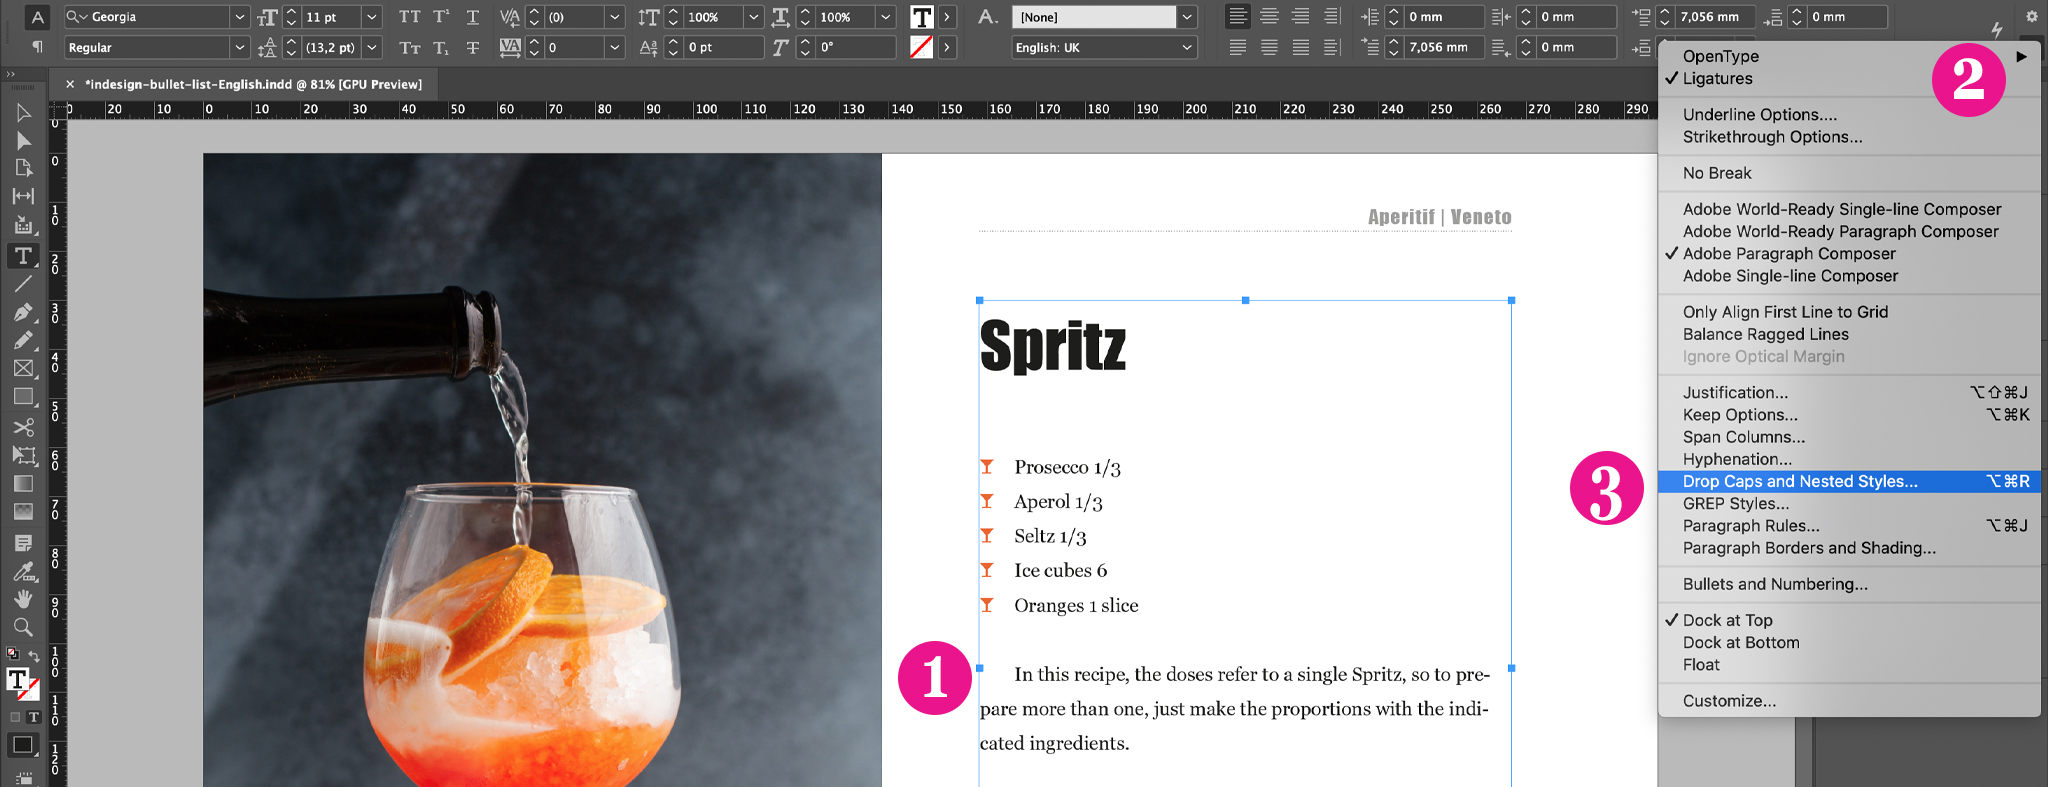
- You can act at the top of the pop-up that opens to create the Drop Cap. Lines indicates the height that the letter must take (in my case it is 3) while Characters indicates how many characters you want the Drop Cap to have.
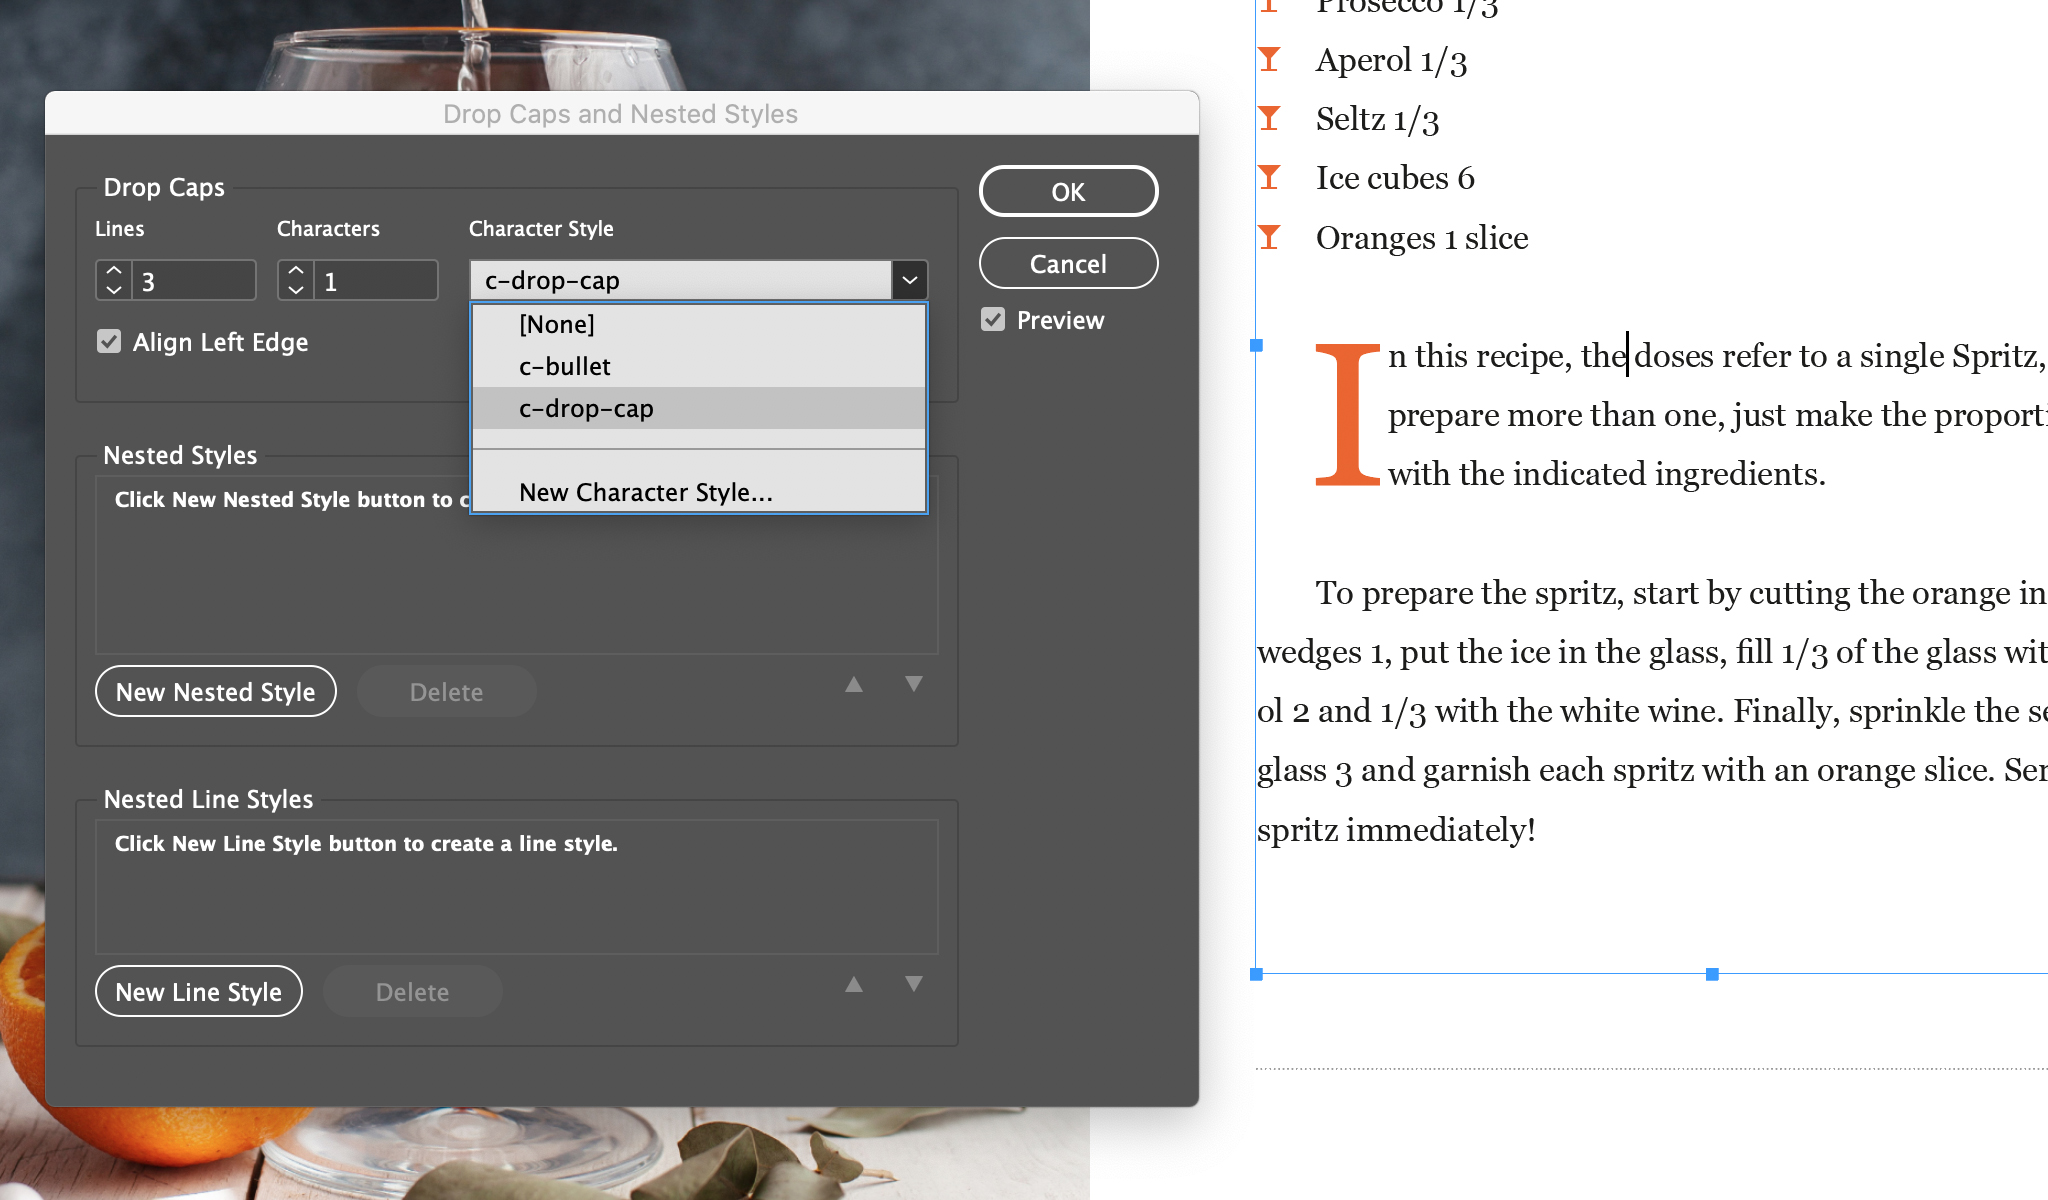
- Change Character Style if you want the Drop Cap to take on a particular style. In my case, the font style I created turns the letter orange.
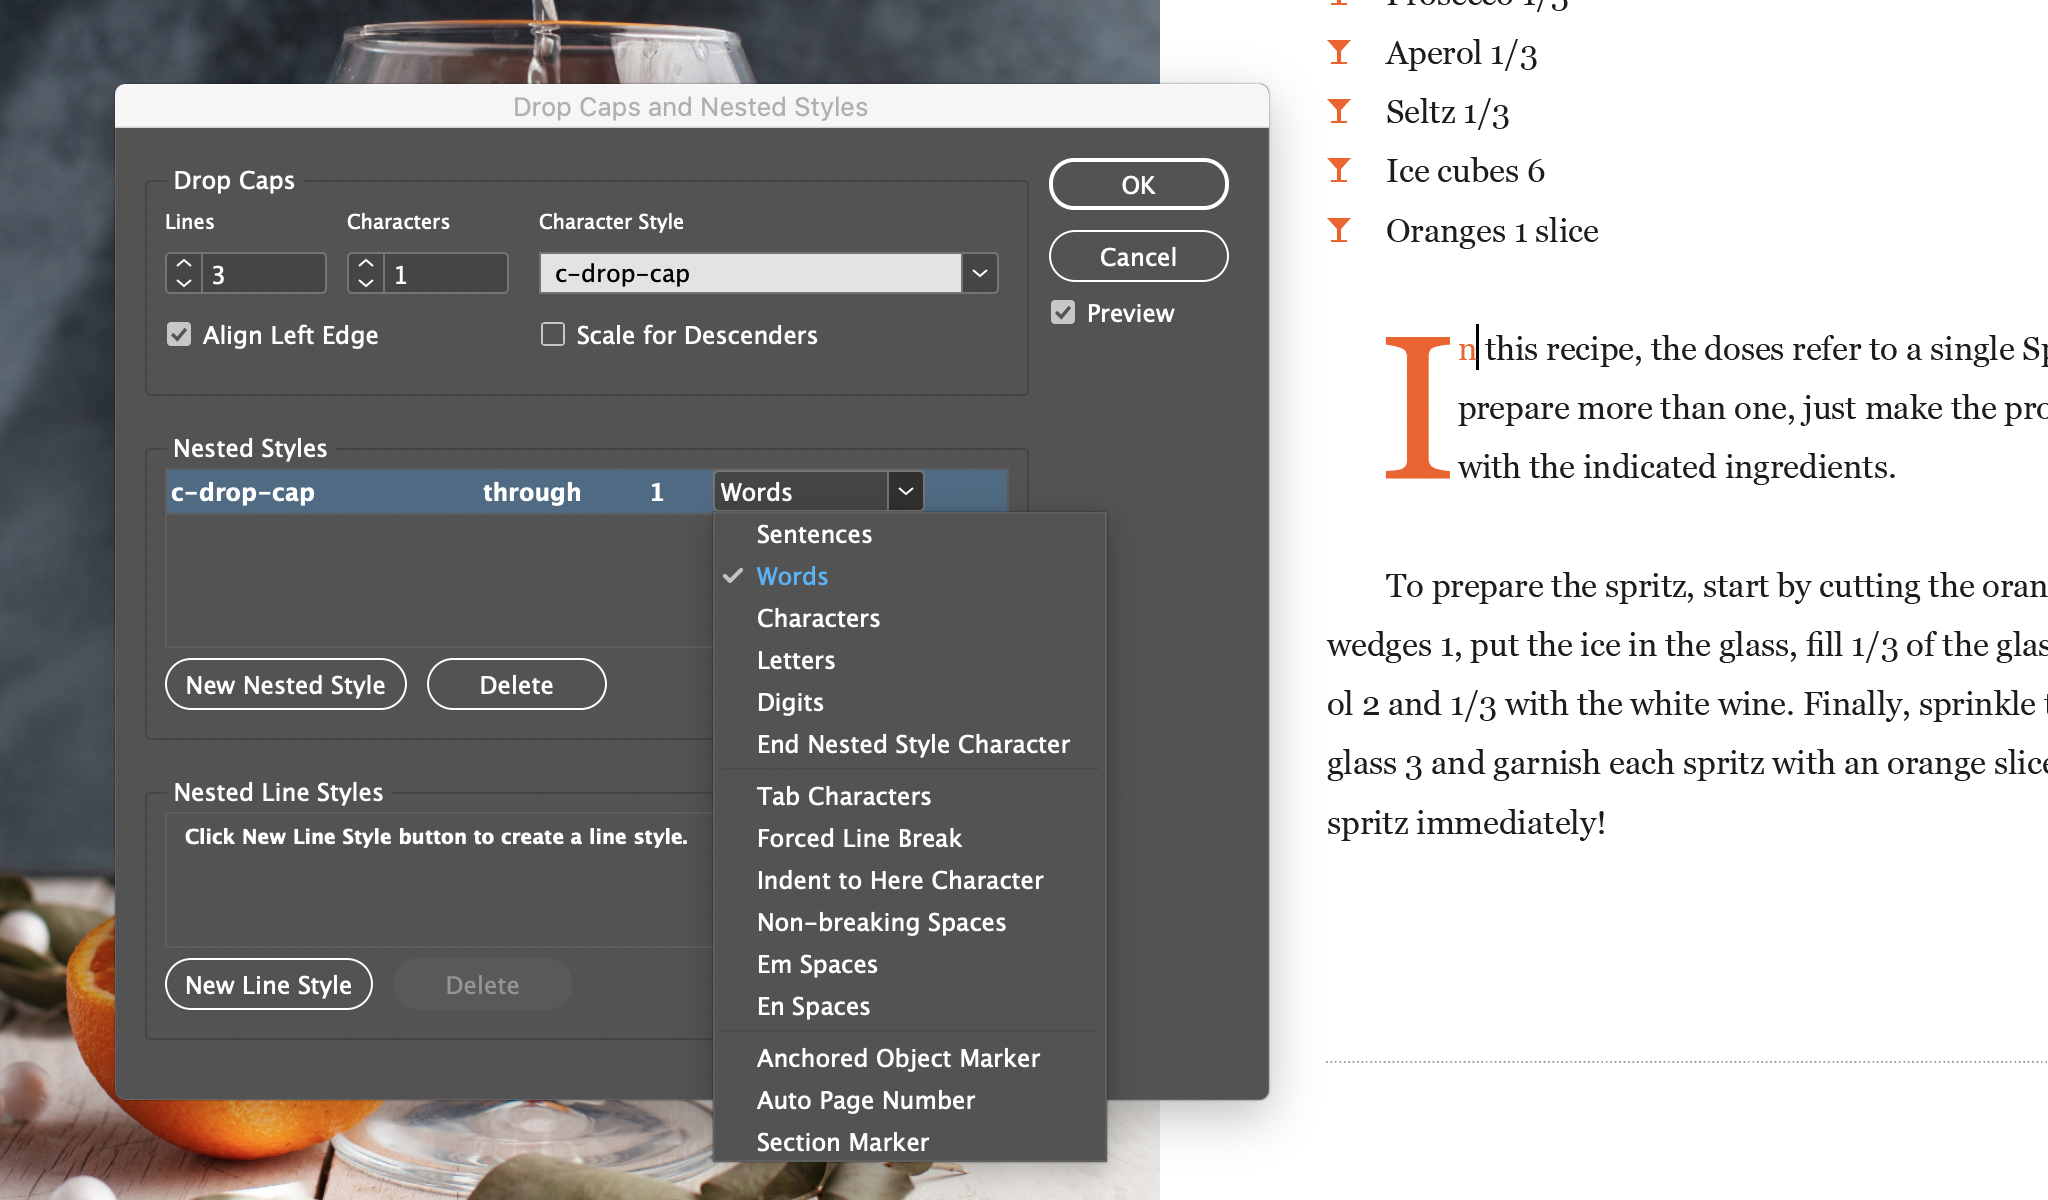
Use a nested style to color a whole word
If you want to apply a particular style to the whole word (as you see in the image below), change the options in the central part of the pop-up called "Nested styles".
Use Paragraph Styles to create Letters in InDesign
The same variables that we talked about in the previous section can be found within the settings of a Paragraph Style, in the "Drop Caps and Nested Styles" tab.
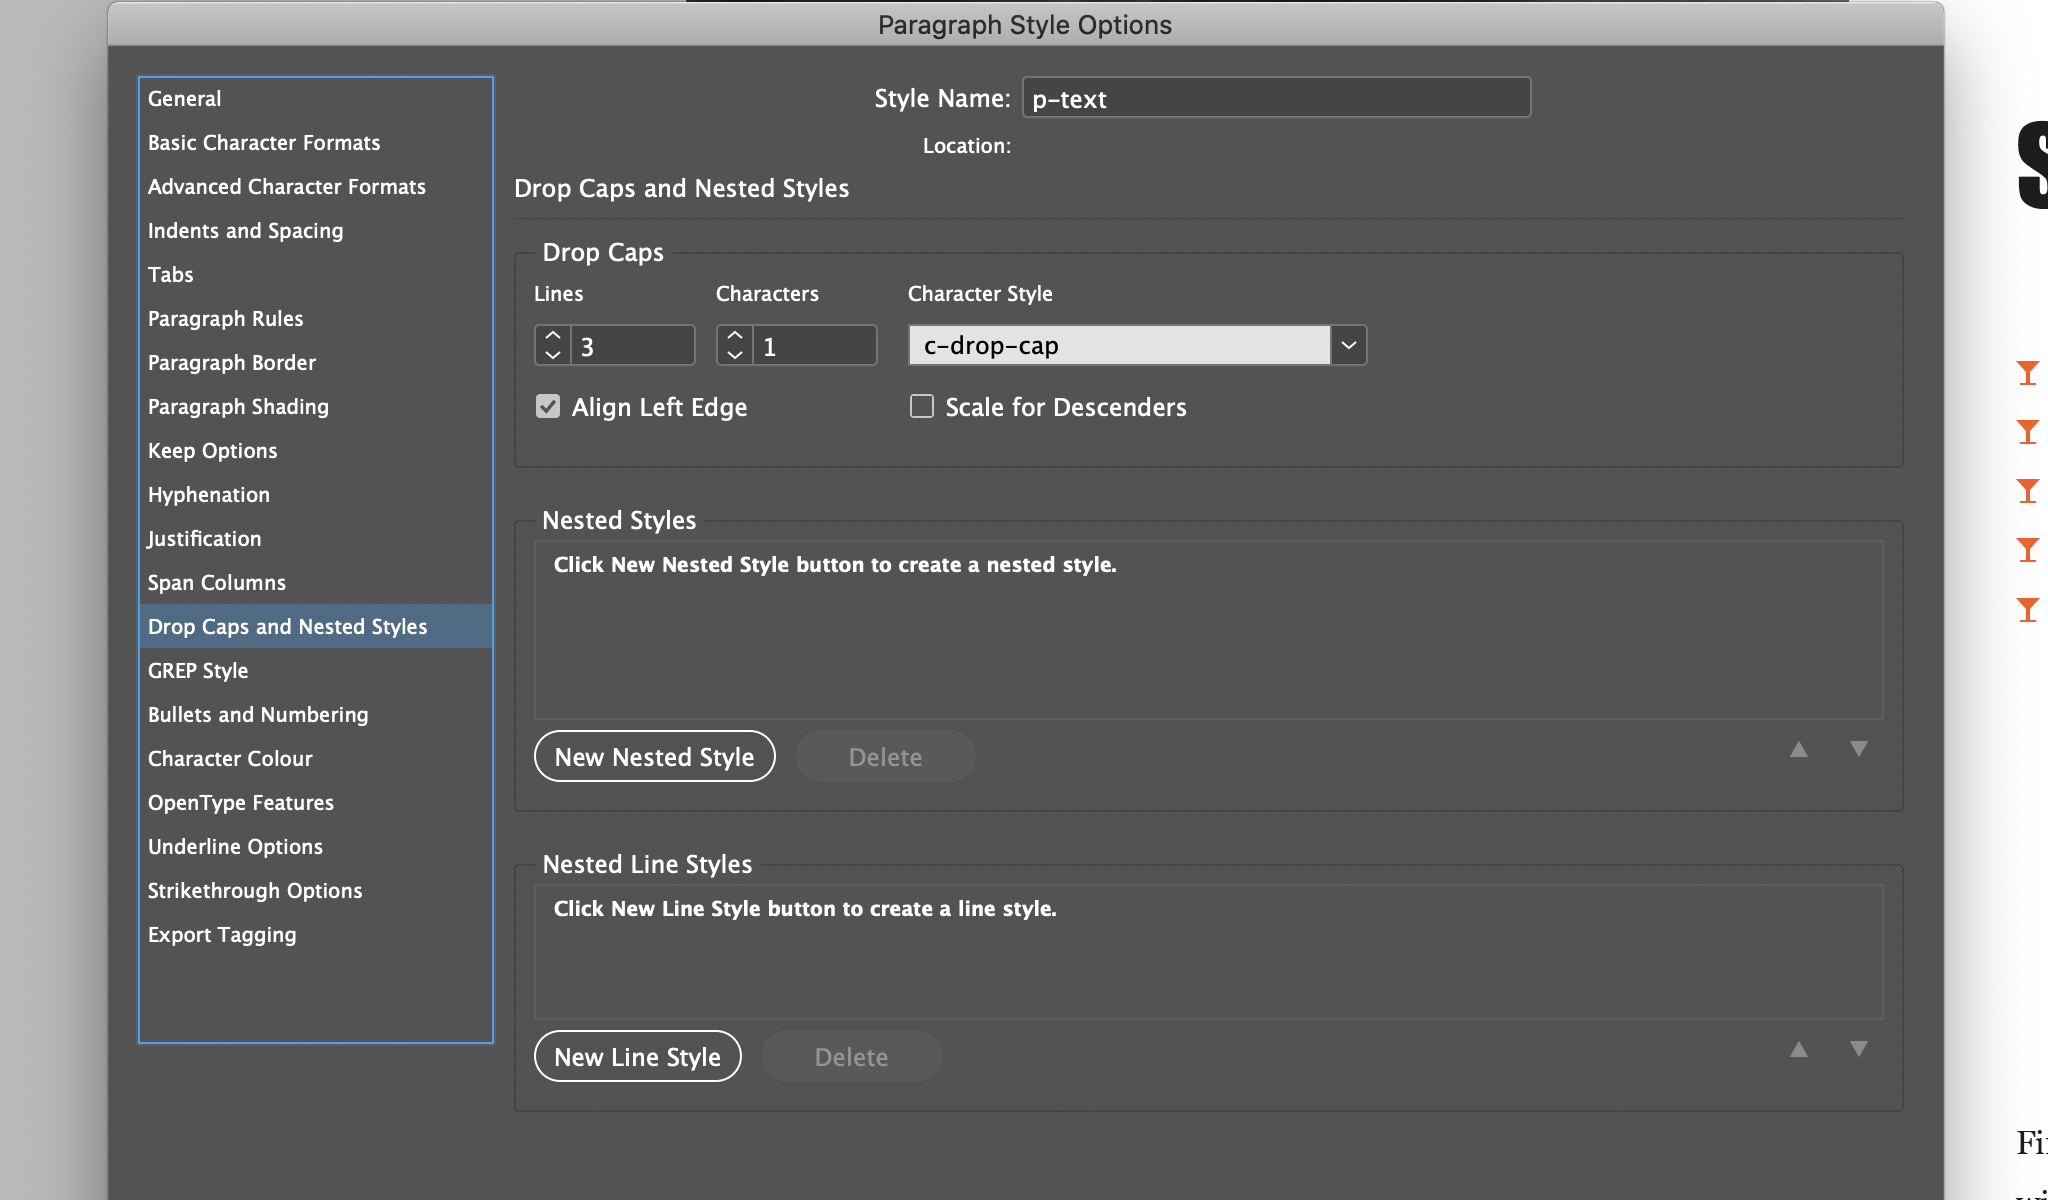
Using a paragraph style will allow you to have more precision when you want to reuse the setting given to the first Drop Cap.
Use Variable Fonts for a more incisive layout
One of the new features of InDesign 2020 is Variable Fonts.
Once you have selected a Variable Font (in InDesign you can recognize Variable Fonts from the VAR label next to the name of the Font. You will be able to use some slides (like the one you see in the figure) to change how the letter is displayed.
So to create more incisive layouts you can also take advantage of a Character Style that assigns a Variable Font to the Drop Cap.
Want to learn more about it - here is a detailed guide about how to use InDesign variable fonts feature.
Advanced Drop Caps in InDesign
However, there are times when you cannot use a simple font to create your first letter. Sometimes, as designers, we want to take our layout to another level of creativity.
For example, we might want to add a handmade letter in Illustrator.
But once we have created our beautiful letter, how can we use InDesign automation to replace all the Drop Caps in our document?
We can use the Find/change feature and the magical GREPs (first time hearing about GREP - read this content and find out all about it).
Now back at our drop caps, let's see the actual process.
- We create each image in Illustrator (or Photoshop).
- We indicate which letters will be replaced by putting them in square brackets.
- We replace the letters with the pictures.
Use GREPs to indicate which letters to replace
We need to find a quick way to indicate which letters we want to replace with the drop cap we created in Illustrator (or Photoshop).
In my case, it is the first letter with the p-text style assigned on each page:
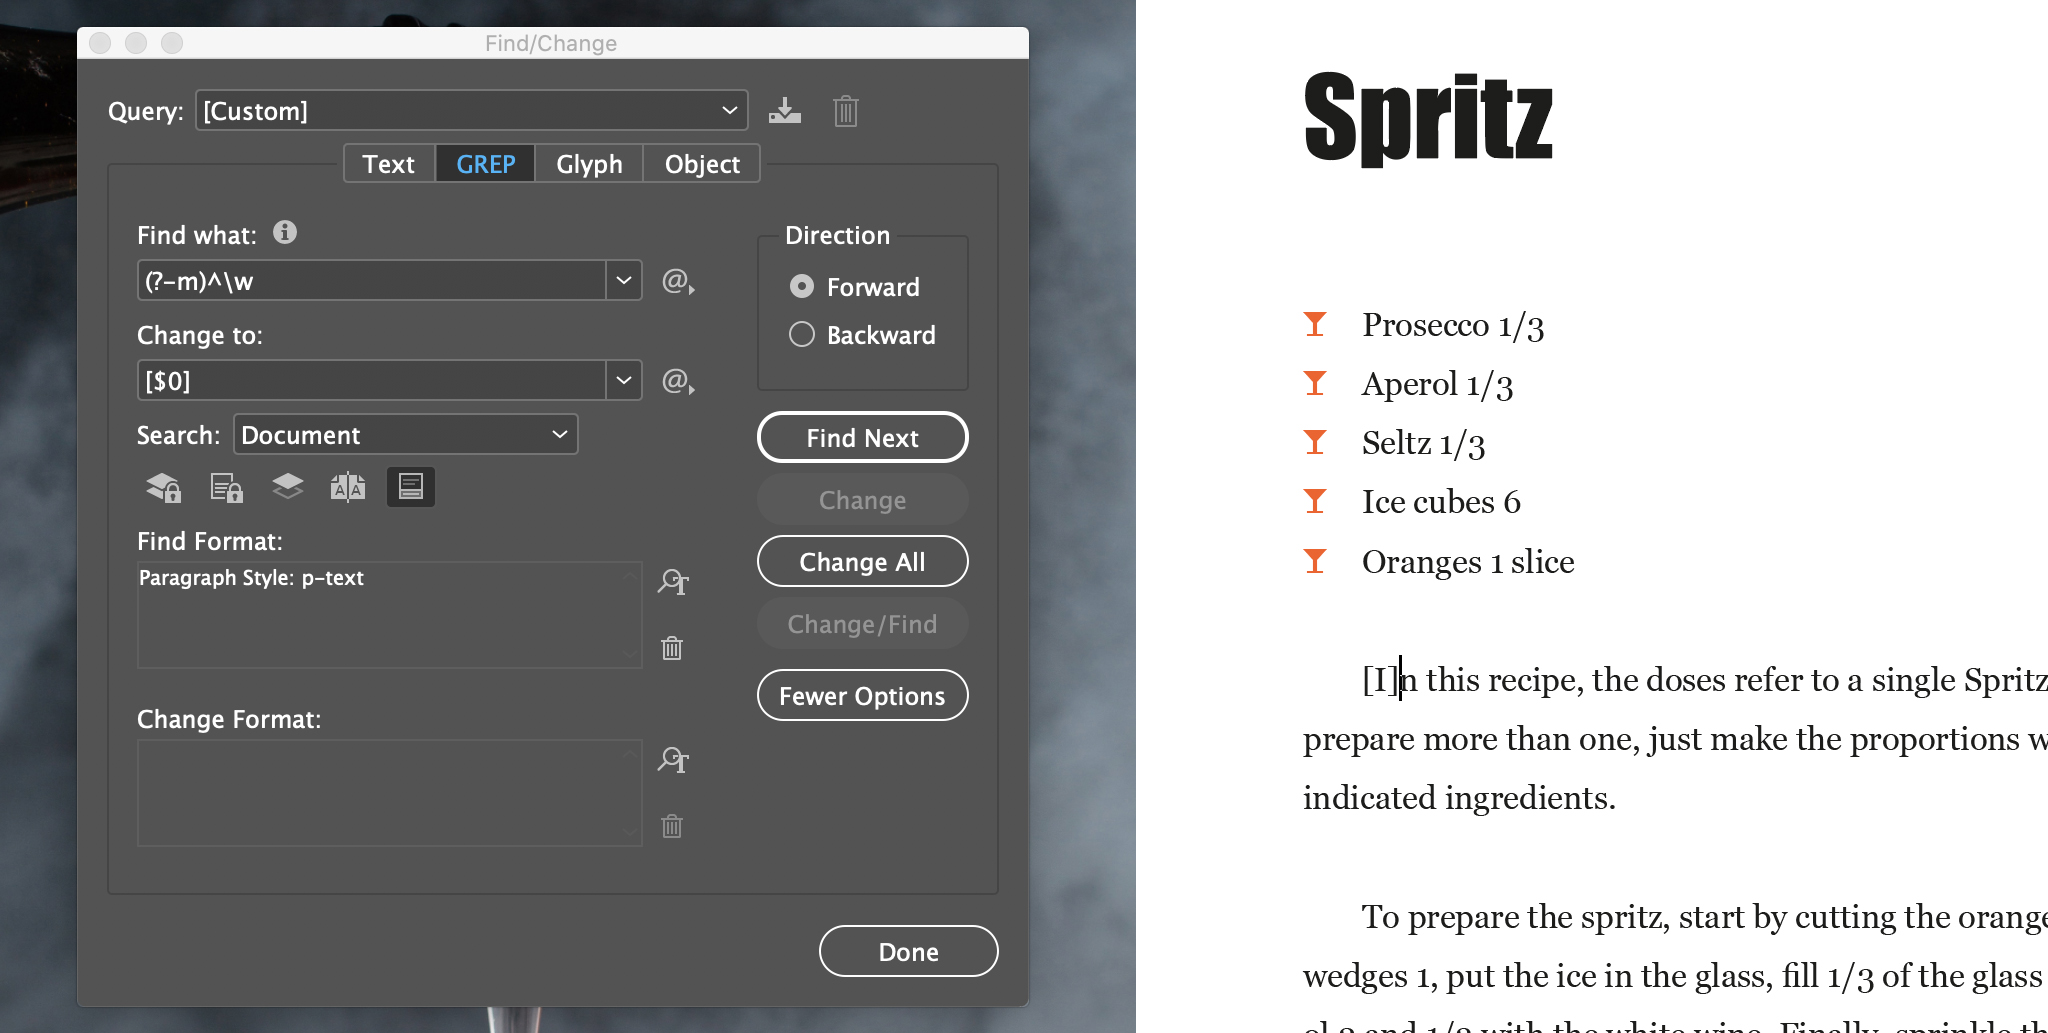
- Open the Find/Change (Cmd + F in MacOs or Ctrl + F in Windows).
- Enter the GREP tab and in Find add this instruction (? - m) ^ \ w - this expression tells InDesign to select the first letter of the text.
- In Change insert [$ 0] - this will cause InDesign to insert two brackets around the first letter.
- Finally, make sure that the format in which InDesign will search is p-text and that you search throughout the entire document.
- At this point, I click on Replace all and in all the pages, the first letter with the style p-text applied, will be inserted in parentheses.
Replace the letters in parentheses with the images of the initials
In this step, the Find/Change feature comes back to help us.
- First, insert the image you created in InDesign in place of the [I]. I'd suggest you set an Object Style to the image so you can better control its position. If you don't do that, you will then have to manually adjust the position of all the drop caps in the various pages of your document.
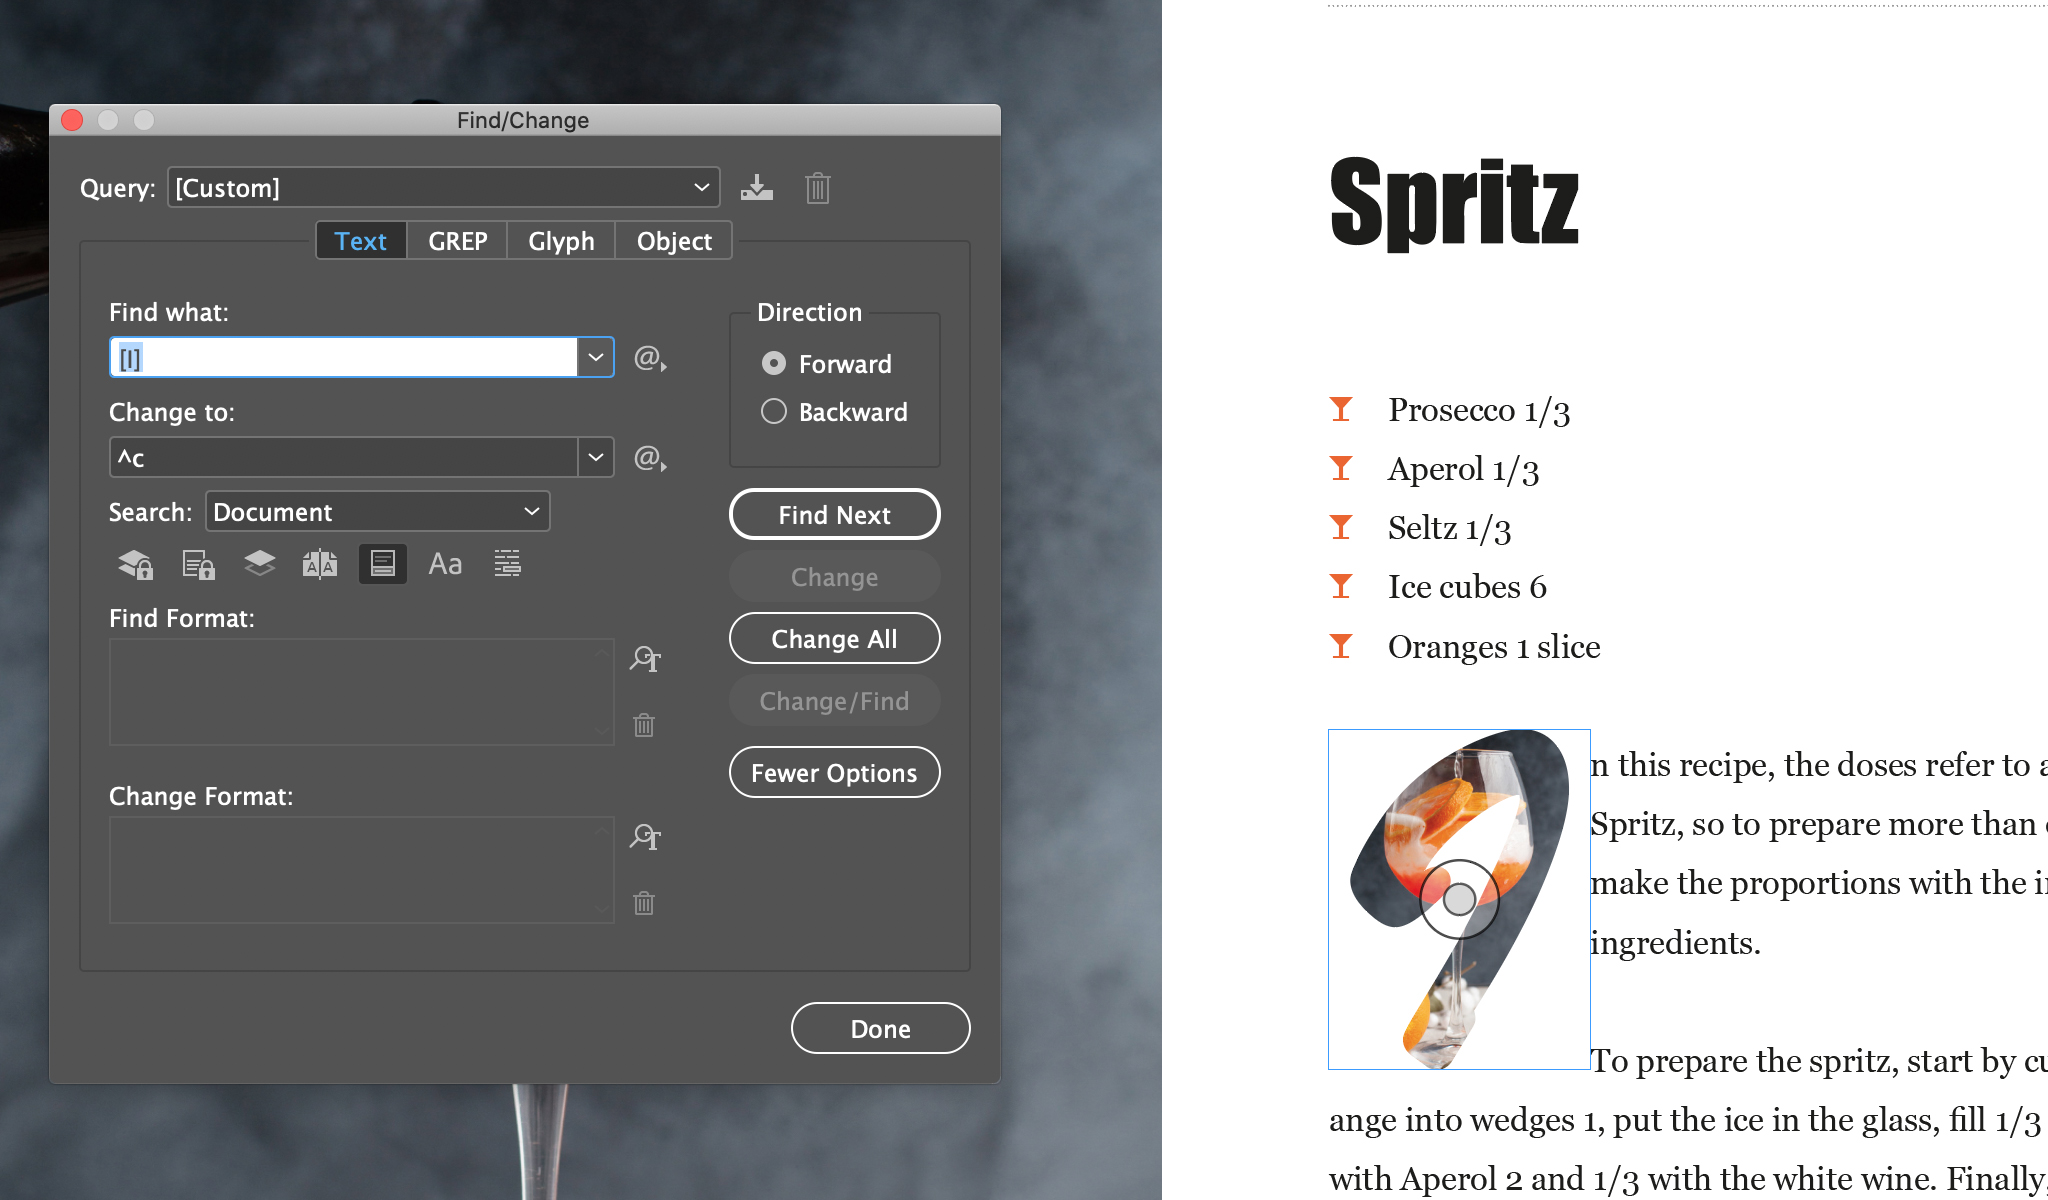
- At this point, copy the Drop Cap that you just placed and open the Find/Change again.
- In the Text, enter the letter you want to find in brackets, in my case I write [I].
- In Change, write ^c this tells InDesign to paste what you have on the Clipboard (format included).
- At this point, click on Replace all and as a result, in my whole document, the first letter (when it comes to an [I]) will be replaced with the image we copied.
Conclusion
Letter caps are one of the many ways you can make a layout much more interesting. As you may have figured out through this post, by knowing how to use InDesign features correctly and knowing some tricks, you can get extraordinary results. For most designers it would take hours and hours of work.
Learning to use InDesign is a fundamental step in becoming a true professional in the field graphics.
Until next time,
Stefano


