


InDesign is an amazing and powerful tool, I’ll never get tired of saying it!
It is filled with automations to help you create beautiful and stunning documents that are still practical and user-friendly. More often than not, though, these same automations can lead to some confusion when it comes to hyphenation, and confusion can lead to mistakes.
Let me help you prevent some with this post on how to understand, control, and disable InDesign hyphenation.
I’ve divided the topics of this post into sections to help you navigate better. Click on the links to jump to each section:
- How Hyphenation Works in InDesign
- Remove Hyphenation on a Single Word
- Manually Adjust a Word's Hyphenation
- Remove Hyphenation on the Entire Text
- Edit Hyphenation Settings in InDesign
How Hyphenation Works in InDesign and how to Avoid Mistakes
Hyphenation is a very important element in a document; it controls how text is shown within the page.
InDesign has very advanced features to best control hyphenation. These features are called “Composers”.
There are essentially two types of “Composers”: Adobe Paragraph Composer (usually default), and Adobe Single-line Composer. These two composing methods calculate the possible line breaks according to:
- the set language,
- the hyphenation settings,
- the justification settings.
Without getting into too much detail, the paragraph composer analyzes the entire paragraph to distribute words throughout the different lines, while the single-line composer analyzes, you guessed it, each single line.
For your documents, I would suggest that you use the Adobe Paragraph Composer, as I feel it gives the best results, but if you want to change this setting, you can find more information here.
How to Avoid Hyphenation Mistakes
Setting the language in your document is necessary, not just for spell check, but also for hyphenation!
If you set the wrong language, the hyphenation will be off. The image below is an example of that.
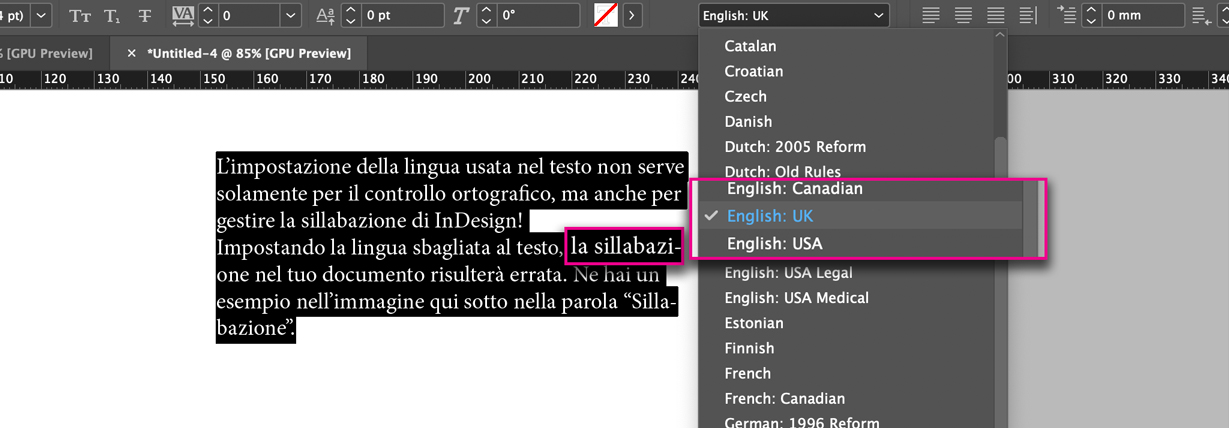
Be careful: if you’re working on documents containing more than one language, you will have to make sure to set the right language for each section.
How to Remove Hyphenation on a Single Word
You can control hyphenation on a single word by:
Removing Hyphenation by Acting on a Local Format
If you want to act on a local format you can:
- Select the word that you don’t want to be split up.
- On the control bar at the top, click on the icon with the three parallel lines.
- Select the No Break option.

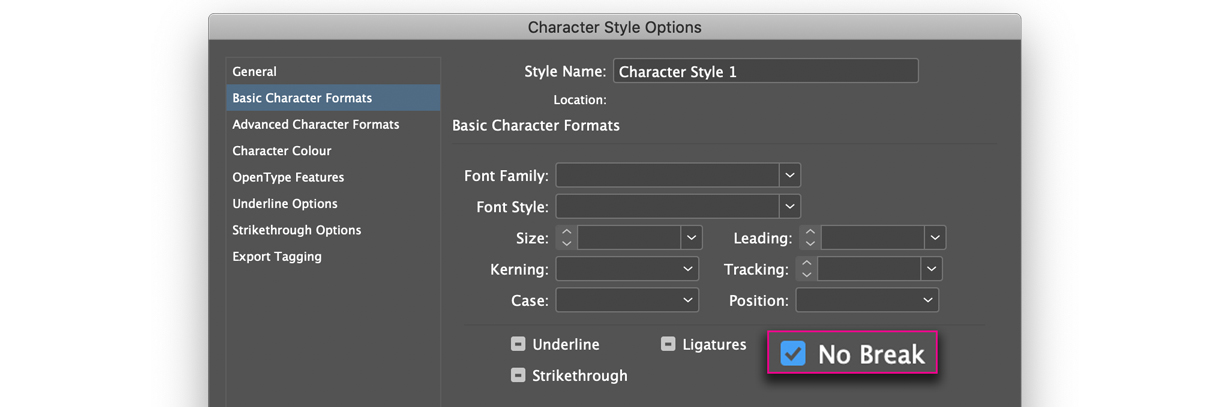
Removing Hyphenation Through Character Style
If you want to use Character Style instead you will have to:
- Create a Character Style;
- Activate the No Break option in the Basic Character Formats tab that you can find in the Character Style Options window;
- Apply the style to the word that you don’t want to be split up.
How to Manually Adjust a Word's Hyphenation
In some cases, you may want to hyphenate a word in a specific way. For example, the word “constrictor”, within my text is hyphenated as “constric-tor”, while I want it to be hyphenated as “con-strictor”.
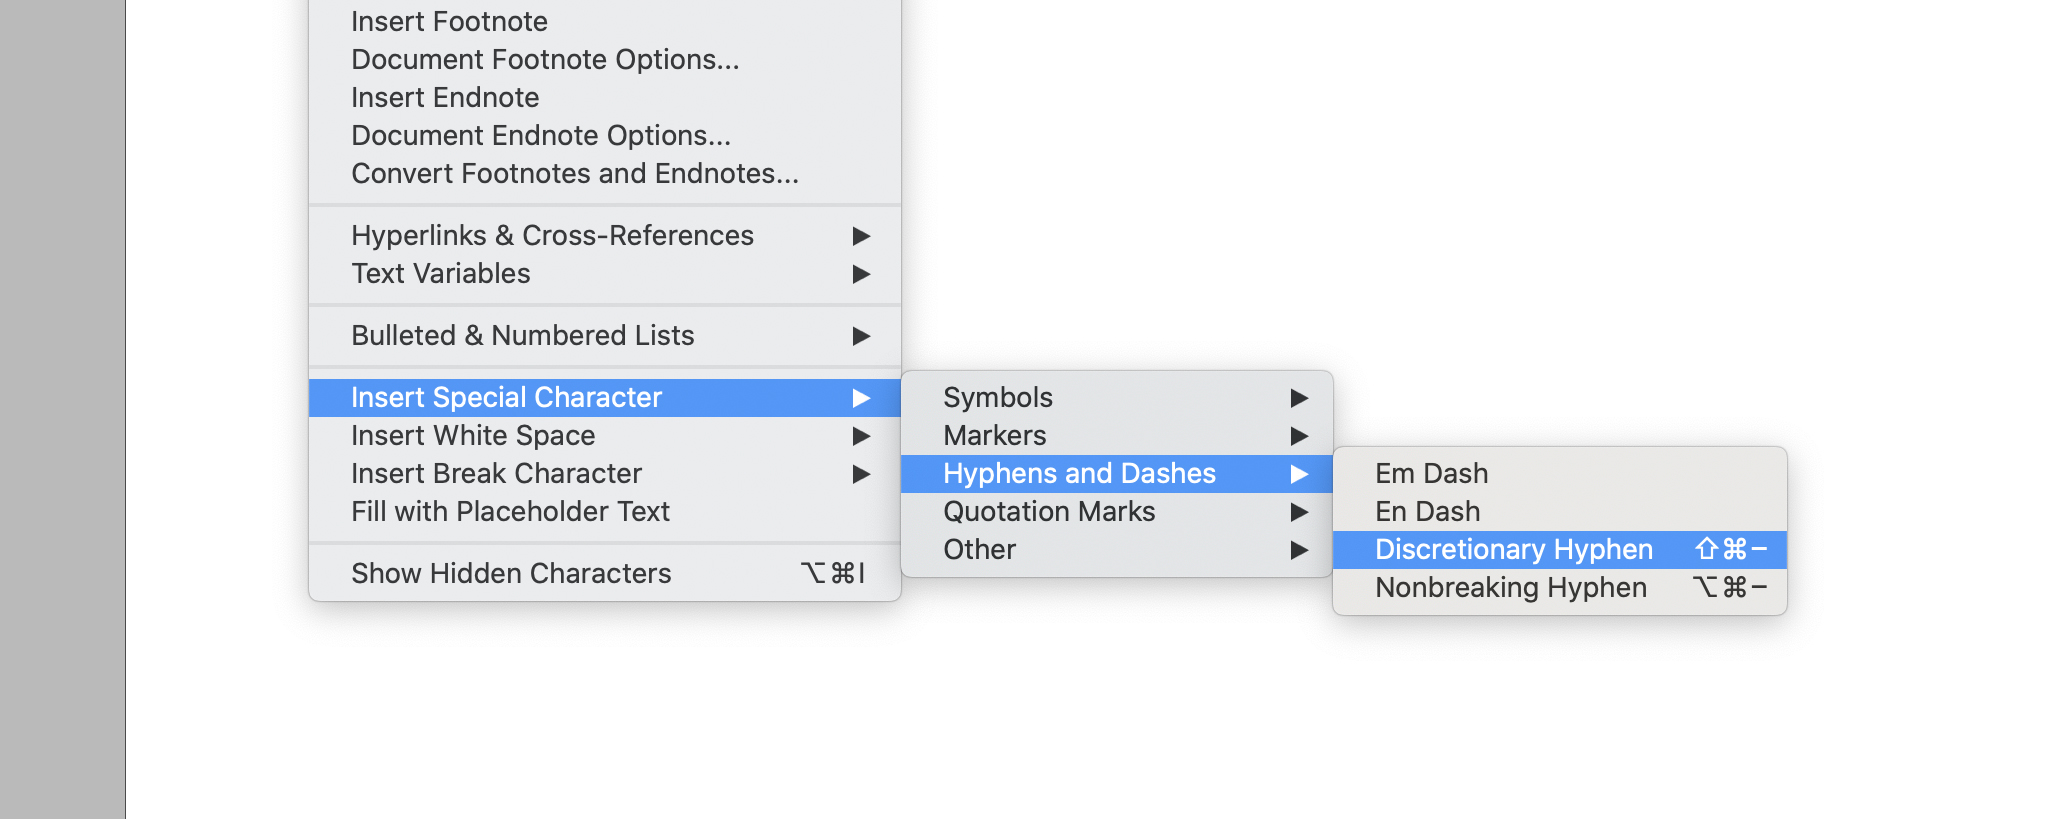
In InDesign you can customize text in a way that allows you to do just about anything, including this. You can manually adjust a word’s hyphenation by using the Discretionary Hyphen.
- With the Type tool, click on the spot where you want to insert the hyphen.
- Click on Type > Insert Special Character > Hyphens and Dashes > Discretionary Hyphen.
Be careful, though, because hyphenation is managed in a much more complex way, and the document will still follow the rules we’ve seen up through this point. But if you use the Discretionary Hyphen, you will force InDesign to split the word only in the spot you have chosen.
How to Remove Hyphenation from the Entire Text
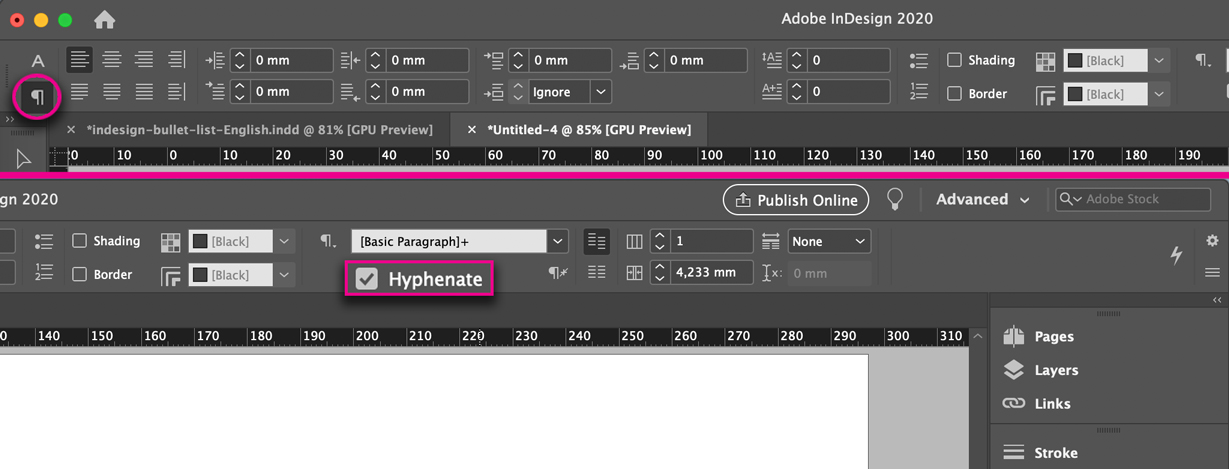
To remove hyphenation in InDesign:
- Select the text.
- In the control bar, in the Paragraph menu, disable the option Hyphenate.
If you’ve followed one of the many InDesign courses we recommended here, you know by now that you should avoid local formatting. You might also already know how to use Paragraph Styles correctly and might want to edit your styles.
Even if you aren’t aware of Paragraph Styles, or if you haven’t used them in your document, you will still find one in your file named “[Basic Paragraph]” which you can use to remove hyphenation anywhere in InDesign.
So, if you’re using Paragraph Styles or you want to edit [Basic Paragraph]:
- Go to edit Paragraph Style by double-clicking on the name.
- Go to the Hyphenation tab.
- Disable Hyphenation.
How to Edit Hyphenation Settings in InDesign
You can edit how InDesign hyphenates text by changing the Hyphenation settings. This can be done both locally and within a style, but since doing it locally would be crazy, what we’re about to go through here is how to do it within a Paragraph Style.
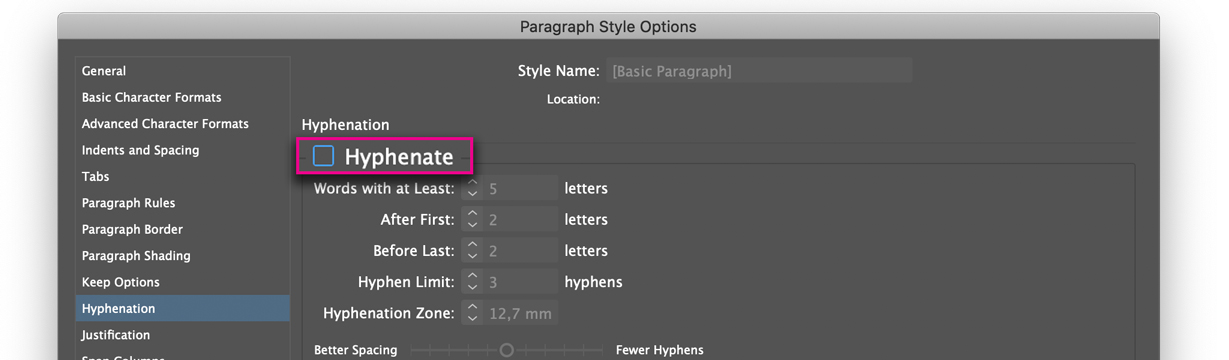
- Go to edit Paragraph Style by double-clicking on the name.
- Go to the Hyphenation tab, here you will find these settings.
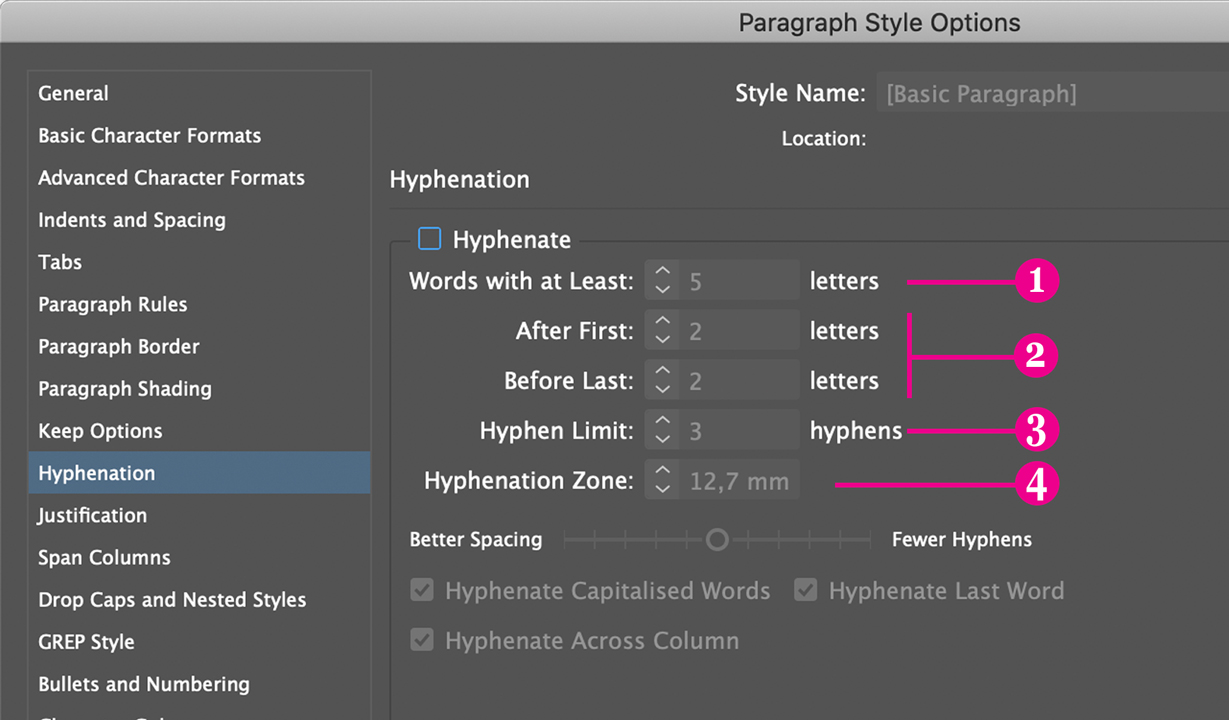
Here is an explanation of the more “obscure” functions:
- Words with at Least X letters: This allows you to control the minimum length of the words on which to apply hyphenation.
- After First X letters/Before Last X letters: This allows you to control the minimum number of characters that each part of the word has to have. If for example you choose 4 as the value of “After first X letters”, the word “constrictor” can only be split up as “constric-tor” and never “con-strictor”. If, instead, you choose 4 as the value of “Before Last X letters”, the word “constrictor” can only be split up as “con-strictor” and never “constric-tor”.
- Hyphen Limit X hyphens: This controls the maximum number of hyphens used in a paragraph. Zero indicates an infinite number of hyphens.
- Hyphenation Zone: This indicates the distance from the right margin before a word is hyphenated. This option is only available for text that uses non-justified Single-line Composer.
Conclusion
While there are many more things to explore and discover about Hyphenation in InDesign, we hope this short post has given you a clear idea on how to navigate this useful, if tricky, function.
After all, our work here at Redokun is to make your InDesign experience easier, whether it is through the use of tutorials, templates, scripts, or our very own language translation.
Until next time,
Stefano


