


How to link an Excel file to InDesign
This is the feature in InDesign I love the most. You can import a linking spreadsheet that you can update from Excel. If you are not very practical with InDesign tables please have a look at part 1 of this series before reading the post.
Problem:
Let’s say that you have a product catalogue or a price list and sometimes you need to apply changes to the product prices listed in a table.
Wrong way:
If you just import the Excel file into InDesign, then when it’s time to change the prices you’ll have to:
- either import the Excel file into InDesign back again
- or edit the pricing manually
This is NOT something I would love to do any time there is a price update.
{{banner-component}}
Linking an Excel spreadsheet to InDesign (the right way)
In this case, the best way to create the table is to import the Excel file into InDesign, making sure that InDesign creates a link with the spreadsheet.
This is how you do so:
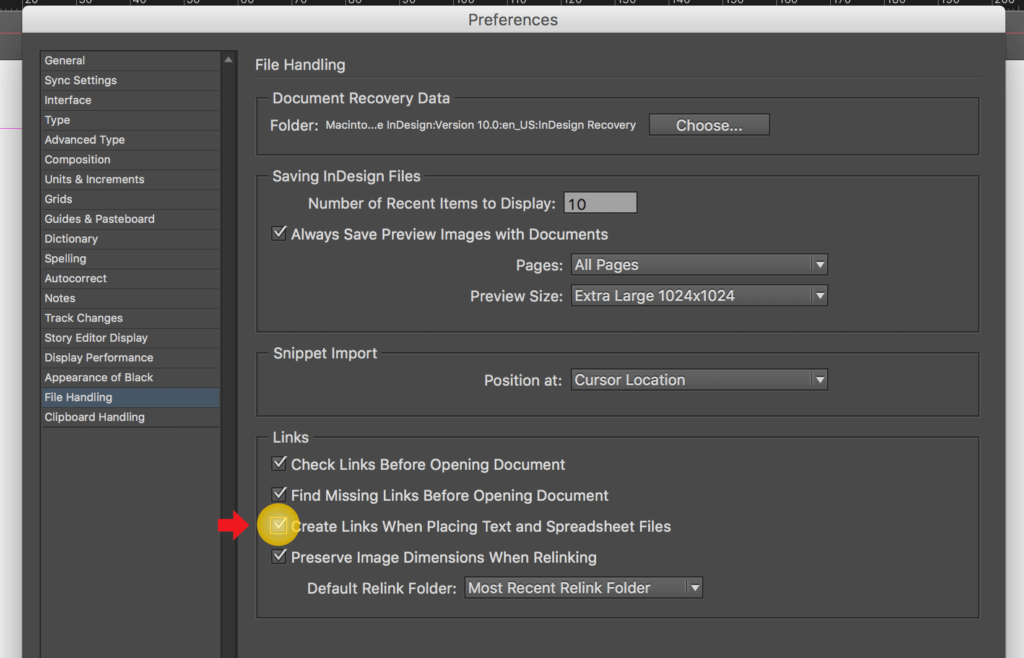
Set the Preferences
- Click on InDesign (on MacOS) or Edit (on Windows) in the main menu bar, go to Preferences in the menu that opens, and click on File Handling...

- Check Create Links When Placing Text and Spreadsheet Files in the File Handling window and click OK.
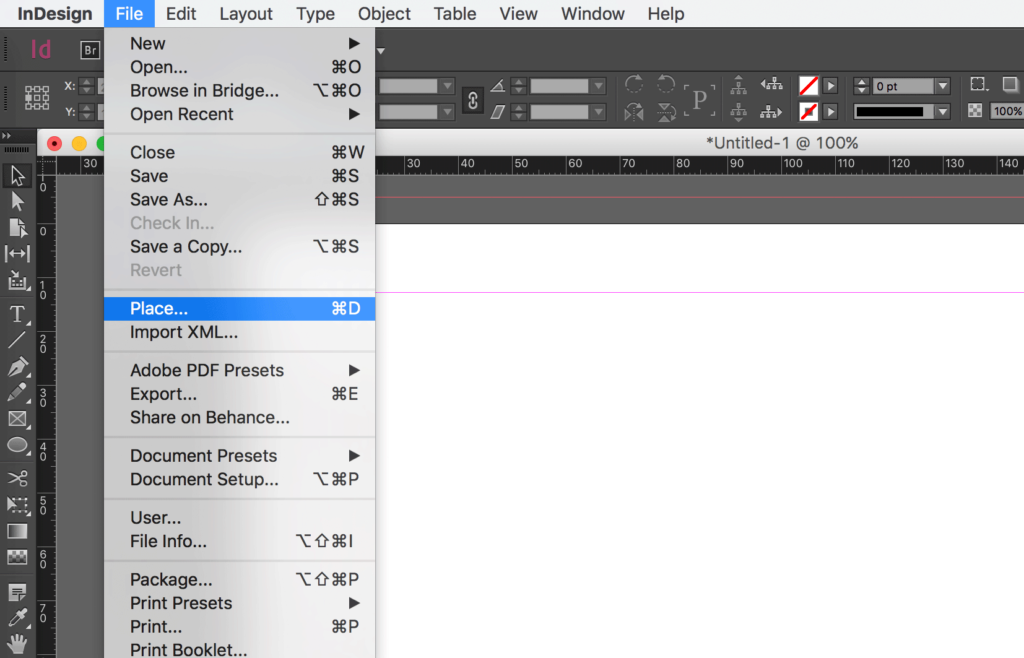
Now let’s import a new Excel file into InDesign.
Place the Table
- Let’s click File > Place (Otherwise you can press Cmd+D on Mac Os or Ctrl+D on Windows)
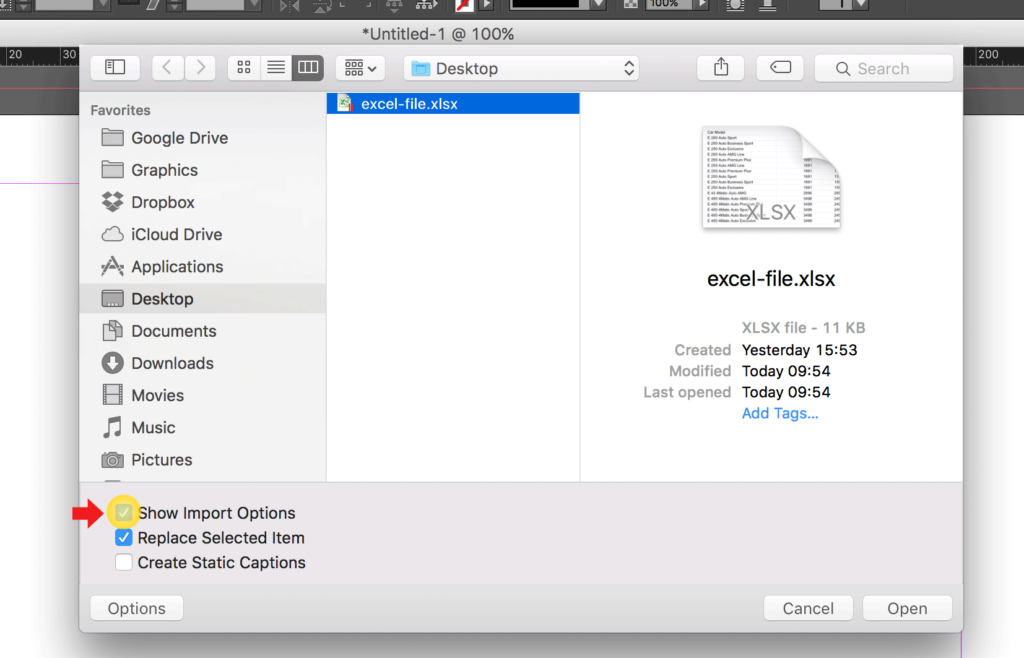
- Check Show Import Options in the import window (If it’s not already checked), select the file and click Open to import the Excel file into InDesign.
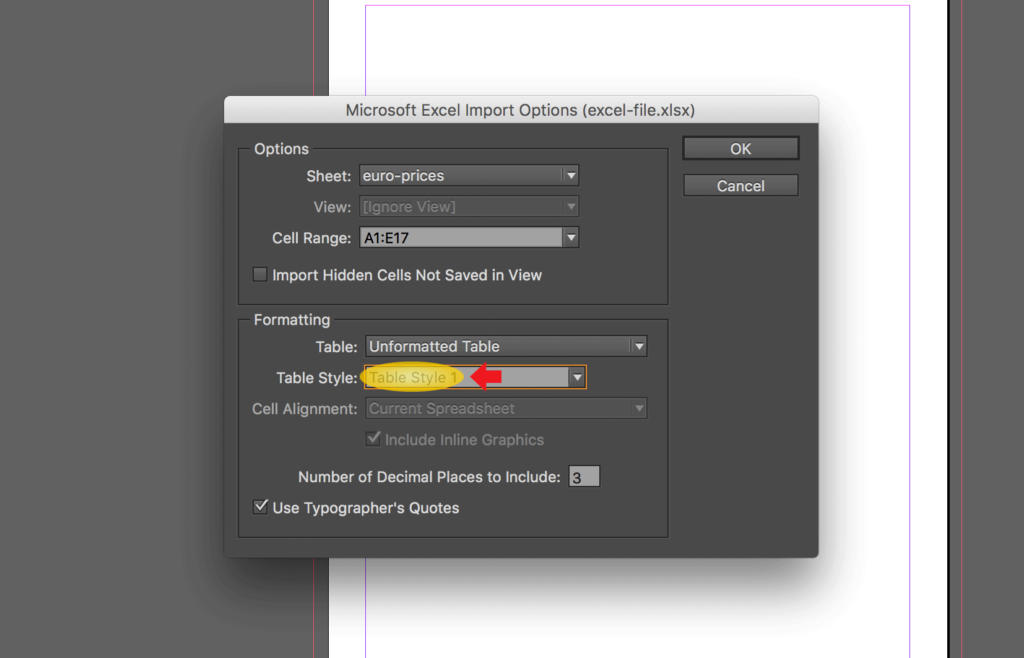
This is important: As we’ve seen in the Import of the Excel file above, here you can personalize a few settings. In this specific case I have already created a Table Style (more about this in part 3), and I am going to use it.
Be aware that if in this step you don’t apply a Table Style, any time the linked Excel changes you will lose the layout properties of the Table placed in InDesign.
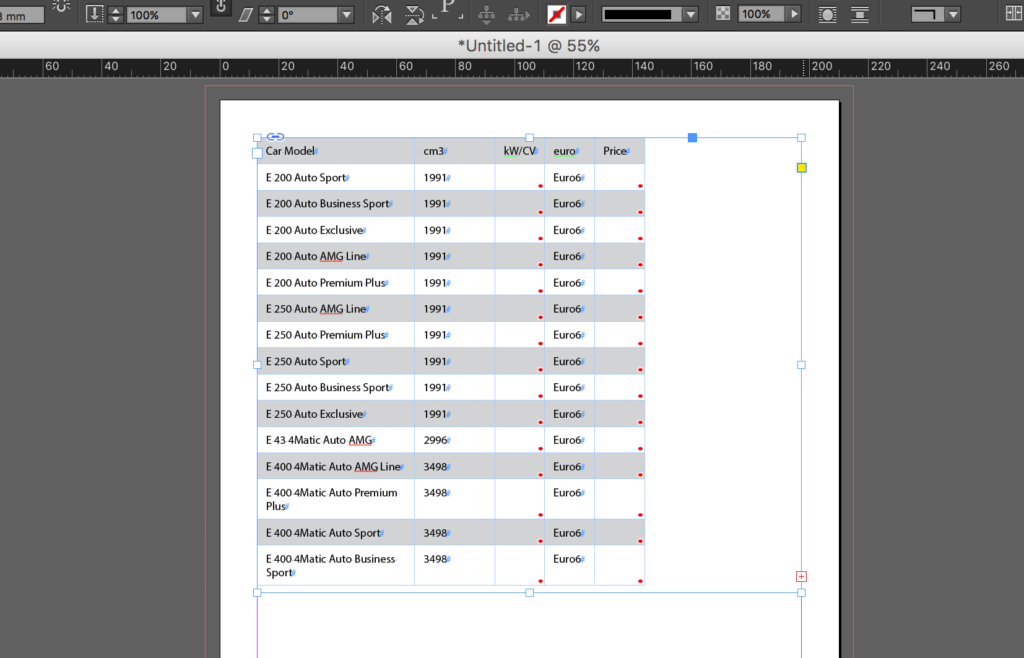
- Click OK and then draw a text-frame in InDesign to place your table.
This is the table in InDesign linked to the Excel spreadsheet.
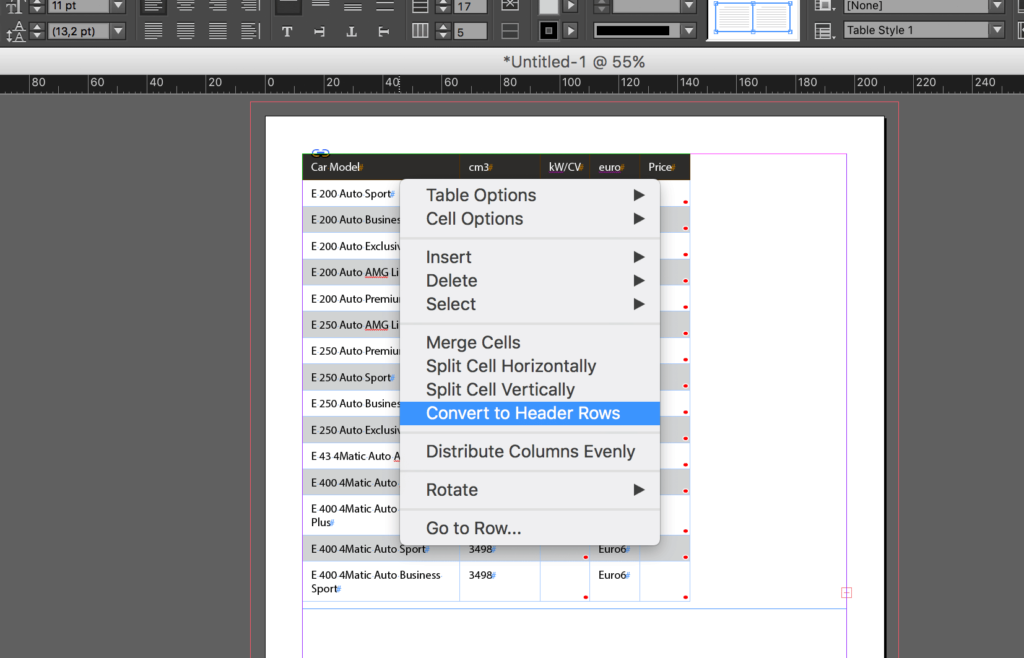
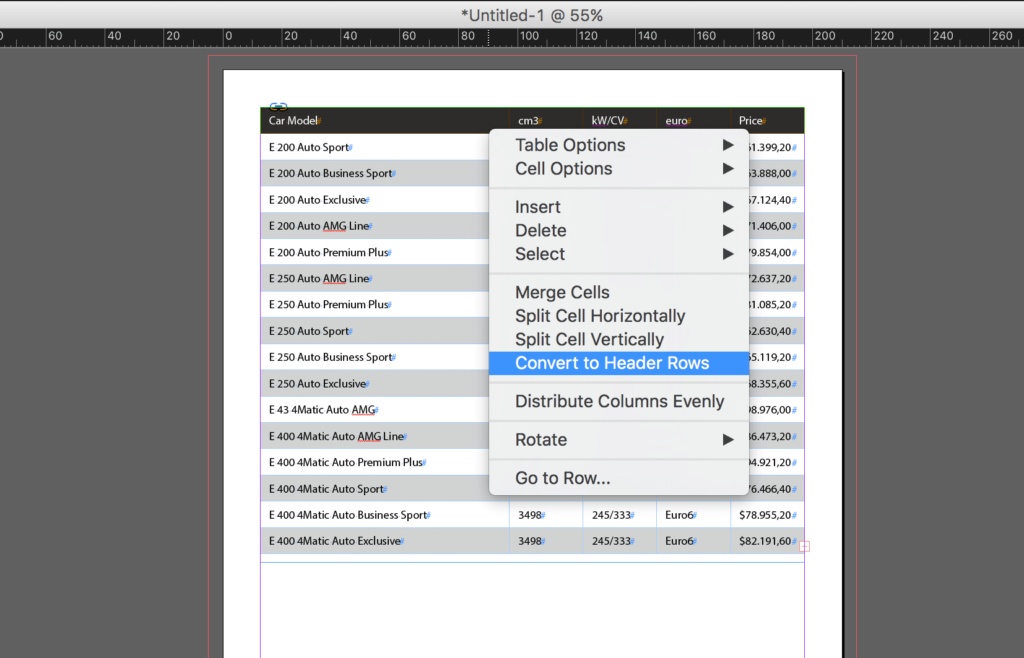
We want to set the first line as the header.
- Select the first row, right-click and select Convert to Header Rows.
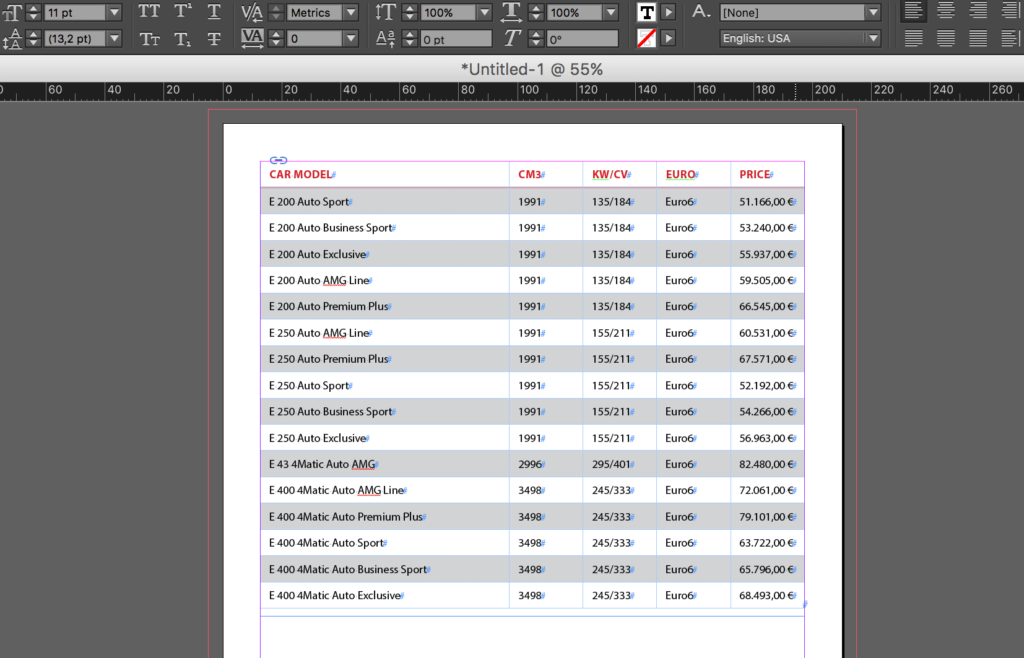
I’ll also adapt the columns width. This is the table we just created importing a spreadsheet from Excel to InDesign.
Changing the data inside the spreadsheet
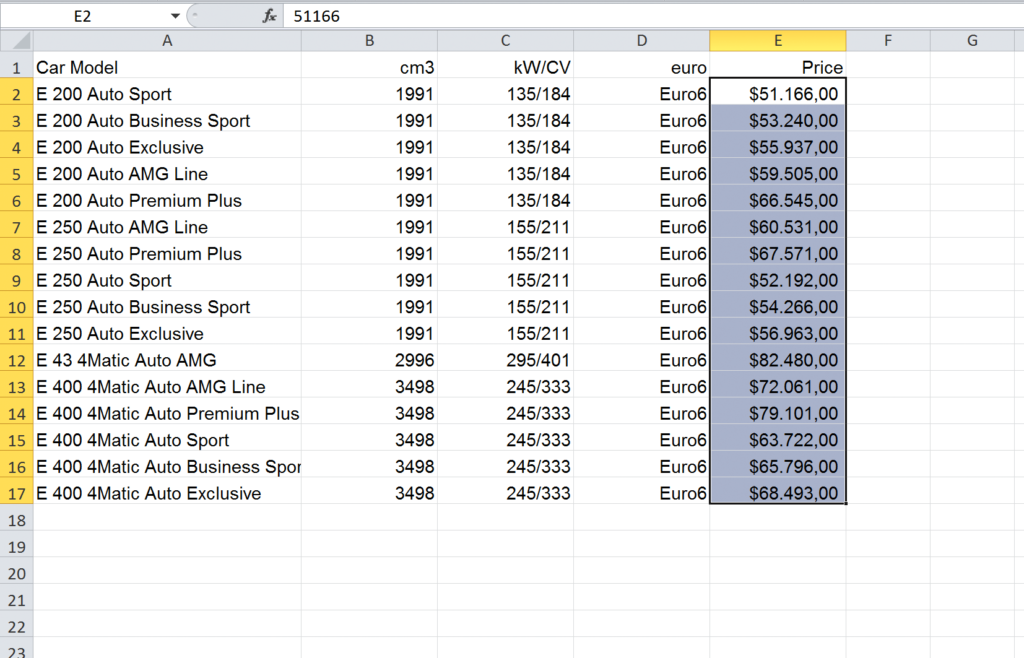
Let’s say that you want to change your prices in Dollars (they are in Euros right now).
You need to:
- change the € symbol to the $ symbol
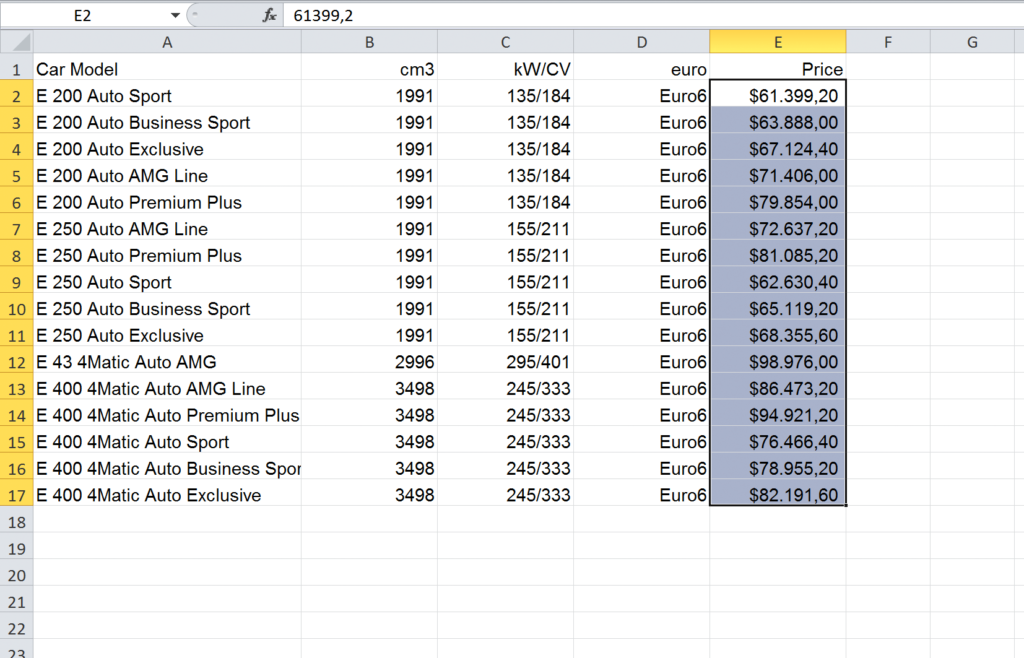
- convert all the prices to their value in dollars
Inside Excel
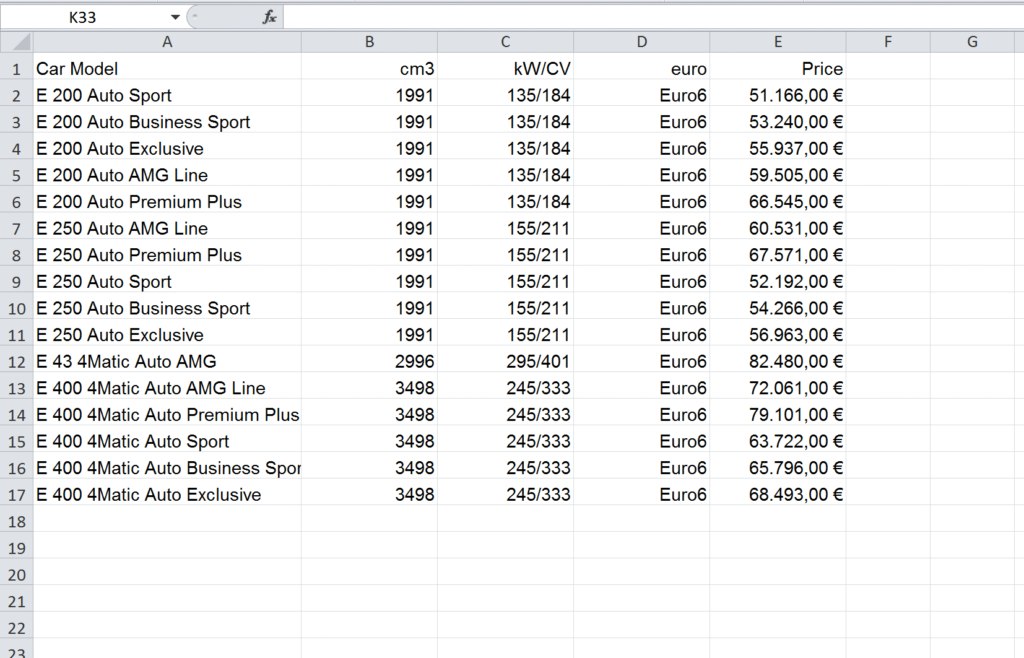
We start from this table.
- Let’s make this change inside the Excel file. The first thing we change is the € to the $ symbol.
- Then with an expression, I’ll change the value of the prices and I’ll save the file in Excel.
Back in InDesign
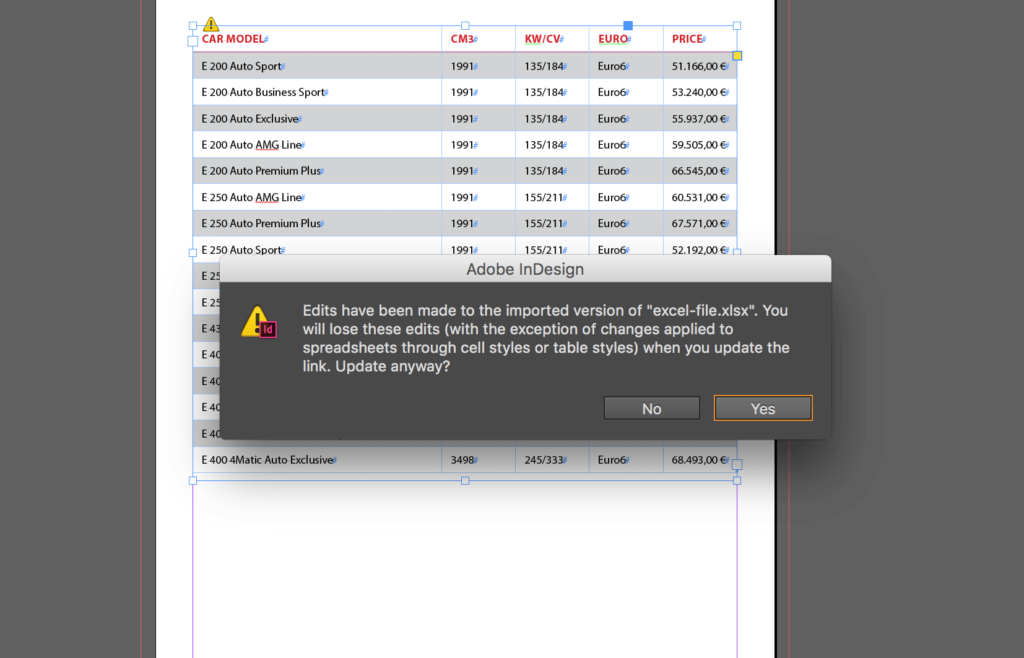
Back in InDesign we see this warning triangle which tells us that the table in the Excel file has been modified.
- Double-click on the triangle to automatically update the linked table.
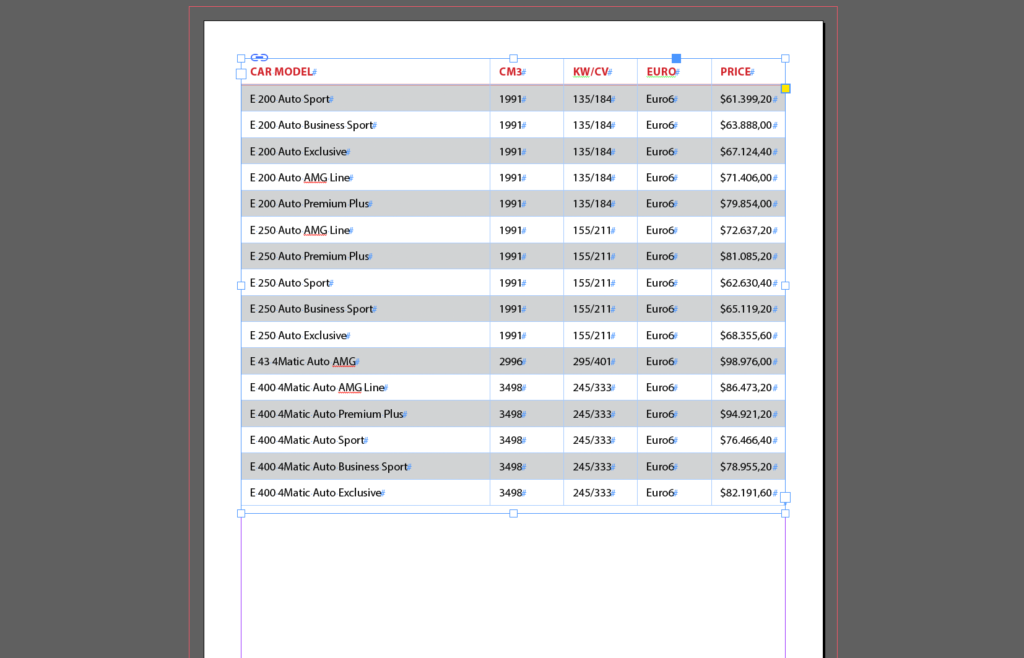
Perfect! The table in InDesign is updated!
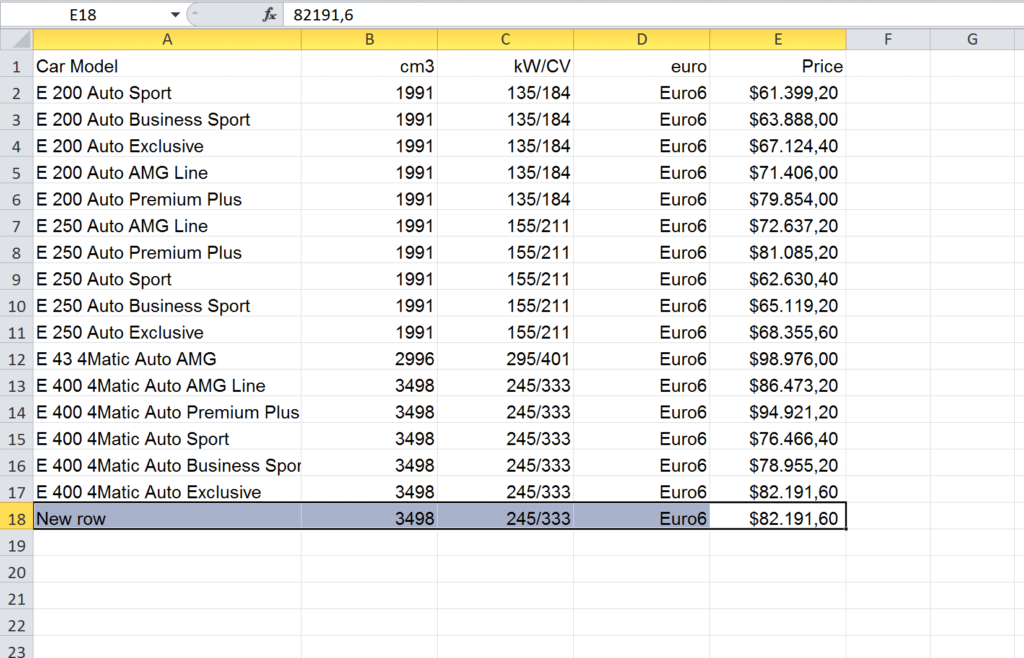
You may wonder, “What happens if I add a row to the Excel spreadsheet?”
Here is the table in InDesign before (left) and after (right) the update. As you can see, the updated table lost its header settings.
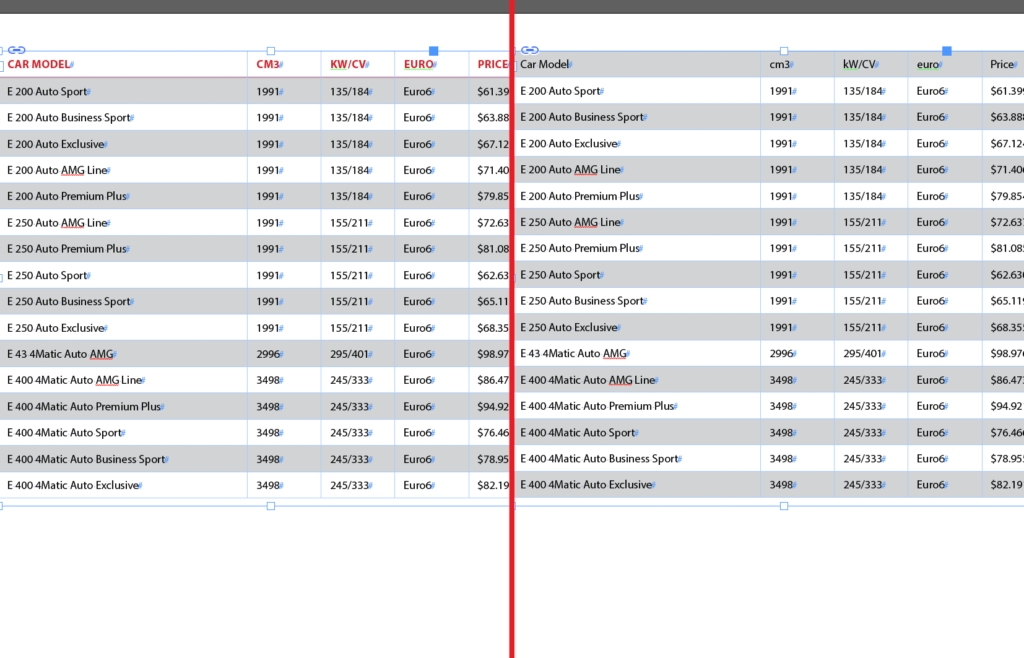
Again, select the first row, right-click and select Convert to Header Rows.
Important: While the width of your columns will be maintained each time the table is updated in Excel and the changes are applied in InDesign, if you make important changes to the spreadsheet (like adding a row), you will always need to set the header back.
Conclusion
Please be aware that with the Create Links When Placing Text and Spreadsheet Files feature active, any time you import an Excel file with the Place command you’ll create a linked table. To unlink the table, just click on the link of the table inside the Links window and select Unlink.
As you see, linking an Excel spreadsheet into InDesign is quite simple, yet very powerful. One of the handiest ways I use this feature is when I have to localize documents to the US market.
The Excel I use is generally like this:
- A spreadsheet in €
- A spreadsheet in $
- A spreadsheet for variables (like the change value between € and $)
And my process is:
- I create the Italian version (which has a linked table in €)
- then I create the English version with Redokun and change the link of the table to the spreadsheet in $
This way, any time there is a pricing change in my spreadsheet in €, the changes are automatically made into the spreadsheet in $, and both my Italian and English documents are updated.
Must-know InDesign Keyboard Shortcuts
Useful resources
Here a useful video by Lydia on linking an Excel spreadsheet to InDesign: https://www.youtube.com/watch?v=yjEa0Zk75-o
In the next post (part 3)
In Part 3 we will learn how to use InDesign Table Styles with a quick exercise. We will create the styles we need to lay out the table we’ve seen in this post (part 2).
Be sure to subscribe to our newsletter to keep up with future posts or major updates. If you liked the post, I'd really appreciate you sharing it!


