


InDesign table styles
Let’s learn how to use InDesign Table Styles with a quick exercise. We are going to create the styles we need to lay out the table we’ve seen in the previous post “How to link a file Excel to InDesign”.
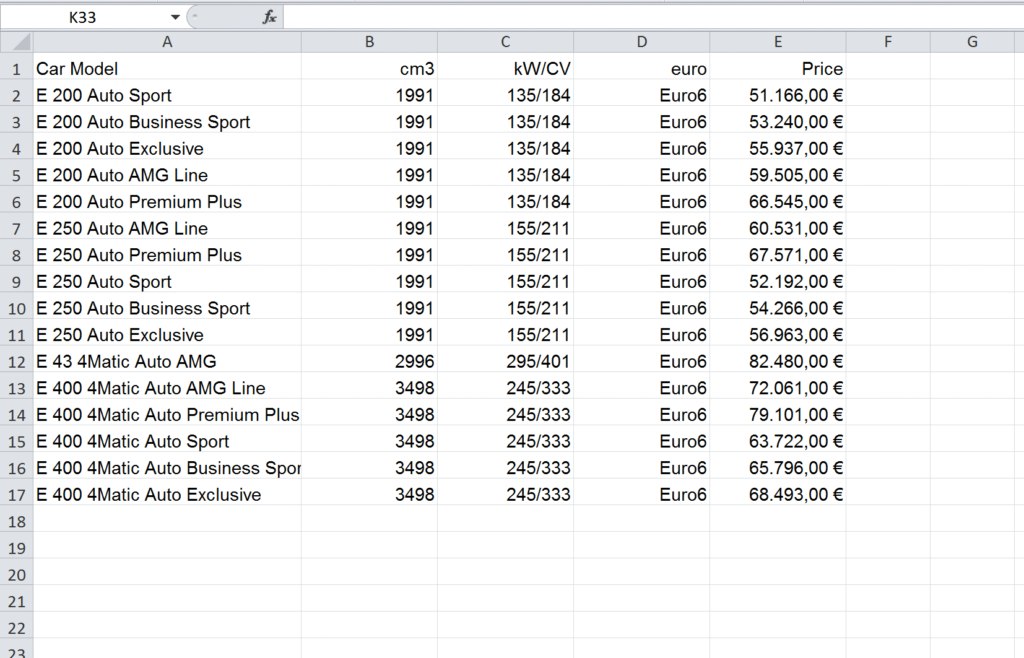
- Please download the Excel table from here.
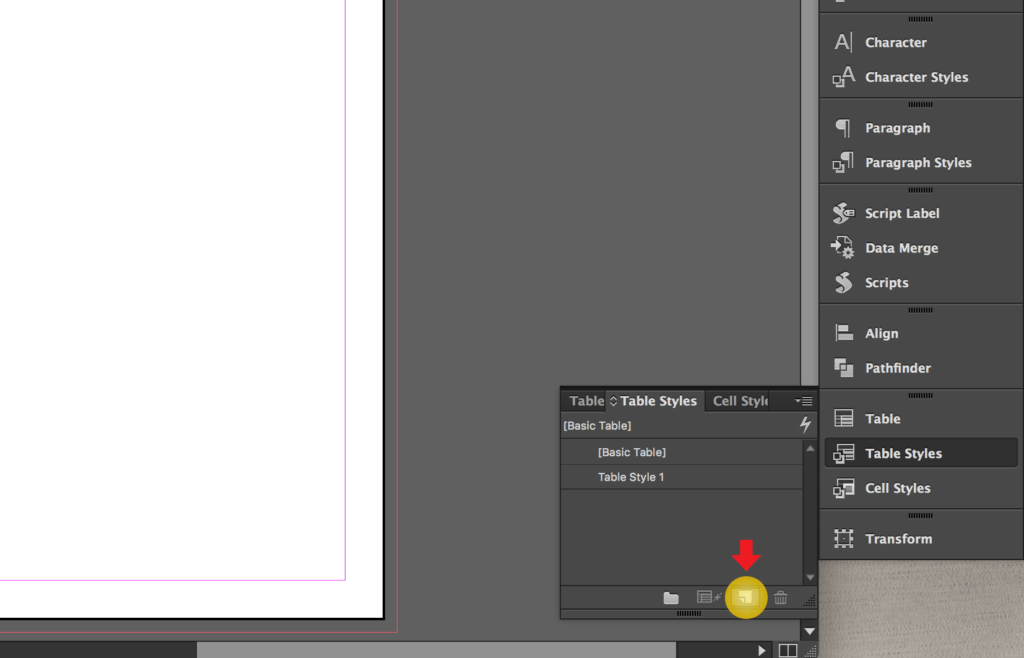
- Let’s create the InDesign Table Style by clicking on the icon Create New Style in the Table Styles menu in the panels to the right.
(If you can’t see the menu, turn it on by clicking on Window > Styles > Table Styles.
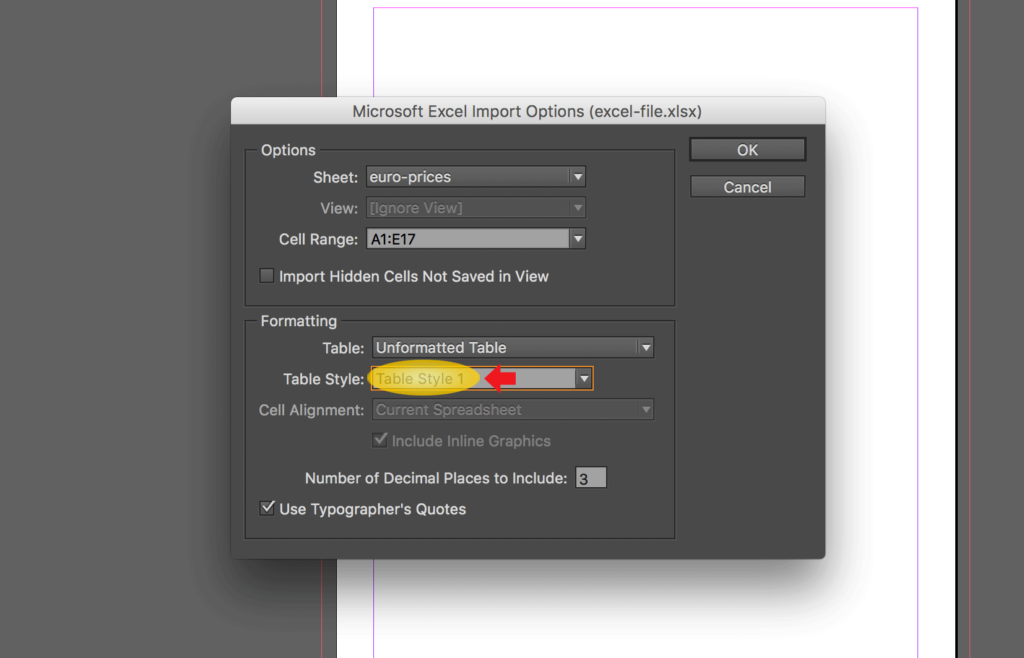
- Place the table into InDesign with the InDesign Table Style we just created (remember to check “Show Import Options” when you select the file).
The first thing we are going to do is apply an alternating pattern to the table rows.
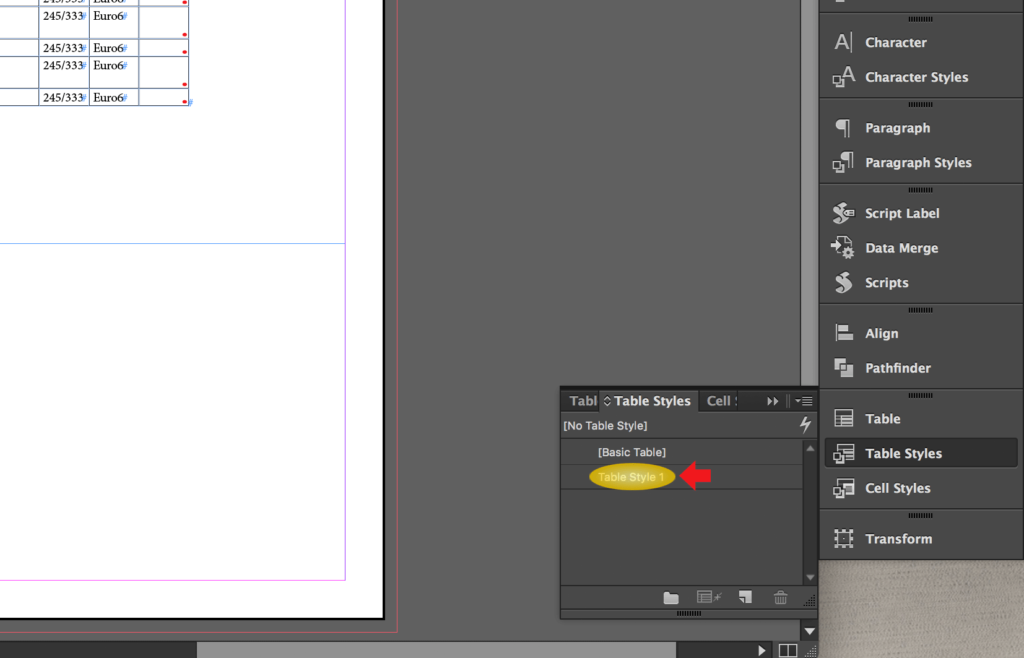
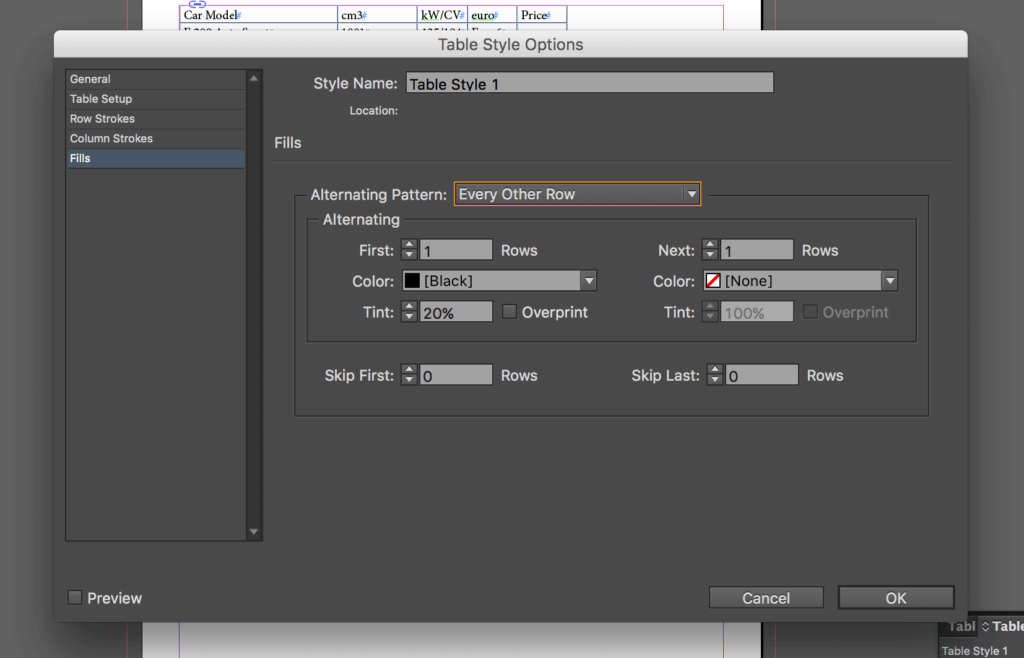
- Double-click on Table Style 1 to edit the new InDesign Table Style.
- Click on Fills and set Alternating Pattern to Every Other Row. Make sure that the row colors are set like in the screenshot. One color is set to Black 20%. The other is set to None. Then click OK.
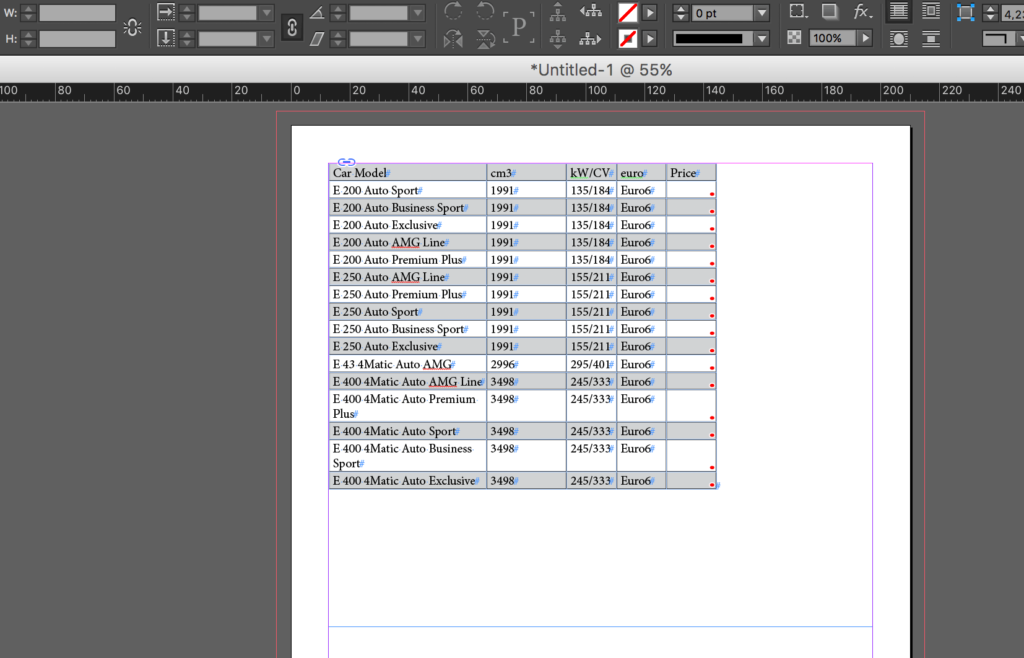
Here is your table.
InDesign lets you use Table Styles and Cell Styles to lay out your tables. Table Styles and Cell Styles allow you to set different attributes to your table. We just saw how to apply an alternating background pattern, which is something you can achieve with a Table Style. There are other layout settings that you can’t achieve with Table Styles where you can decide to use Cell Styles.
For example, you cannot use a table style to change the border color of interior cells. Instead, create a cell style and include it in the table style.
Now we are going to create the Cell Styles for the Header and the Body of the table.
I’ve already created two Paragraph Styles that I am going to link to the Cell Styles. If you want to create them too, below are the properties (or here is a detailed guide). Otherwise you can download this ZIP file and keep following the guide with it.
header-text: Myriad Pro + Bold + size 11pt + color: C=15 M=100 Y=100 K=0 + all caps
body-text: Myriad Pro + size 11pt
{{banner-component}}
Let’s create the Header Cell Style
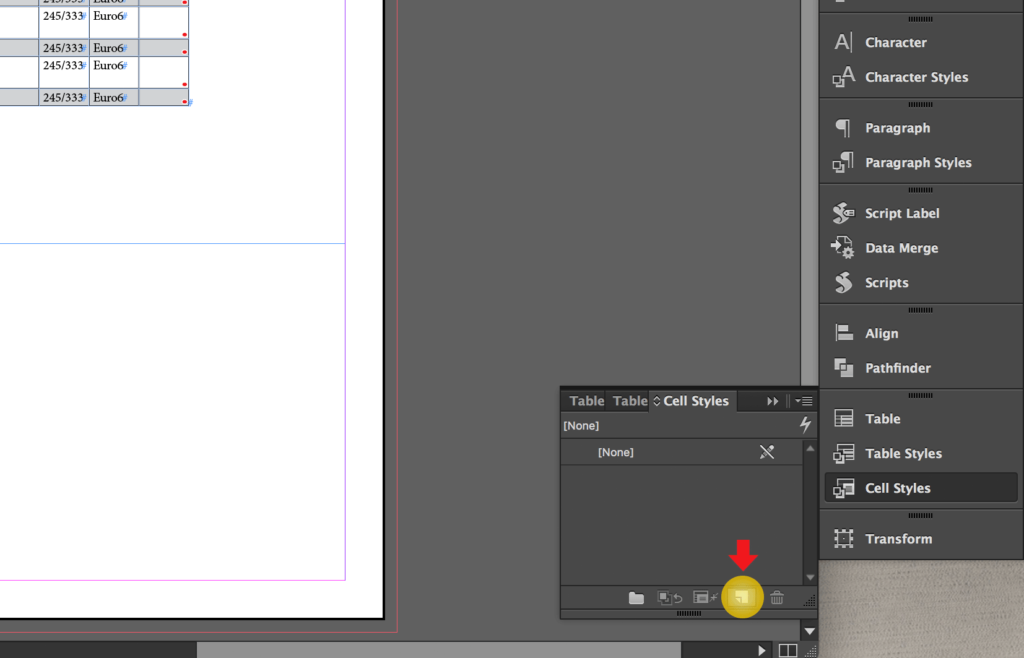
- Create the first Cell Style by clicking on the icon Create New Style in the Cell Styles menu in the panels to the right.
(If you can’t see the menu, turn it on by clicking on Window > Styles > Cell Styles.)
- Double-click on Cell Style 1 to edit the new InDesign Cell Style.
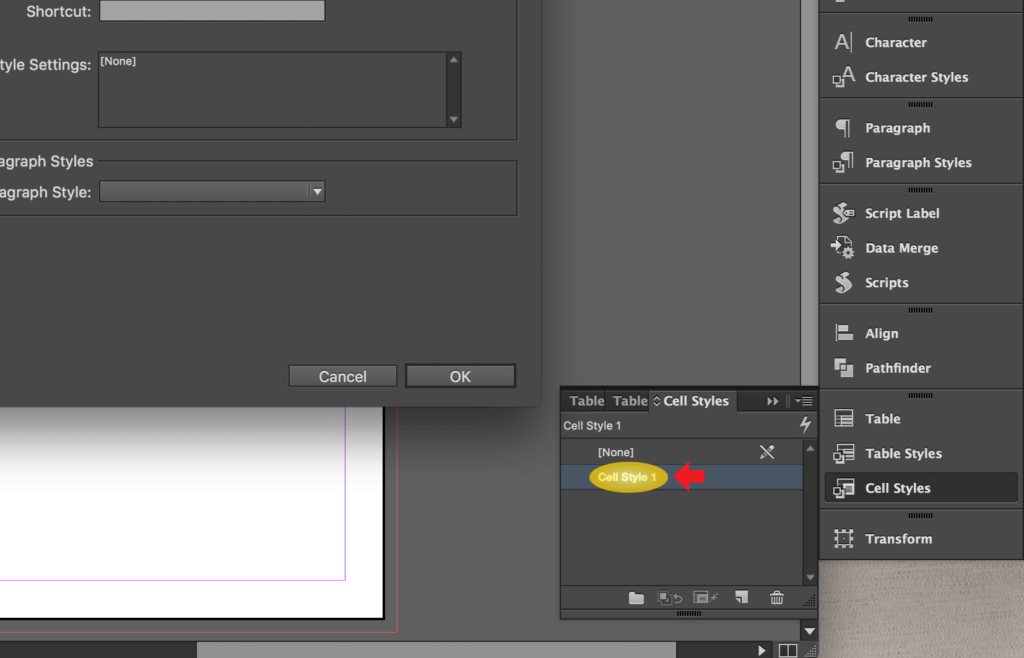
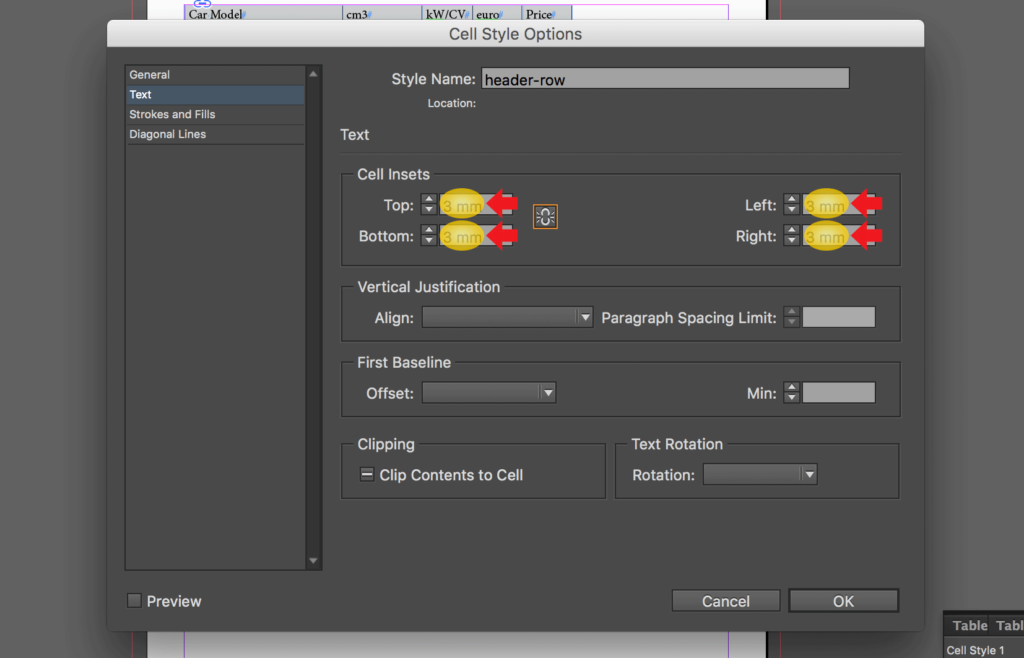
- In General, change the name of the Cell Style into “header-row” and set Paragraph Style to “header-text.”

- Click on Text and set Cell Insets to 3mm to Top, Bottom, Left, and Right.
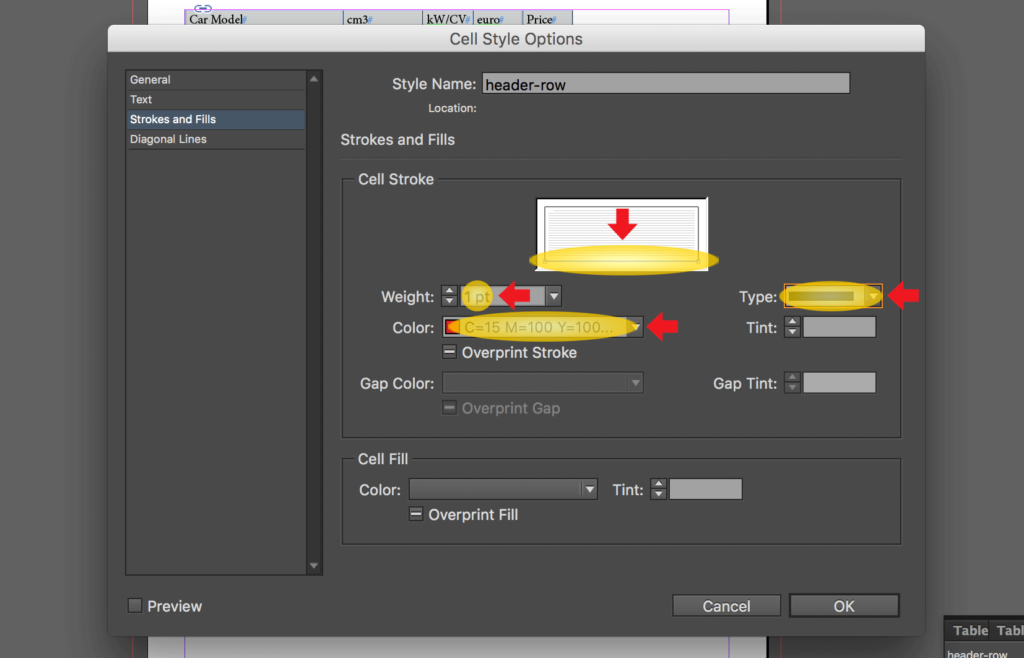
- Click on Stroke and Fills, and set all the strokes to 0pt. Then select ONLY the bottom cell stroke, and set it to 1pt, color = red, type the first solid one, then click OK.
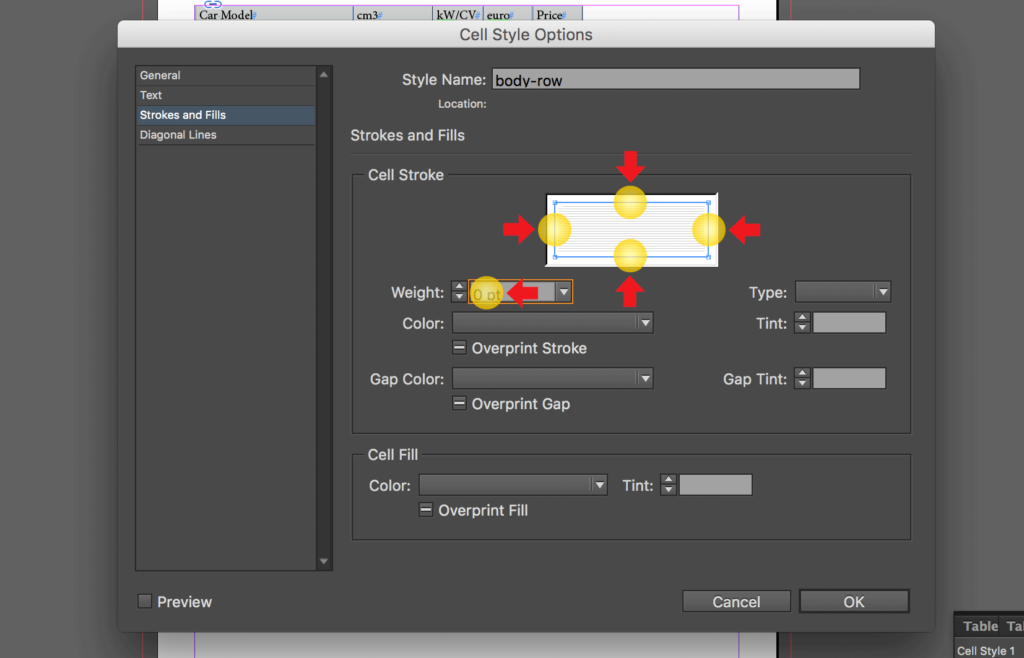
Let’s create the Body Cell Style
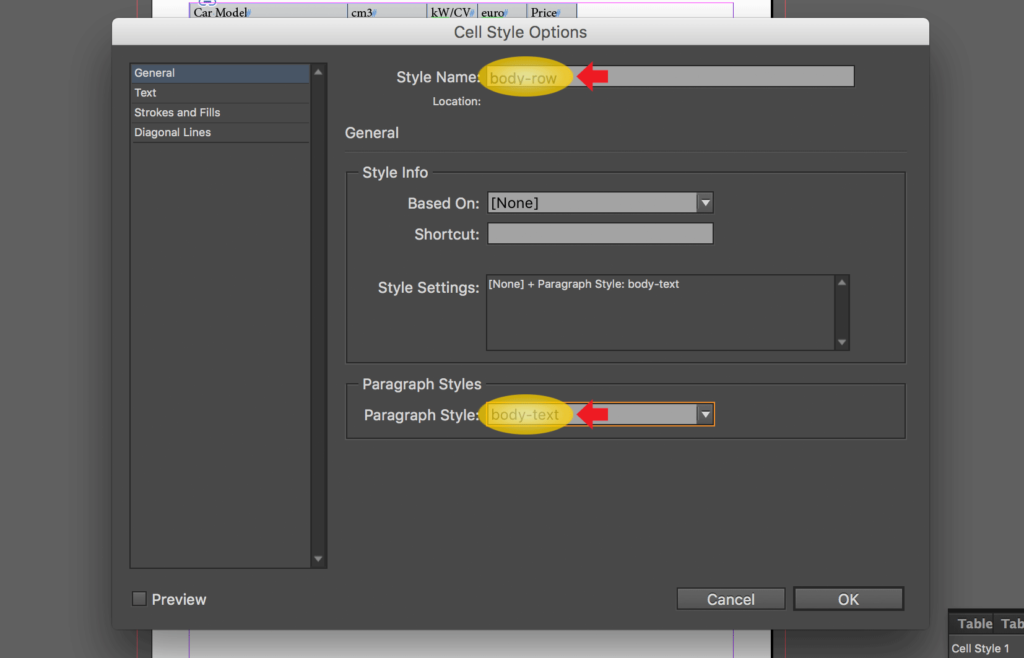
- Create the second Cell Style and in General, change the name of the Cell Style into “body-row” and set Paragraph Style to “body-text”.
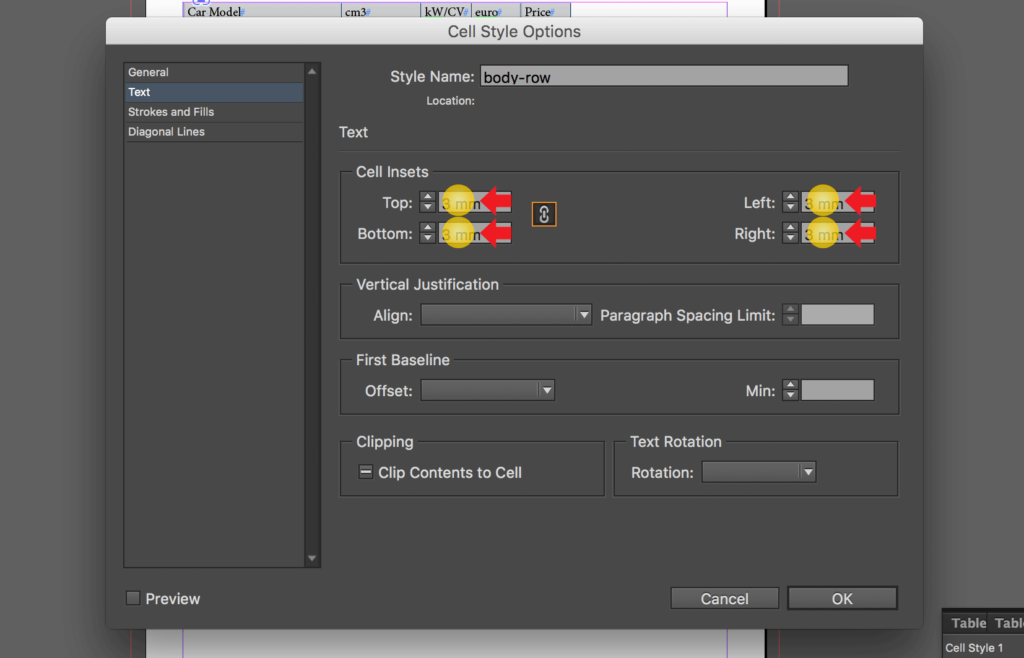
- Click on Text and set Cell Insets to 3mm to Top, Bottom, Left, and Right.
- Click on Stroke and Fills, and set all the strokes to 0pt, then click OK.
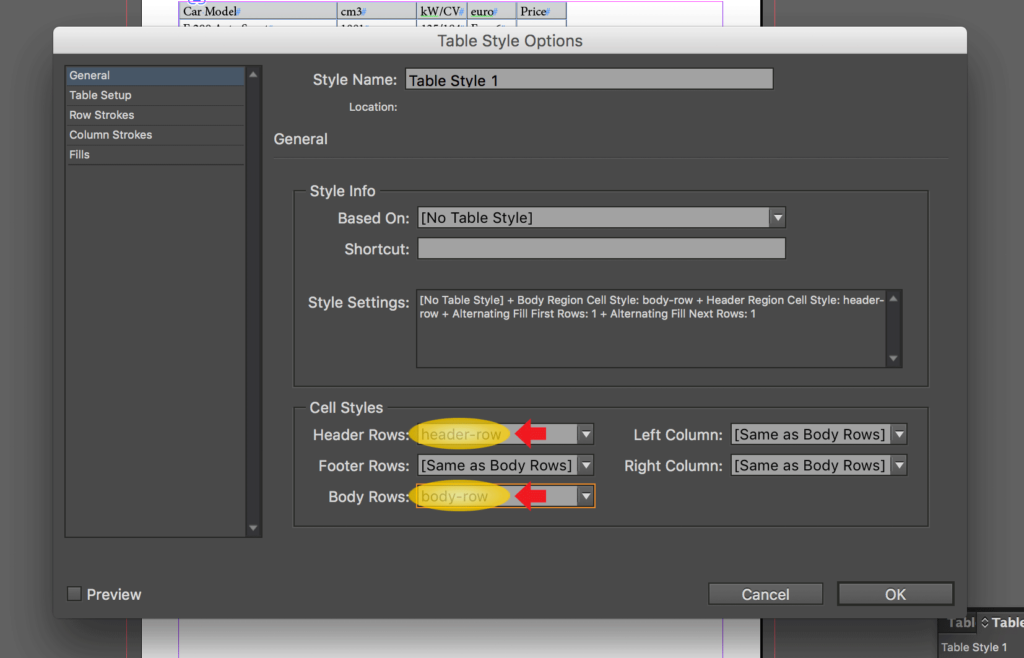
Let’s update the Table Style
Now we change the Table Style so that the table uses the two Cell Styles we created.
- Double-click on Table Style 1 (Table Styles menu). In General, change the Cell Styles properties Header Rows to “header-row” and Body Rows to “body-row,” then click OK.
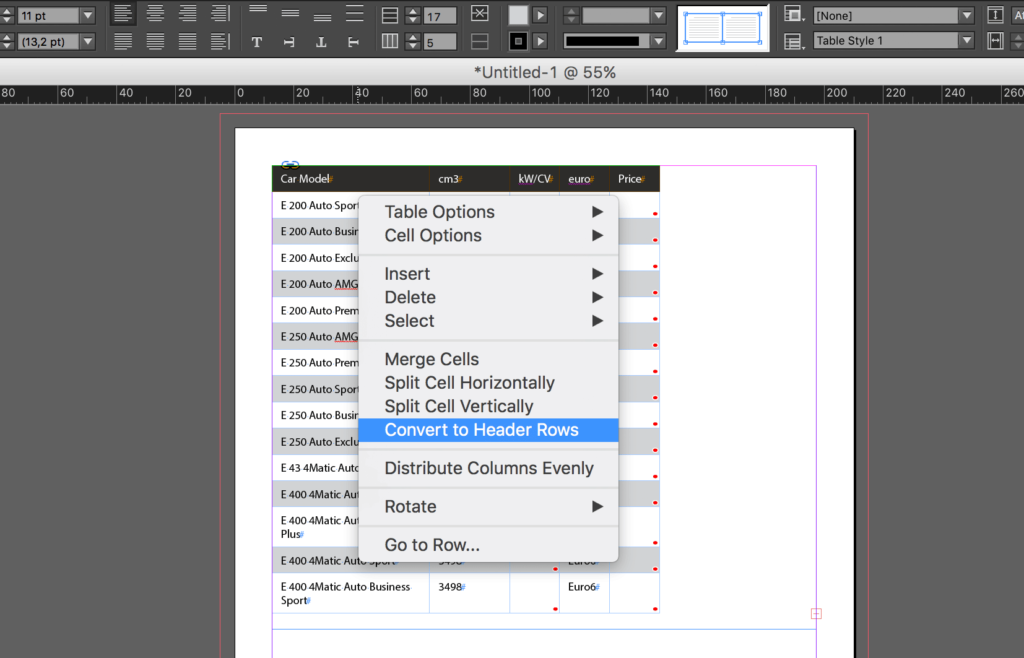
This is what the table looks like right now. We want to set the first line as header.
- Select the first row, right-click and select Convert to Header Rows.
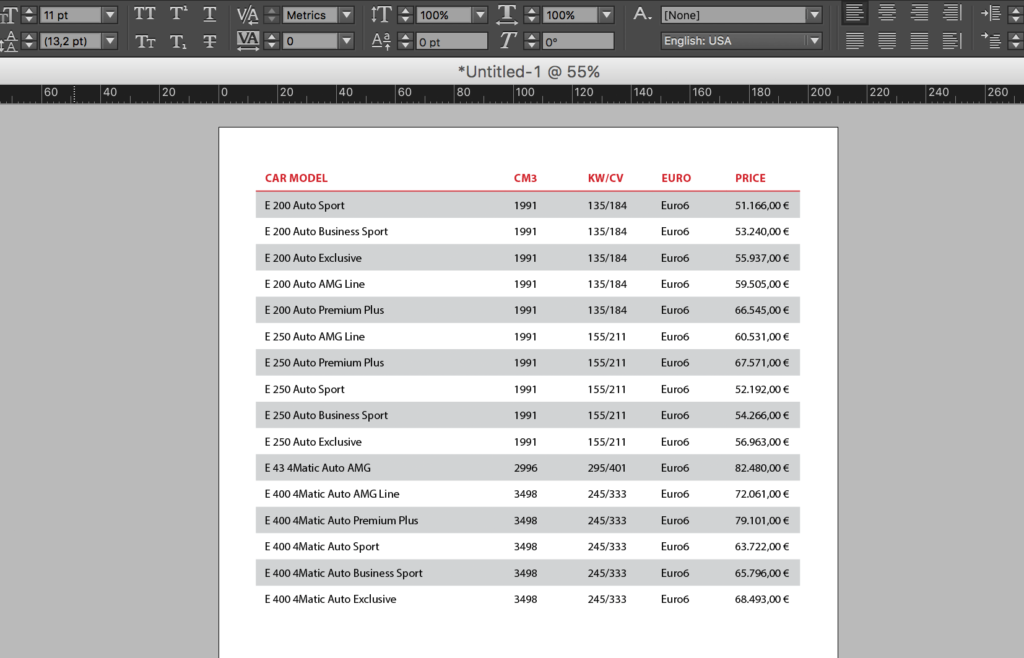
Let’s adapt the columns so that the table looks a little bit better.
Next time you import a table, you will be able to use the InDesign Table Style we just created.
The only operations you will need to do are:
- Convert to header the rows you want as header
- Set the width of each column
InDesign table styles — templates
Here you can download the file InDesign (.idml file format) with the table and all the Styles we just created: download InDesign table styles template
Must-know InDesign Keyboard Shortcuts
Be sure to subscribe to our newsletter to keep up with future posts or major updates. If you have questions feel free to post them in the comments. If you liked the post, I'd really appreciate you sharing it!


