


Overview
- How to set up your documents
- Create threaded text-boxes;
- Set up a text box so that it has multiple columns;
- Use the paragraph settings (here the use of styles is highly recommended).
There is not necessarily a right or wrong way. Choosing between each method is subjective and depends on the context, how you work, and the type of layout you want to achieve.
Choosing the path that best suits the document you are creating, however, allows you to avoid errors and have more control in paginating the text.
Use guides as a check
The first thing I'll teach you is to set up your document so that it has guides that you can follow when you create the columns.
This is not a mandatory step, but it helps you check that the column size is always consistent even when you use a different combination of the three methods that I will explain shortly below.
Also, once you've read this post, I'd suggest you check these 3 Tips to master the text in your InDesign documents.
Create guides to show you the columns
While creating the document, or selecting the pages you want to edit (you can also select the master pages), if you go to the menu Layout > Margins and Columns you find the values Columns and Space between the columns that you see in the image.
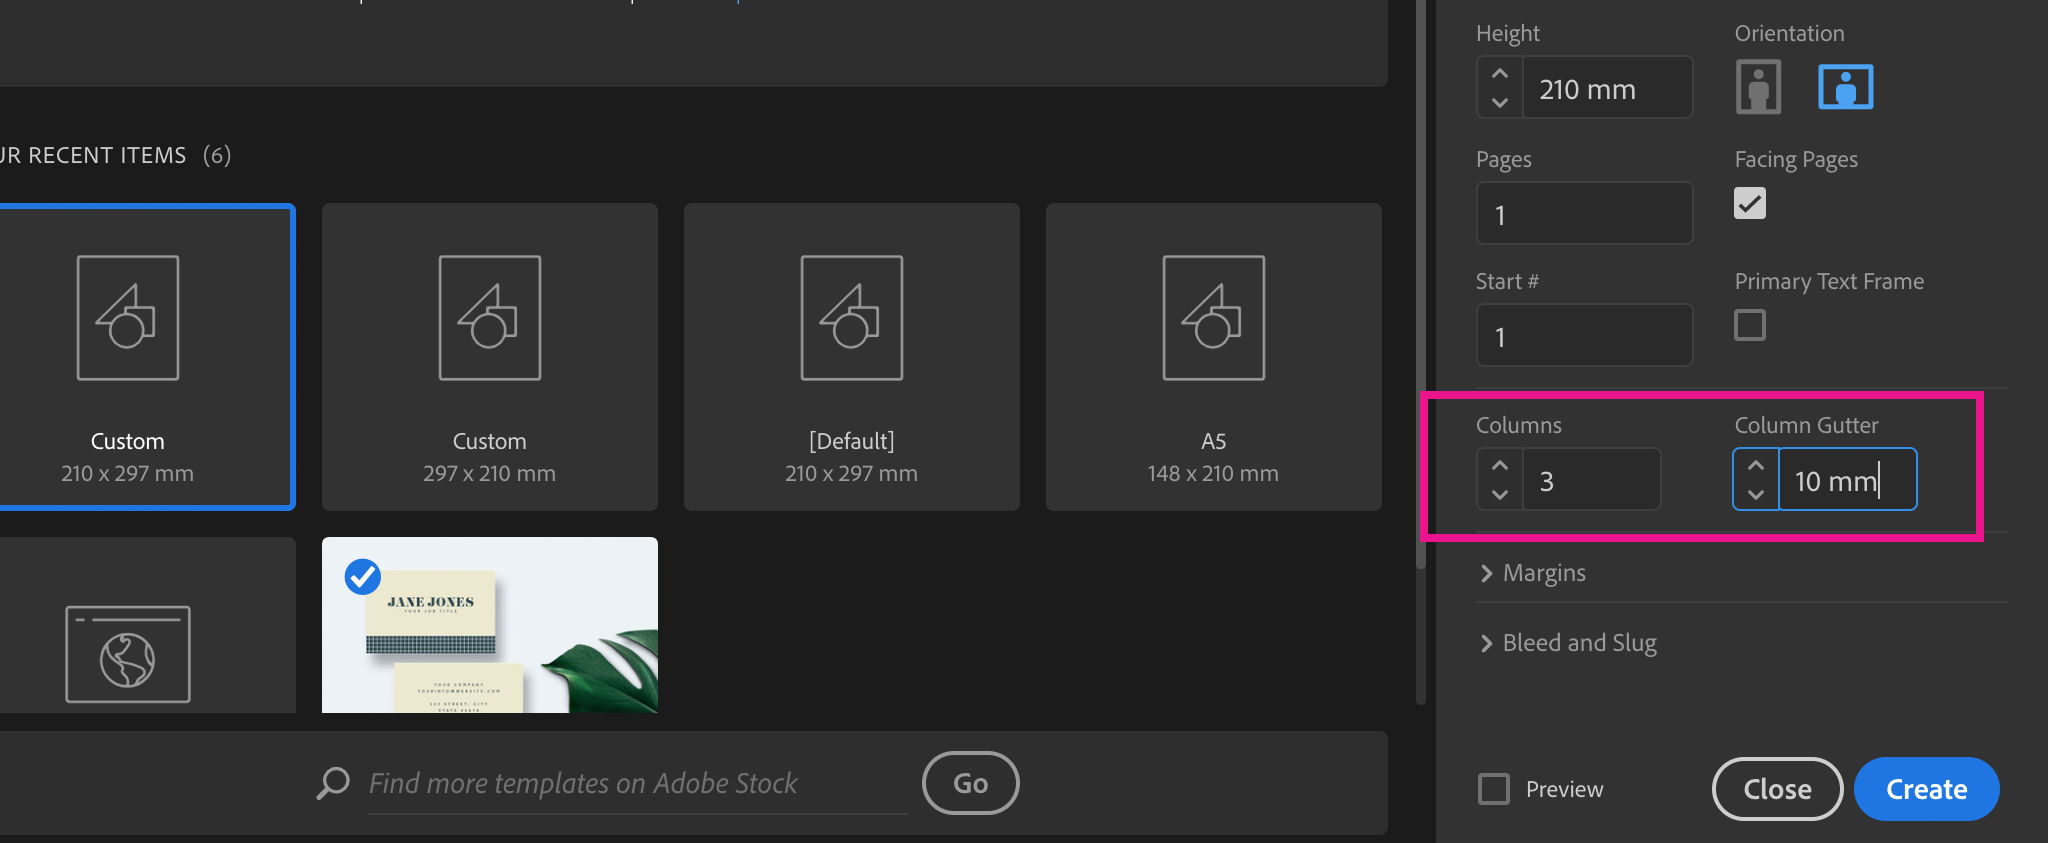
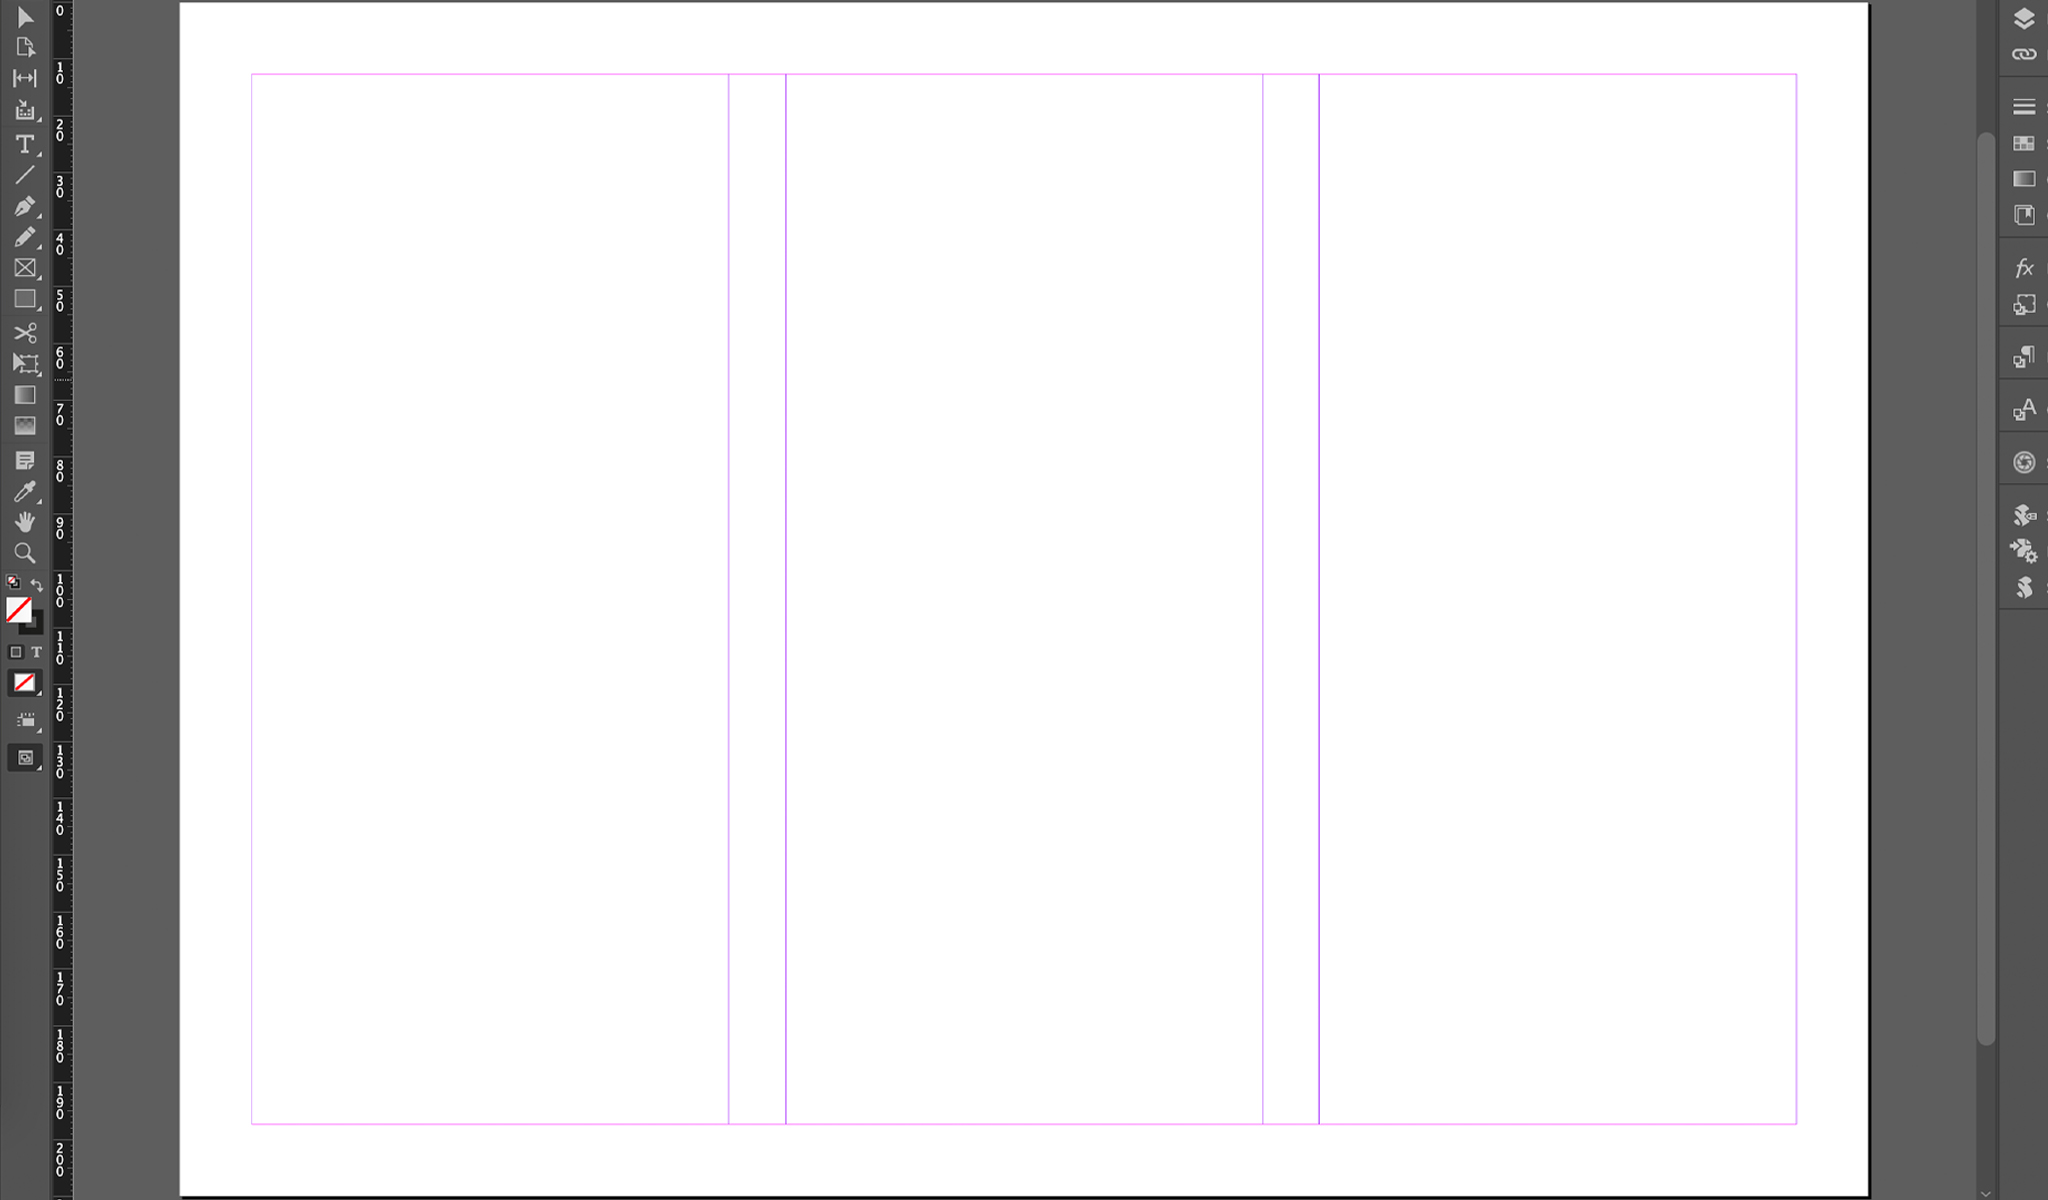
By changing these values you can add guides for the columns throughout all the pages of your document, as you can see below.
Create the columns using threaded text boxes
Well, now that you have a page like the one we created in the previous section, you can use simple linked text-boxes to create the various columns in InDesign.
- Select the Text tool and draw a rectangle covering the entire first column. Make sure that each column respects the guides that we have set up on the page. We will see in the next section how important this advice is.
- After drawing a column, select the Selection Arrow (the black arrow in the Tools panel) and click on the square that you find in the right bottom of the text-box we just created.
- To create a new column simply click in the upper right corner of the "guide column".
You can activate the connections you see between the various columns above by going to View > Extra > Show Text Threads.
✅ When to use this method
I'd suggest you create columns in this way when you have a layout in which the columns have a variable height or width. Note also that in the example above I could have created a column that occupied 2 "guide columns".
With this method, guides become important
Creating the guides on the page, and making sure that the text boxes respect them, will allow you to quickly change the structure of your layout.
Going to Layout > Margins and Columns you can use the Layout adjustment function.
With this function, you can change the Margins of the page and the distance between the columns.
Set up a text-box with multiple columns
Another method of creating columns in InDesign is to add the columns in the text box.
- Insert the text into your document.
- Click on Object > Text Frame Options ....
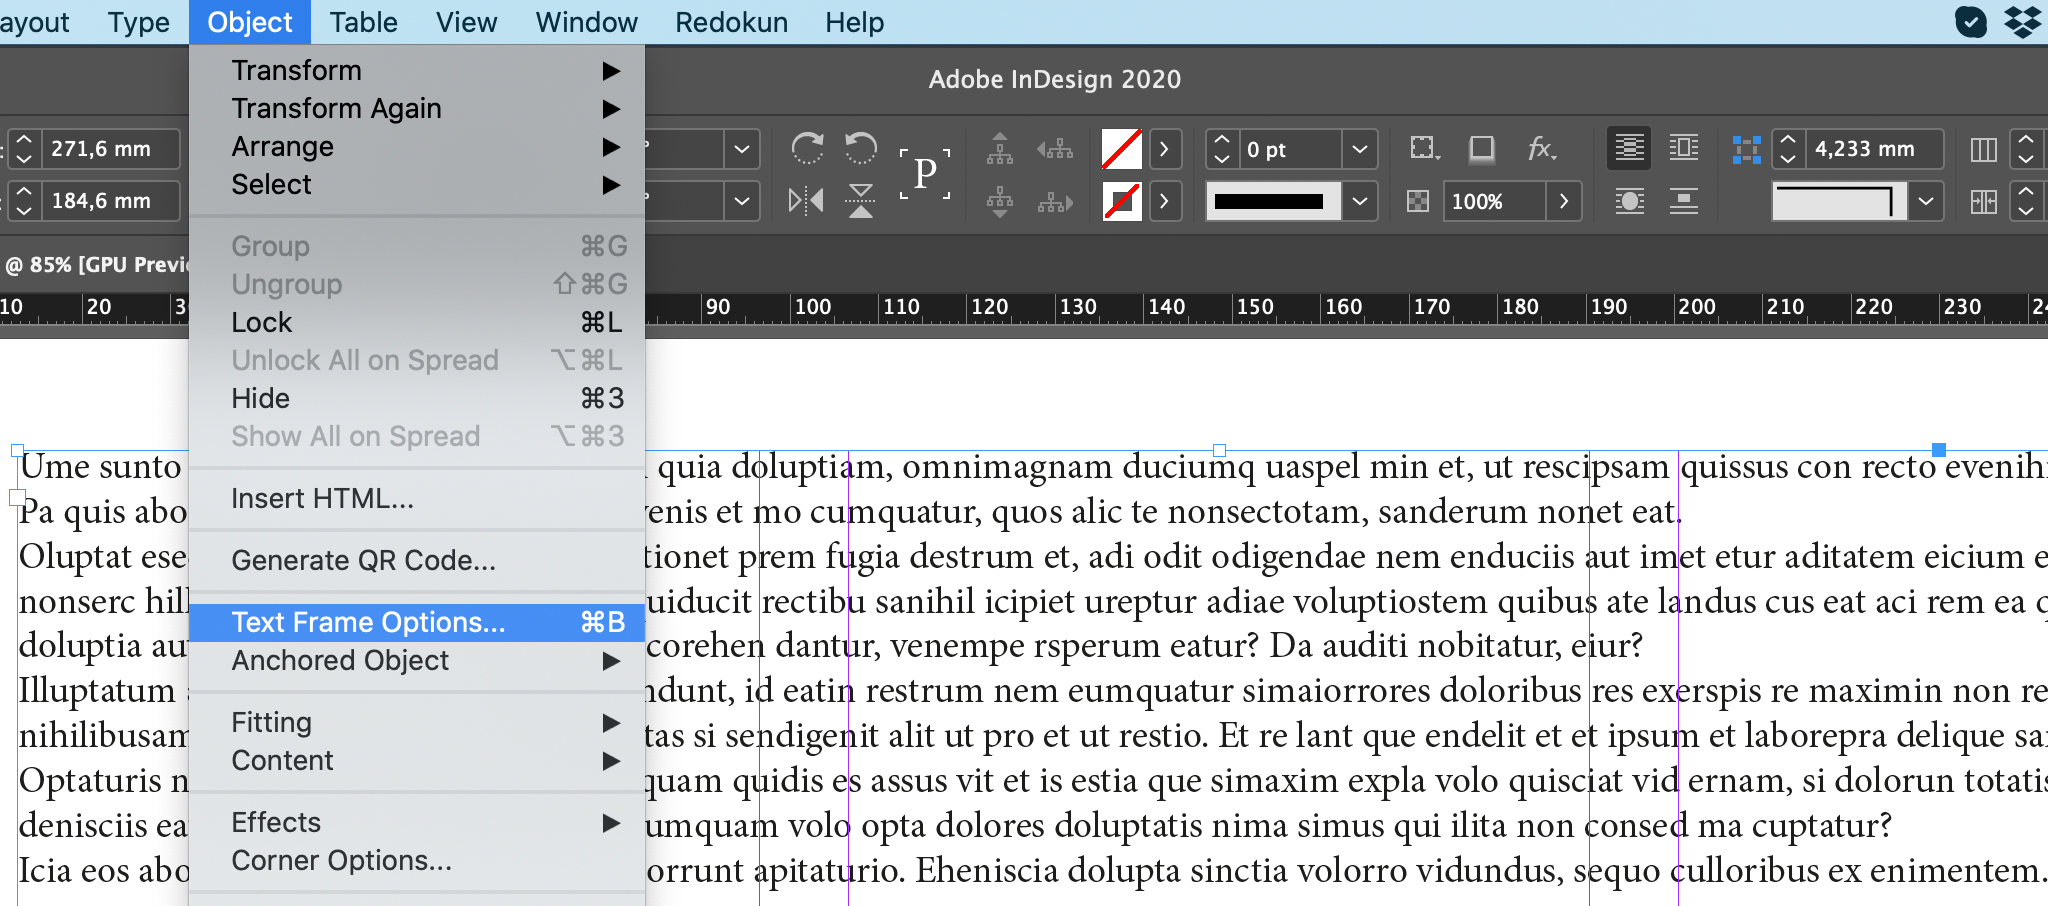
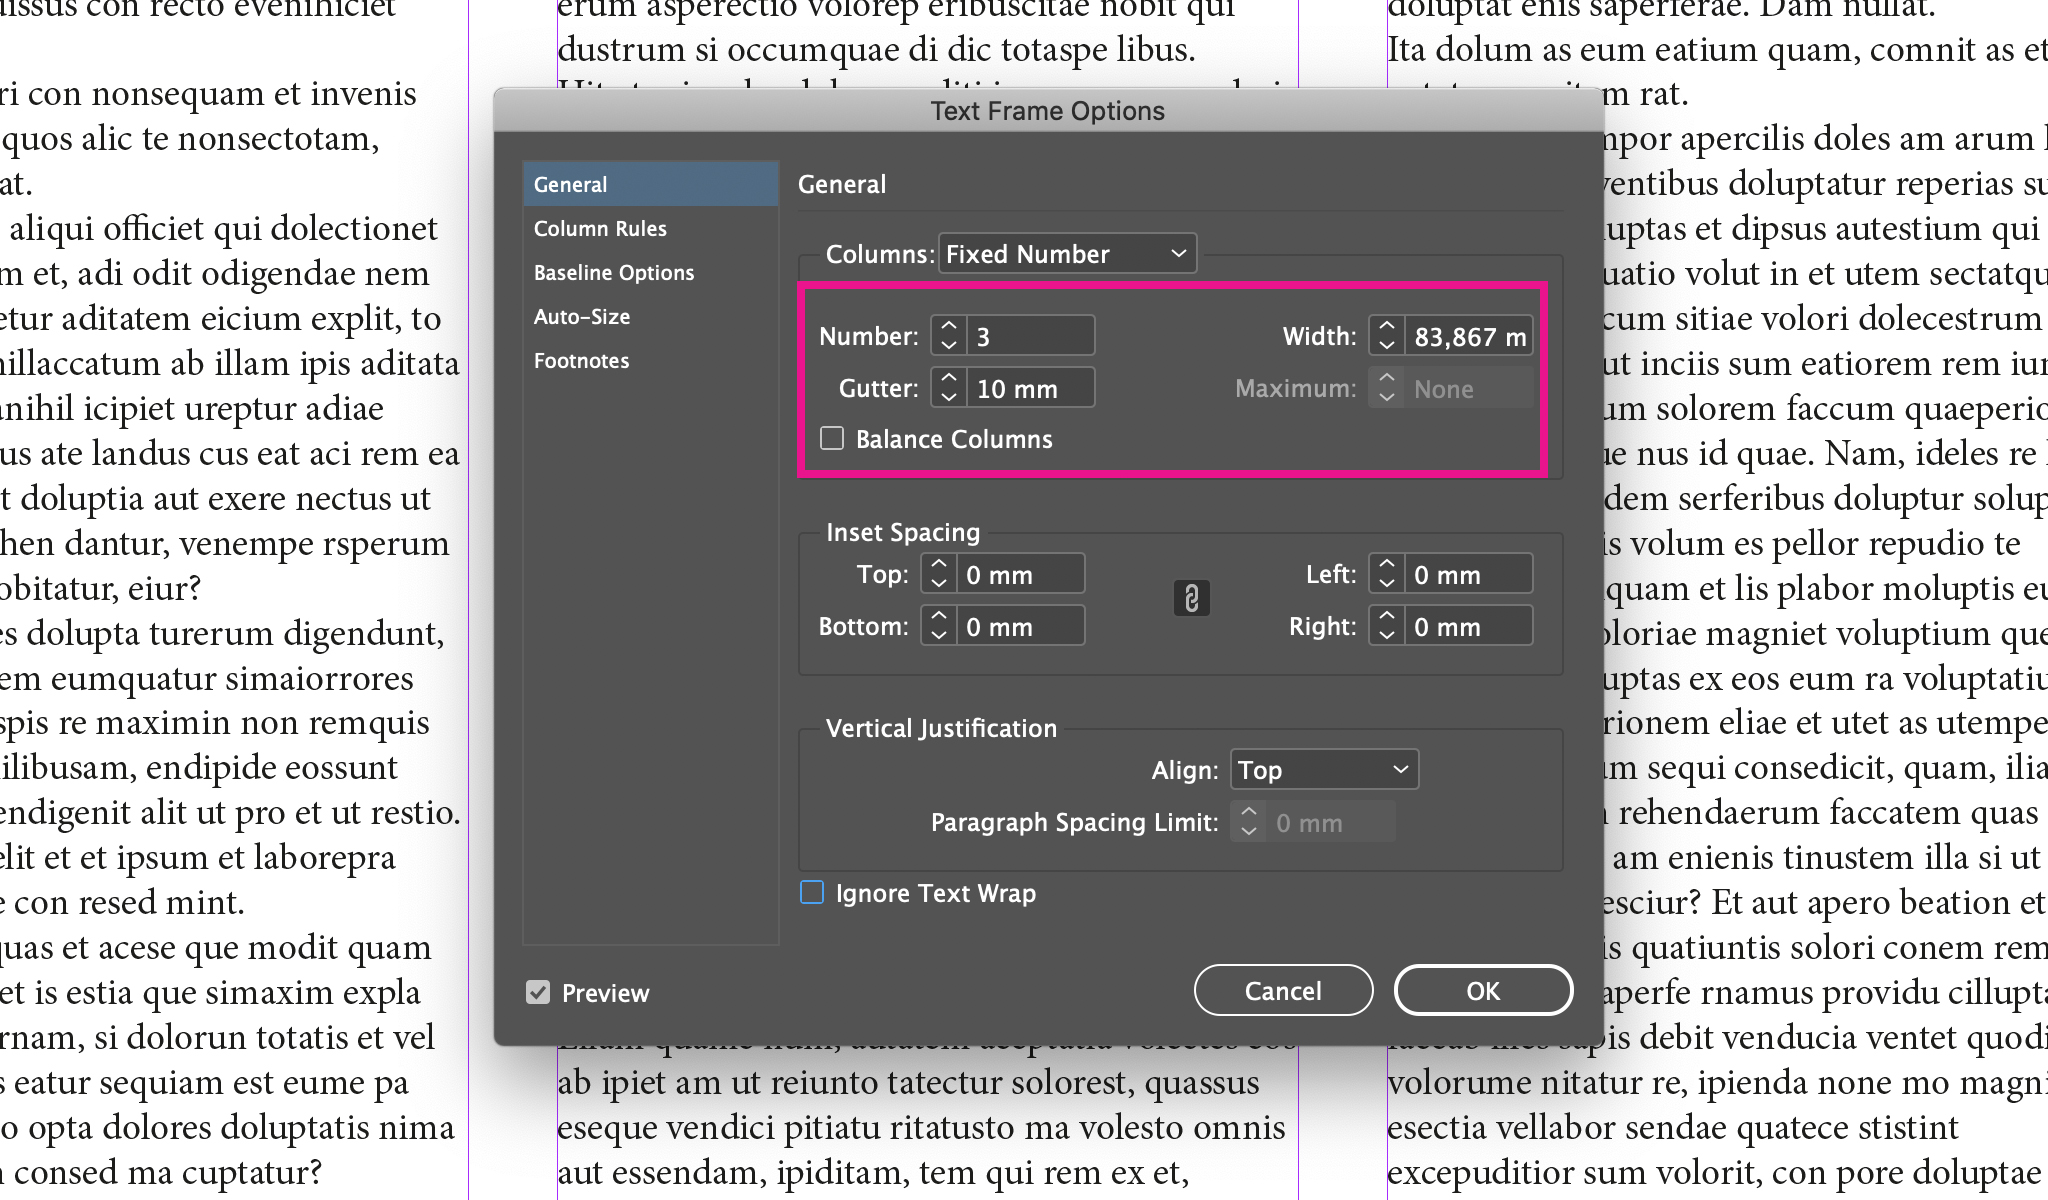
- In this window, you can set the number, distance or width of the columns.
When using this method, I'd suggest you create an object style to add to the various text boxes. By doing this, you will be able to change the layout of your document with very few clicks.
✅ When to use this method
The main advantage of this method is that you can quickly change the number of columns in the entire document.
In addition, this method allows you, by activating the Balance columns option, to place the same number of rows in each column.
Span text through columns
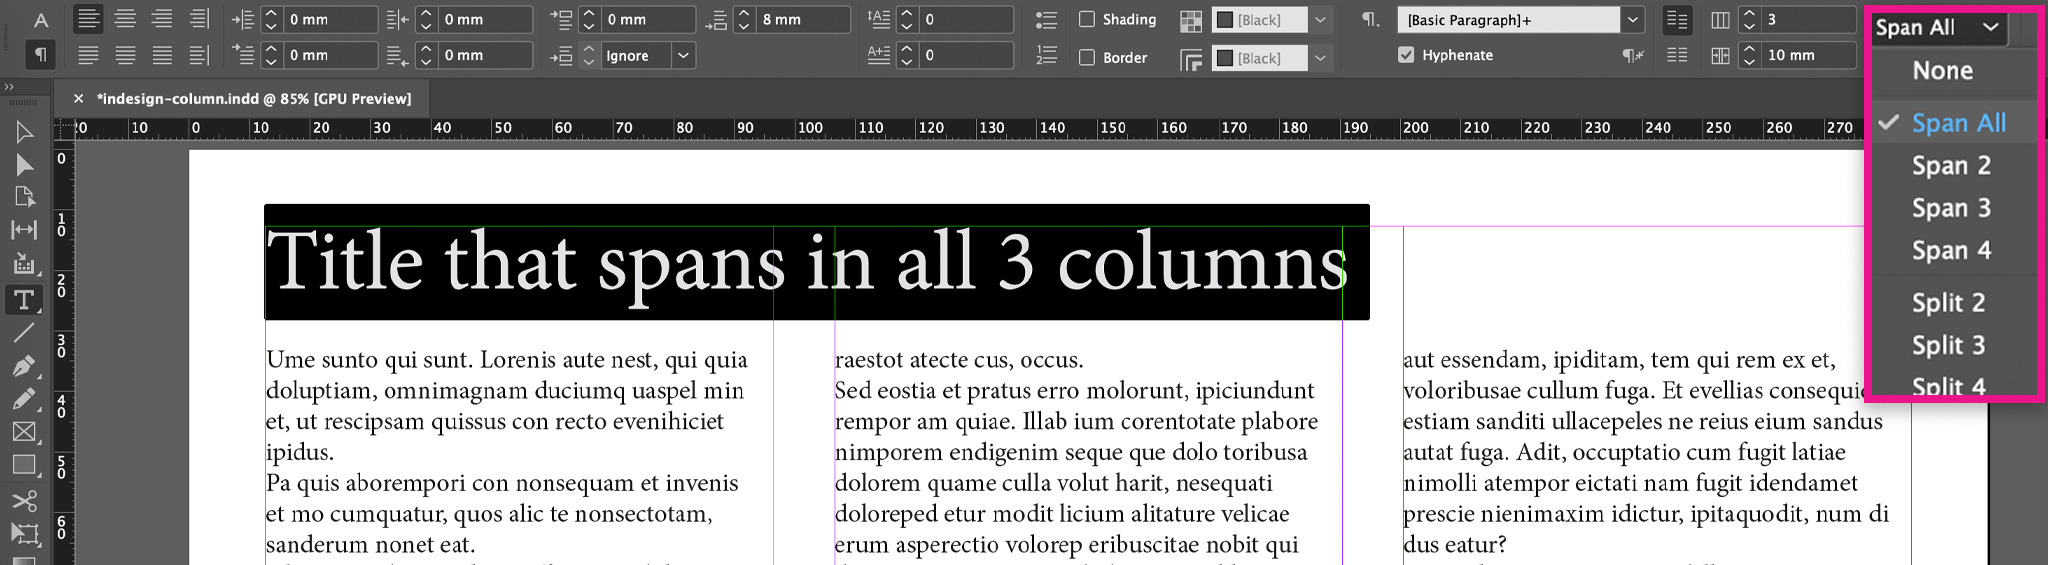
Sometimes you may have to span the text through the columns you just created.
To do this you can use the Span function. You can find it in the paragraph settings (as you see in the image), or when you create a paragraph style inside the Span Columns tab.
Use the paragraph settings to create columns in InDesign
This last method of creating columns in InDesign is a little less known, but in my opinion, you will find it extremely useful.
One of the most common mistakes that designers make in InDesign is to use different boxes when the text goes from 1 to 2+ columns.
In the previous section, we have already seen how you can take advantage of cross columns, but another method is to use paragraph settings to create (or remove) the columns.
Let's go see how.
How to create the columns using local settings
- Select the text you want to divide into columns.
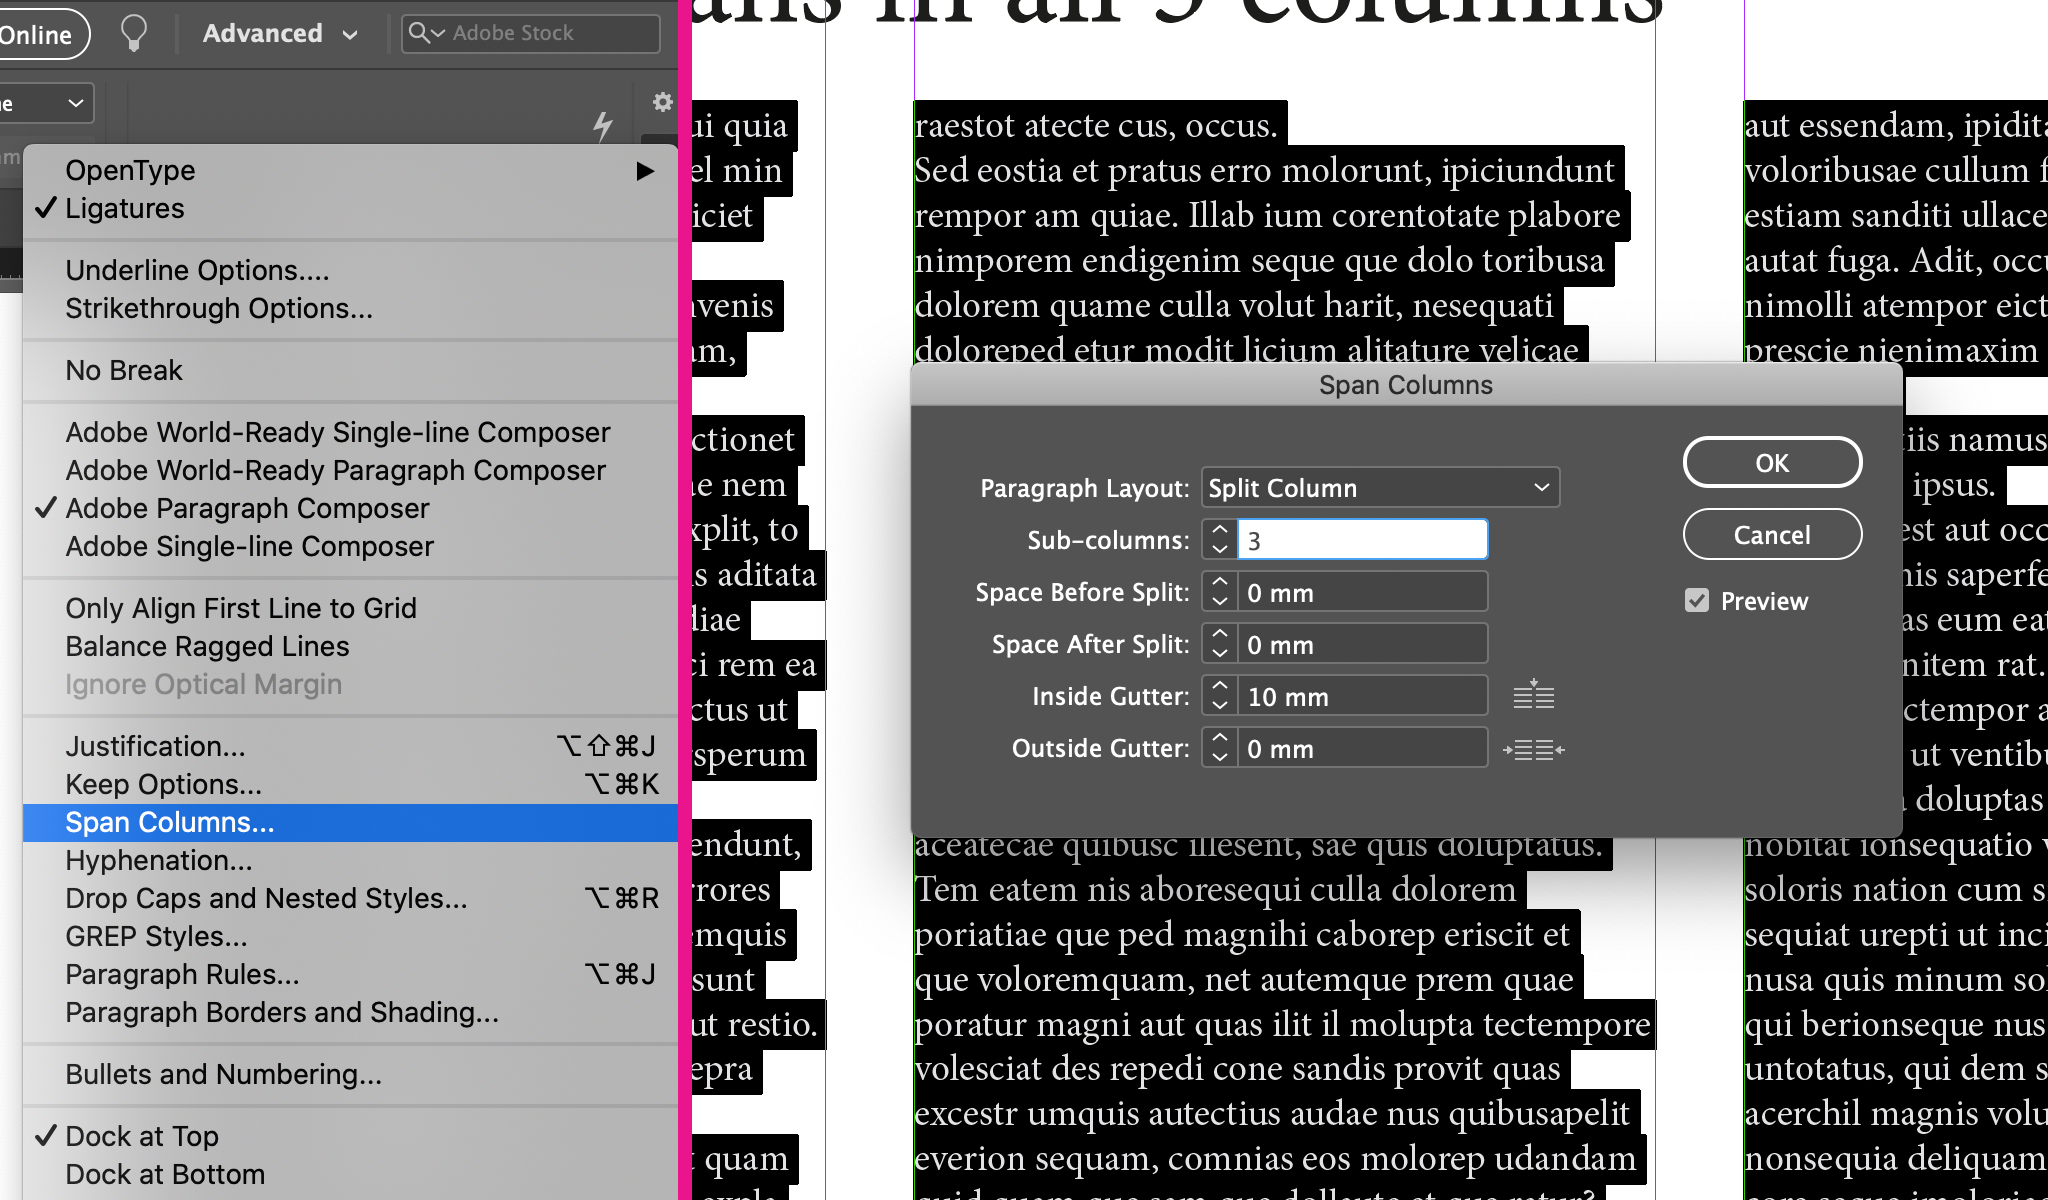
- On the menu at the top, click on the icon at the top right with 4 horizontal lines and select Span Columns....
- InDesign will open the window you see in the image below, and inside you will be able to set the values that allow you to divide the text into columns.
Note that it is highly recommended to use this function by applying an InDesign paragraph style.
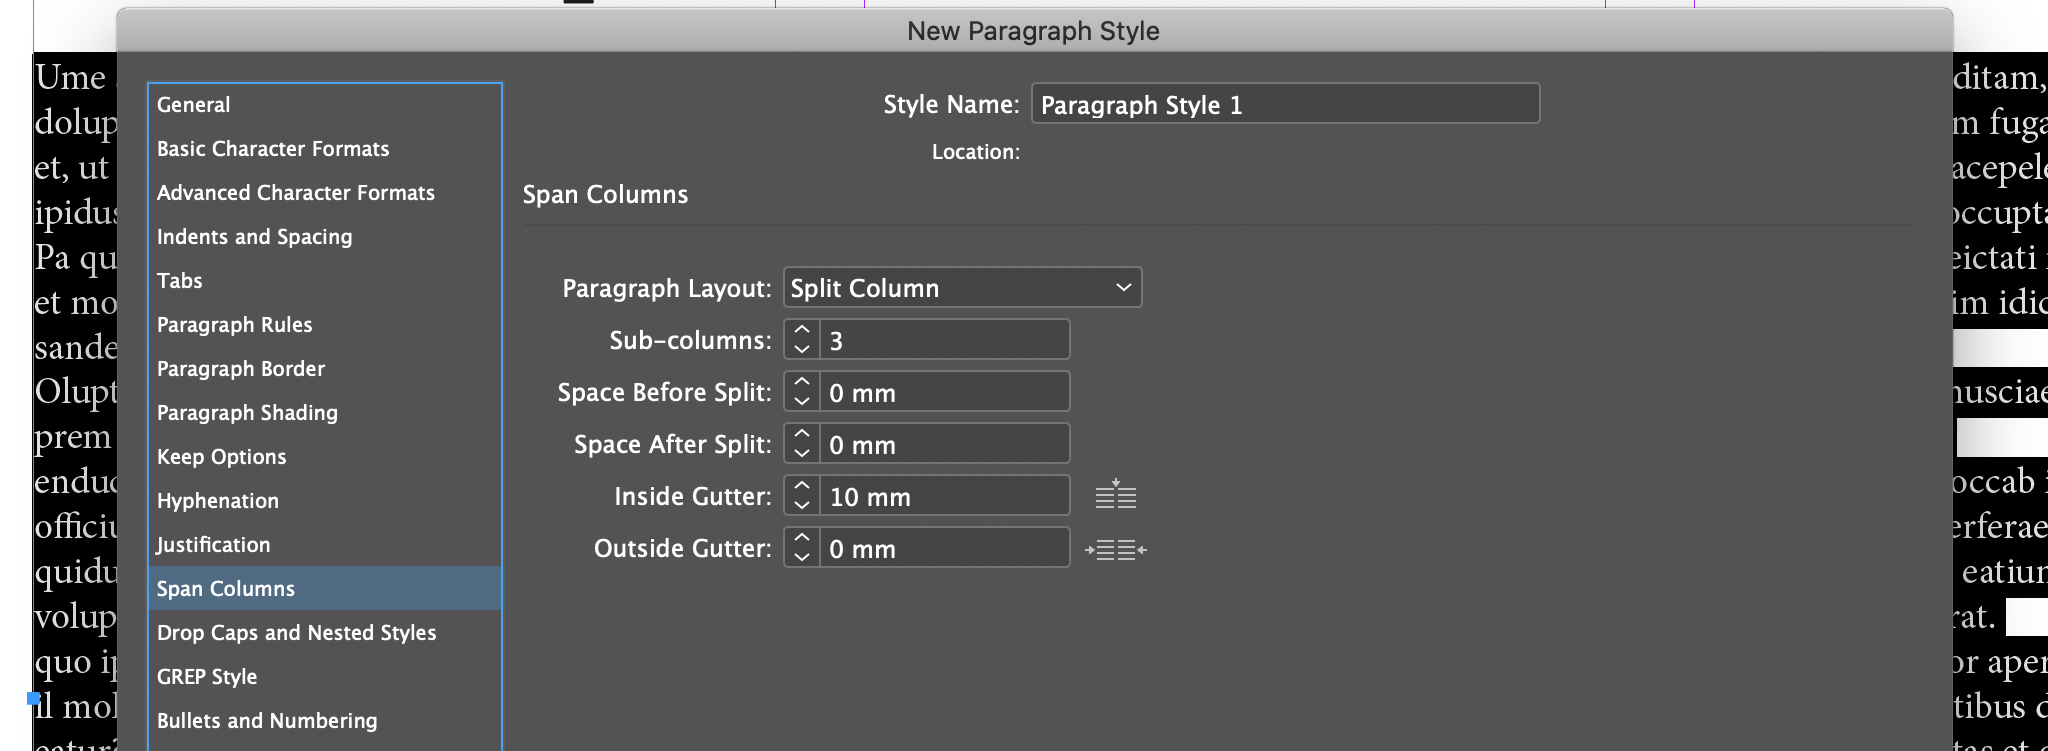
Take advantage of styles
You can find the settings we have just seen above, within the paragraph style inside the Span Columns tab.
Conclusion
Each of these methods has its own advantages and disadvantages - it's up to you to figure out what is the best way to develop your layout, and what method can be more efficient.
As you can understand, if the simple act of creating columns can be done in 3 different ways, then there are many more things to say about InDesign.
Subscribe to our newsletter so that we can keep learning together.
Until next time, Stefano


