In this article, I’ll guide you through the steps of translating your Rise 360 courses without installing additional software. It’s a simple workaround that also supports the needs of larger scale translation efforts if needed.
By the end, you’ll have a productive Rise 360 translation workflow that sets you up for commercial success.
Overview
How to Translate Articulate Rise 360 Courses (4 Steps)
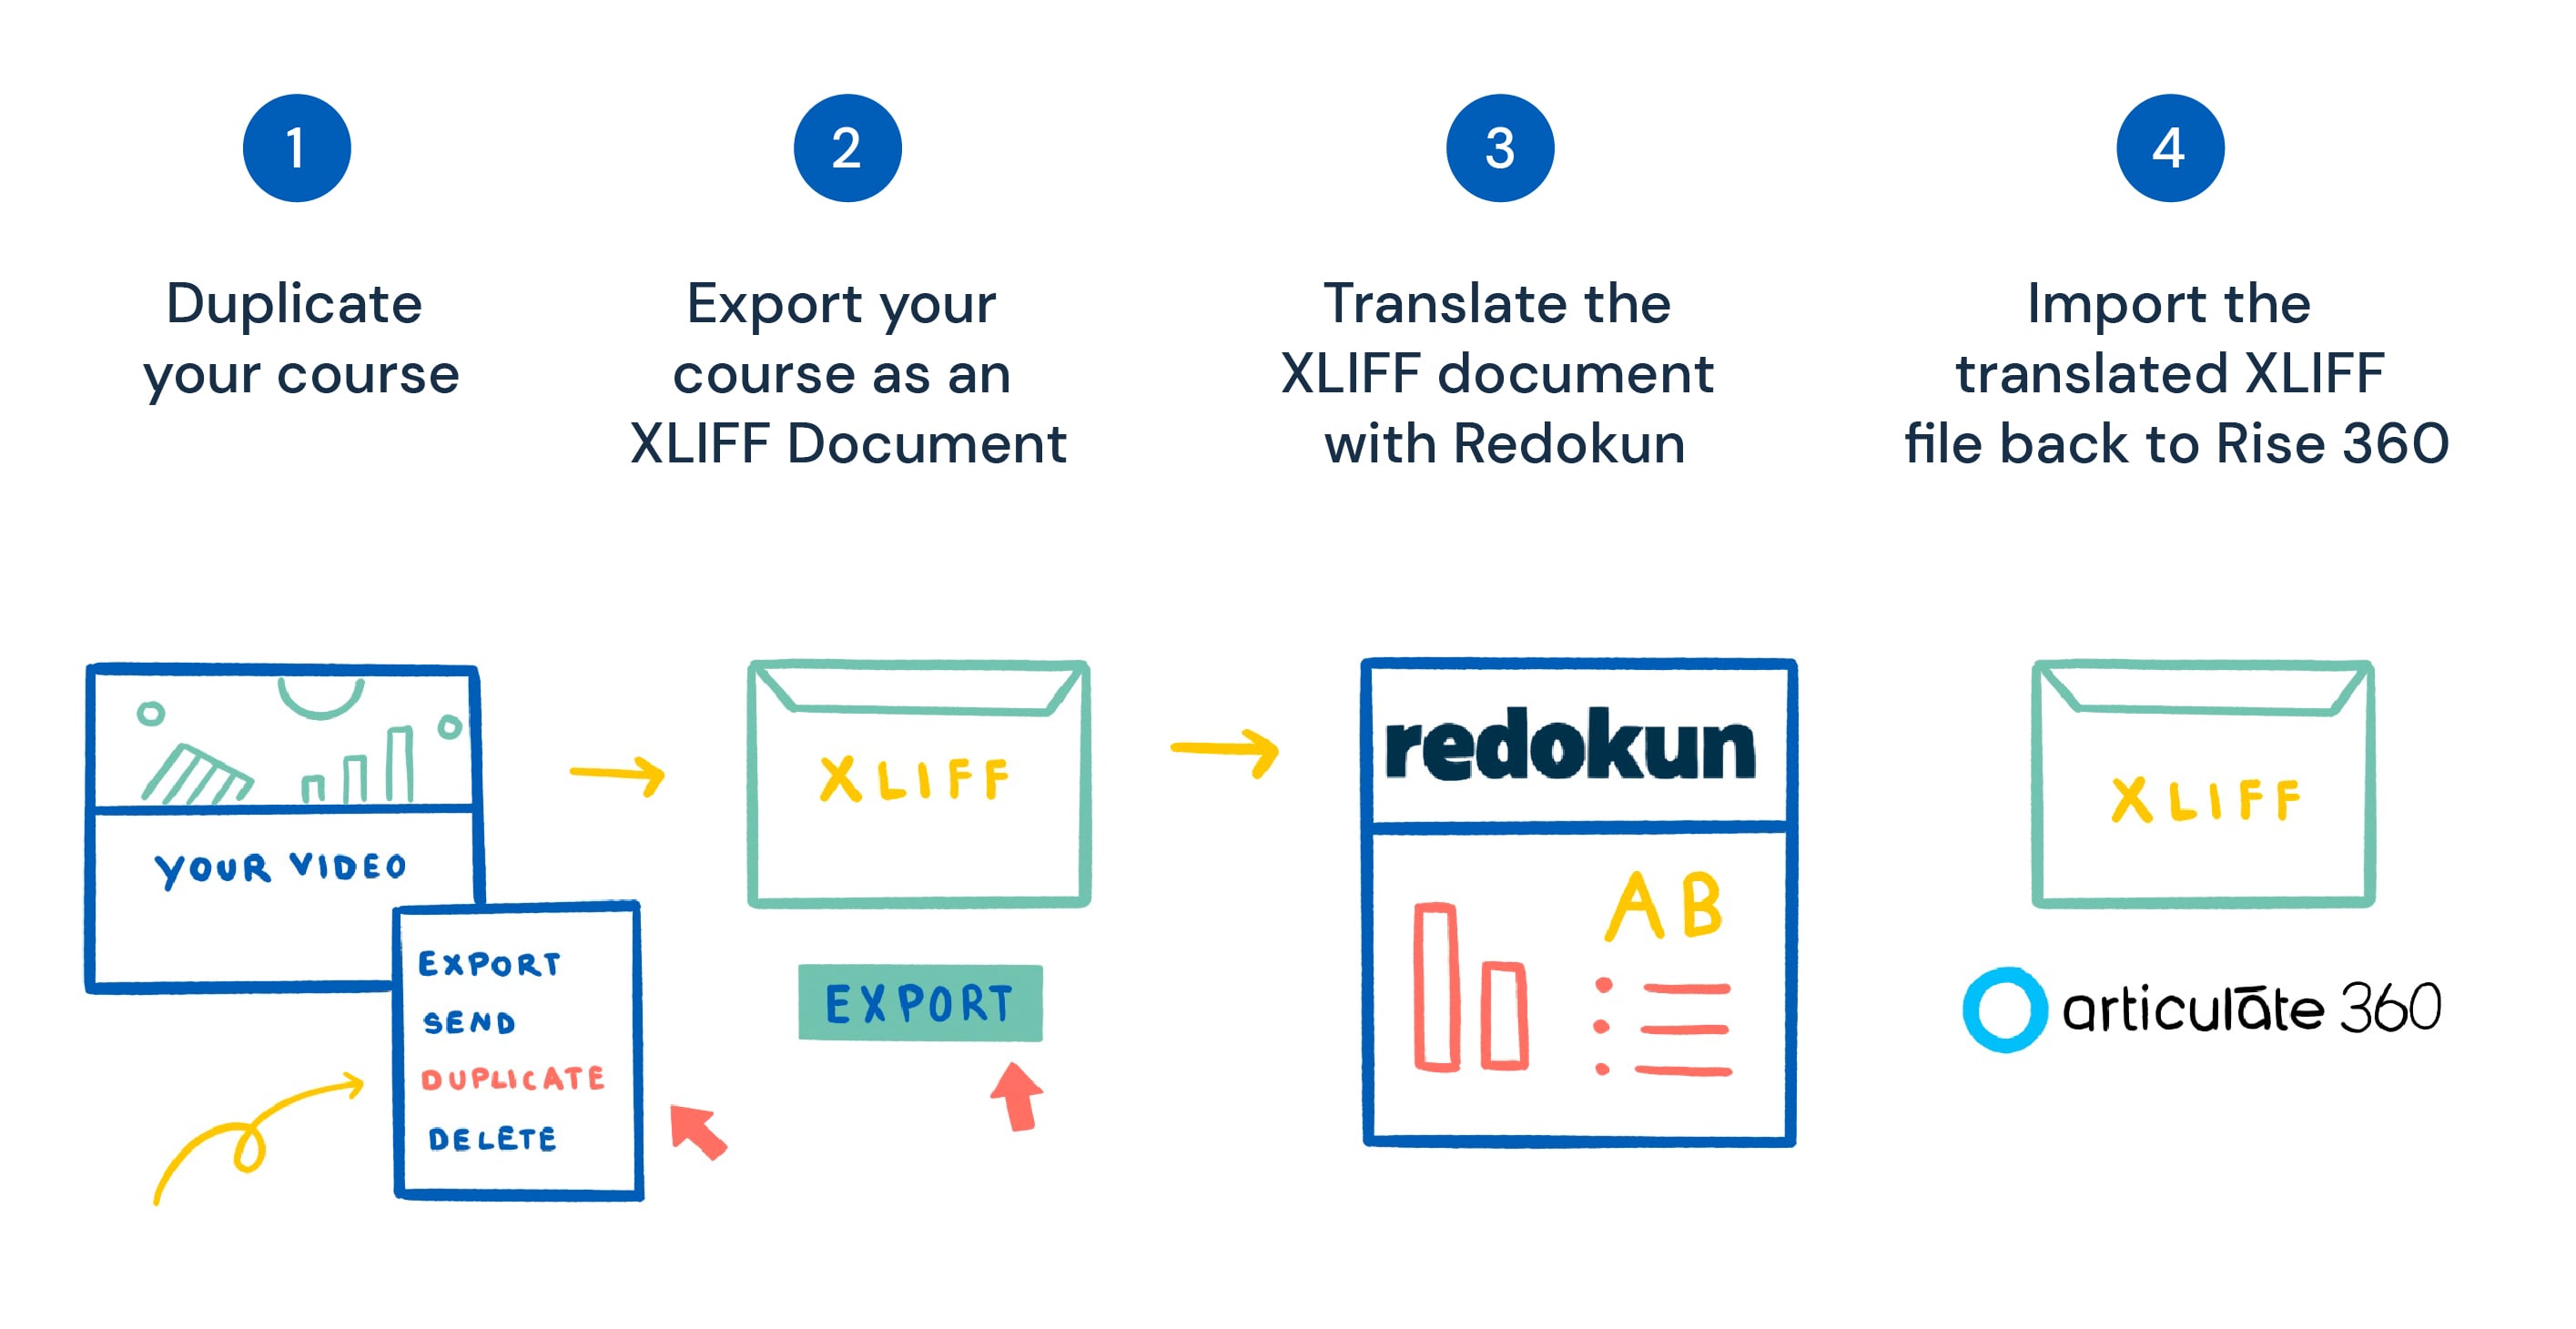
The Rise 360 app does not have a built-in translate function. However, you can export your courses as an XLIFF document, which is incredibly useful in building a workflow that involves external translation software.
XLIFF is the industry standard file format for exchanging translation data between different tools. In this case, the tools we will use are Articulate Rise 360 and Redokun. You can substitute the latter with any translation software that supports XLIFF.
Now here’s how to translate your Rise 360 content:
Step 1: Duplicate your course
First, duplicate your course and change the name to include the target language (add abbreviations at the end like ENG for English or CHN for Chinese). This way you’ll have an easier time keeping track of all your translated courses later. To do this:
- Go to your Rise 360 Dashboard
- Hover over the course you want to translate
- Click on the ellipsis that appears
- Choose Duplicate
- Rename the duplicated course
- Click Save
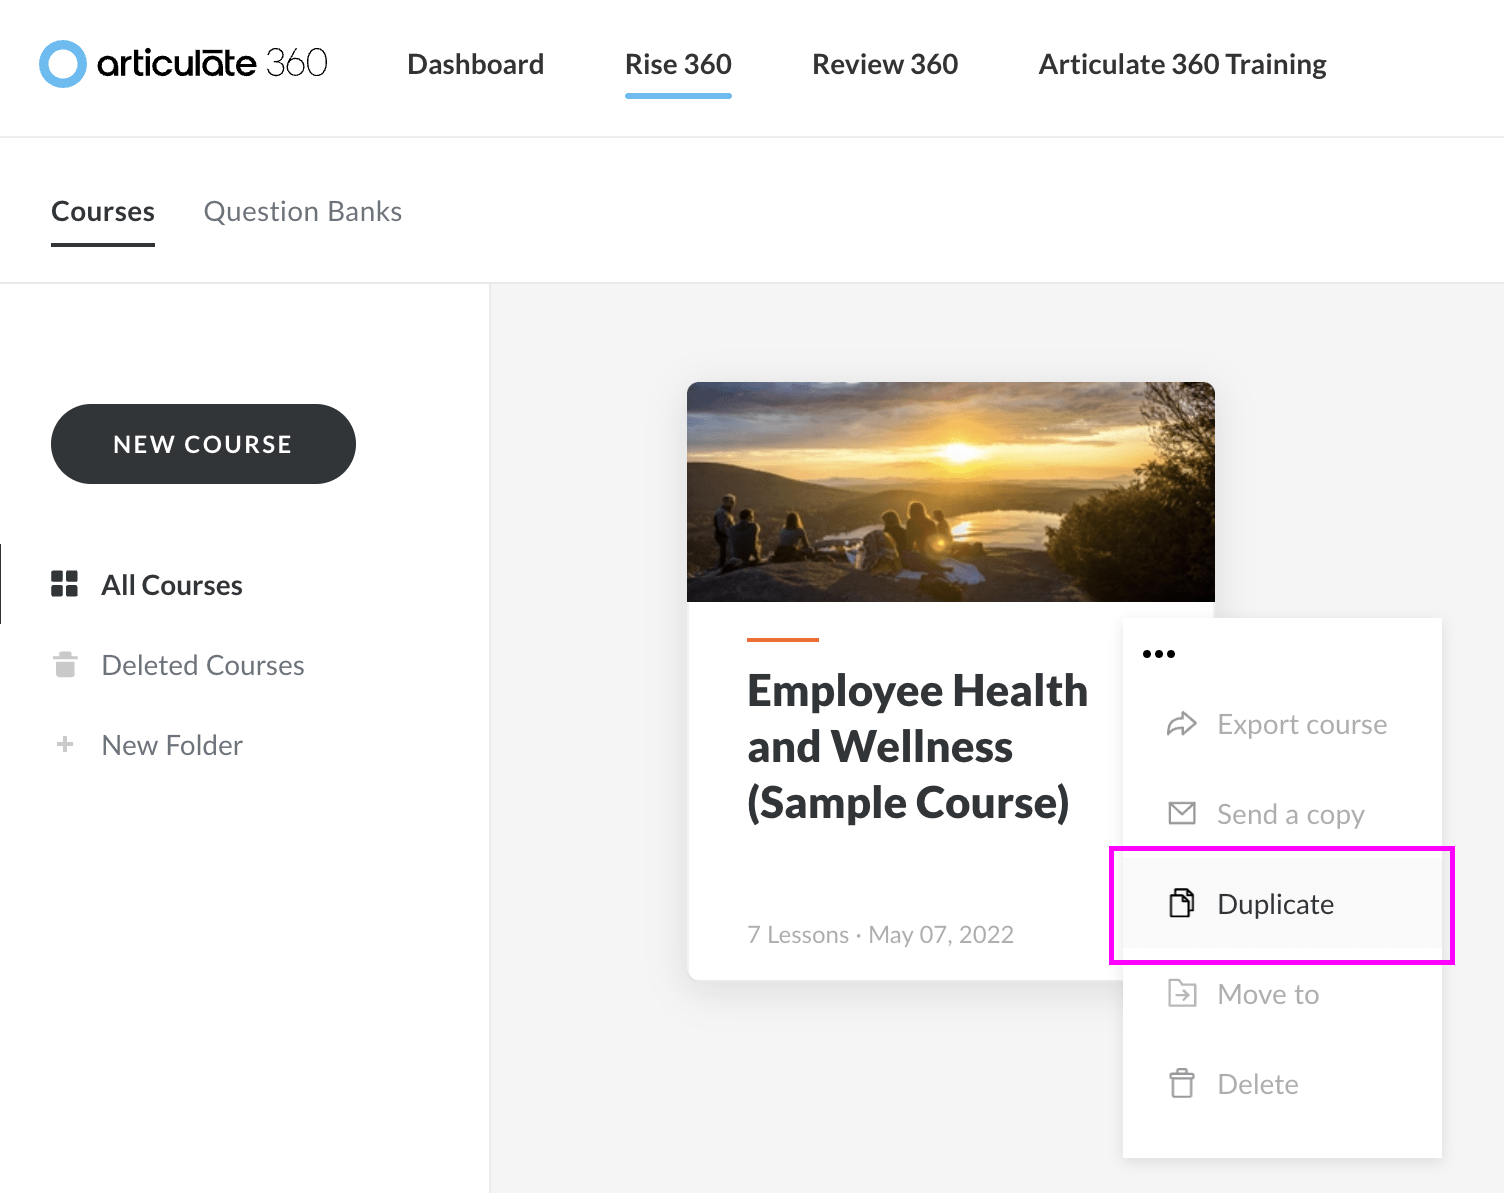
Keep in mind that only managers and account owners are able to duplicate courses on Rise 360.
Step 2: Export your course as an XLIFF Document
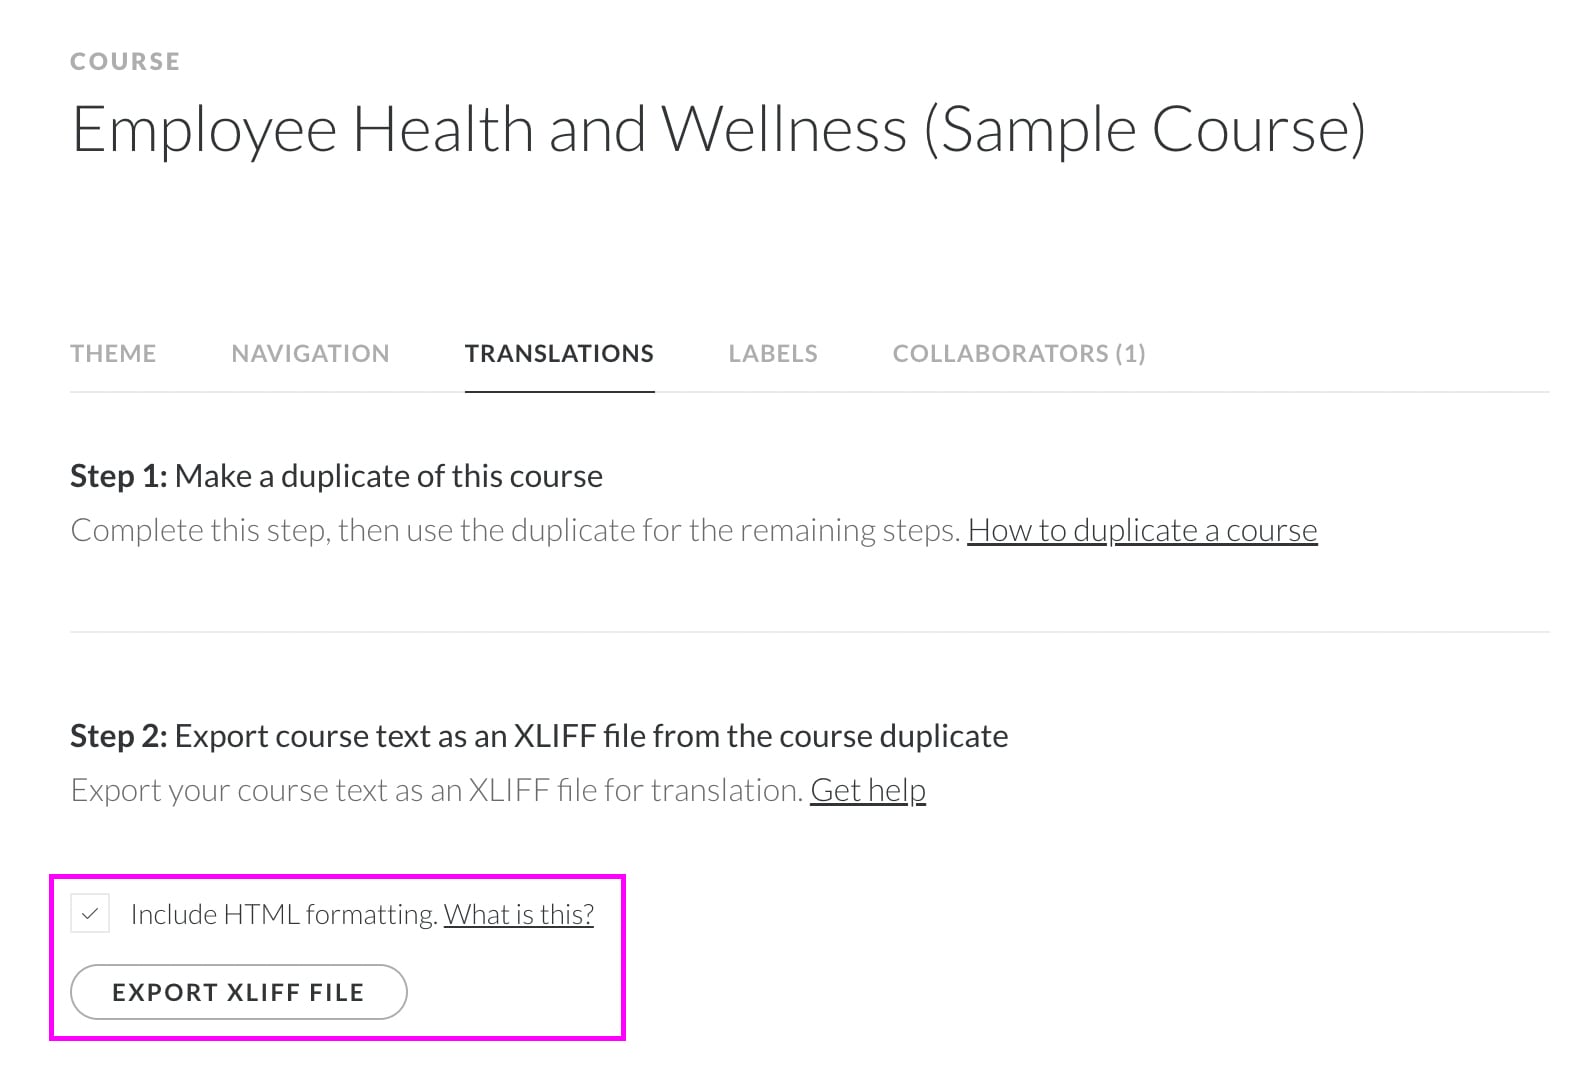
Now you can export your duplicated course as an XLIFF document. To do so:
- Click into said course and select Settings on the toolbar at the top
- Go to the Translations tab
- Take note of the selections you can make under Step 2. If you want to preserve the formatting of your course text, make sure that you select Include HTML Formatting. Otherwise, you may uncheck the box.
- Click Export XLIFF File and save it to your computer
Step 3: Translate the XLIFF document on Redokun
Translating your XLIFF file is easier with a translation tool like Redokun. It’s an online translation management system you can access from your browser.
- Log in to your Redokun account or sign up for a free 14 day trial here (we won’t ask for your credit card details)
- Upload the XLIFF document you’ve exported from Rise 360
- The upload wizard will guide you through the steps of setting up your translation project on Redokun, such as selecting your target language(s); inviting and assigning translators for each target language selected - this could be your colleagues or translation vendors
- Your team can start translating using the Redokun Web Editor, which also provides computer-assisted translation tools to speed up their work
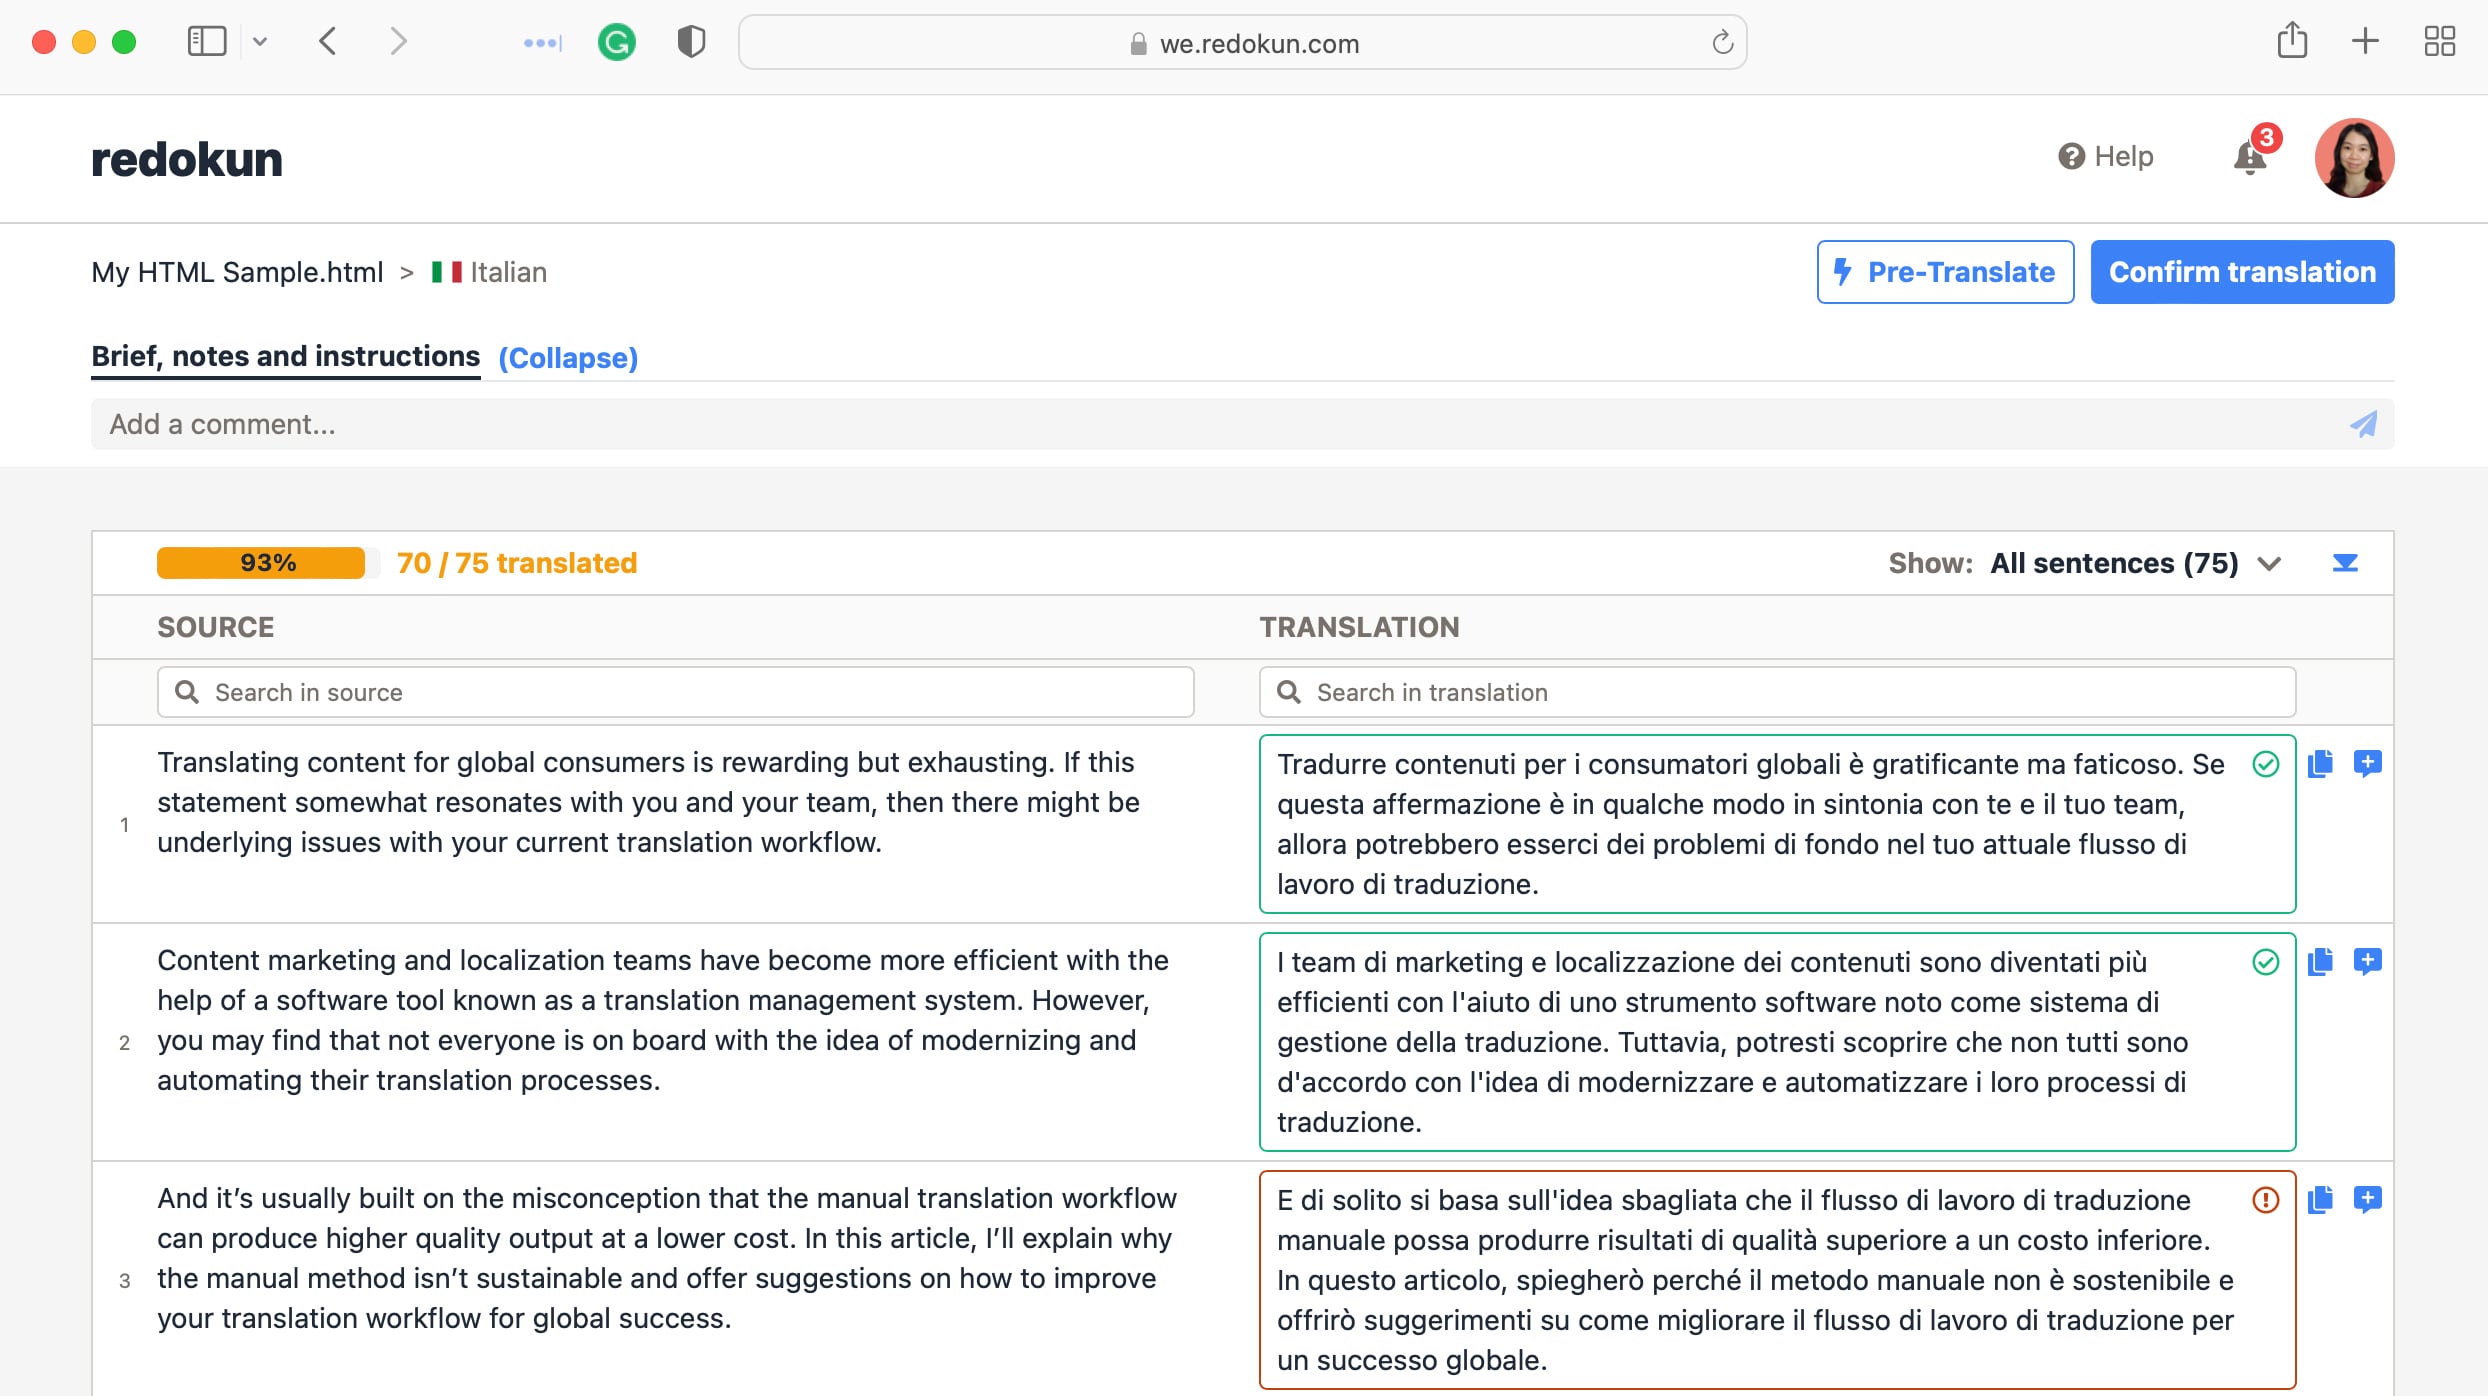
Once your team has finished translating the text, you can download an XLIFF document containing the translations. To do so:
- Go to your Document Detail page
- The Download option will be available for a target language once your translator has confirmed the translation
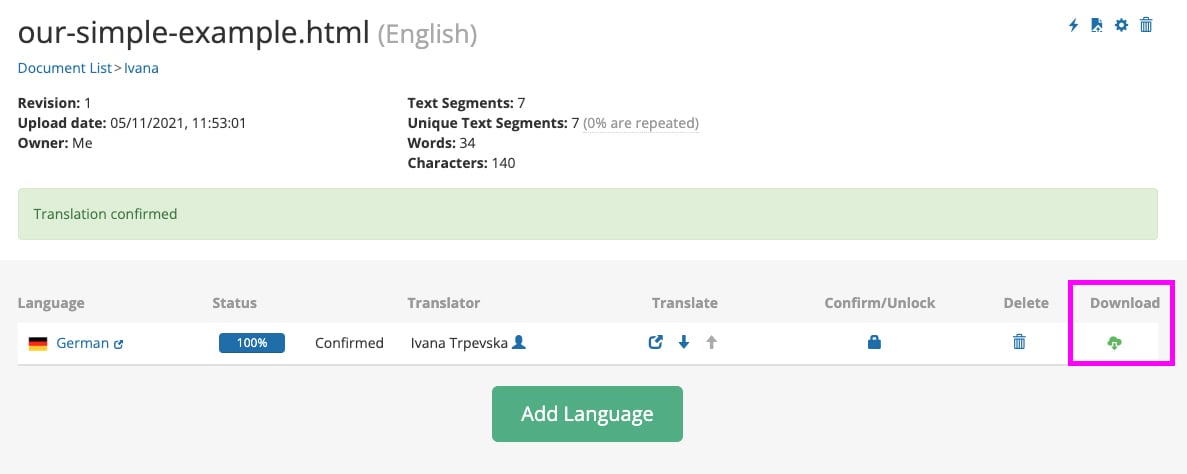
For a full demonstration on how translation projects work on Redokun (complete with screenshots), check out this article.
Step 4: Import the translated XLIFF file back to Rise 360
With the translation you’ve just downloaded from Redokun, the only thing left to do now is to import it back to Rise 360.
- Click into the duplicated course for the target language you want to import
- Select Settings on the toolbar at the top
- Go to the Translations tab
- Scroll down to Step 3 and select Import Translated Text
- Select the translated XLIFF file you downloaded from Redokun
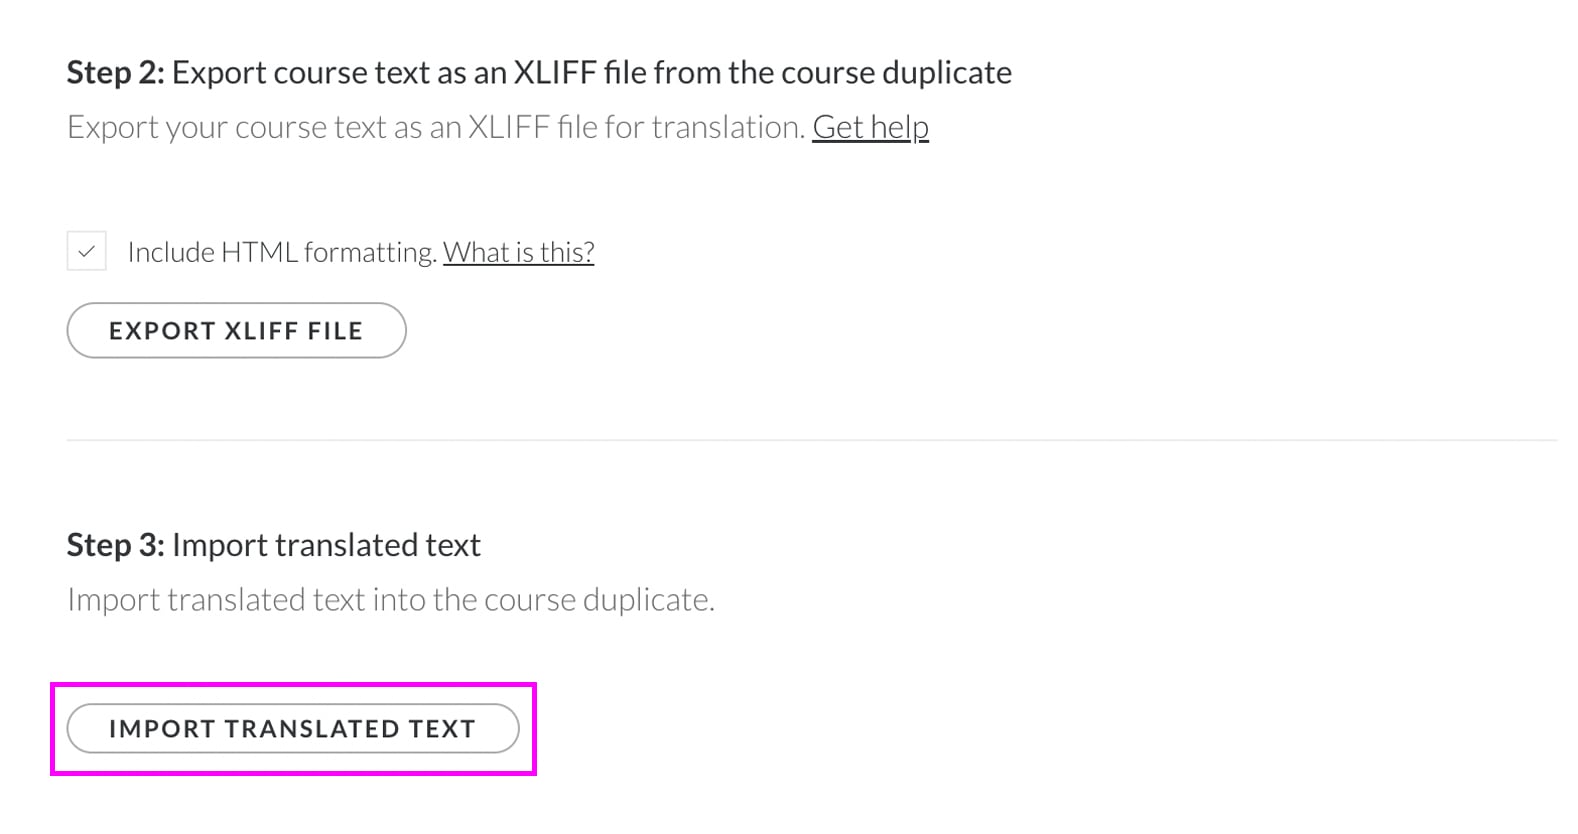
And that’s all! You’re ready to publish your course for a new language market... unless you want to go the extra mile.
Optional Step: Translate course labels
Labels here refer to the textual UI elements throughout your course that either
- prompt user action (e.g. Start Course, Resume Course); or
- display learning information (e.g. Must pass quiz before continuing)
Let’s say you’ve translated your course content from English to Spanish. It would be useful to translate the labels to Spanish as well to build a more immersive learner experience in one language.
However, since labels aren’t encoded into the exported XLIFF file, you must change them manually in Rise 360:
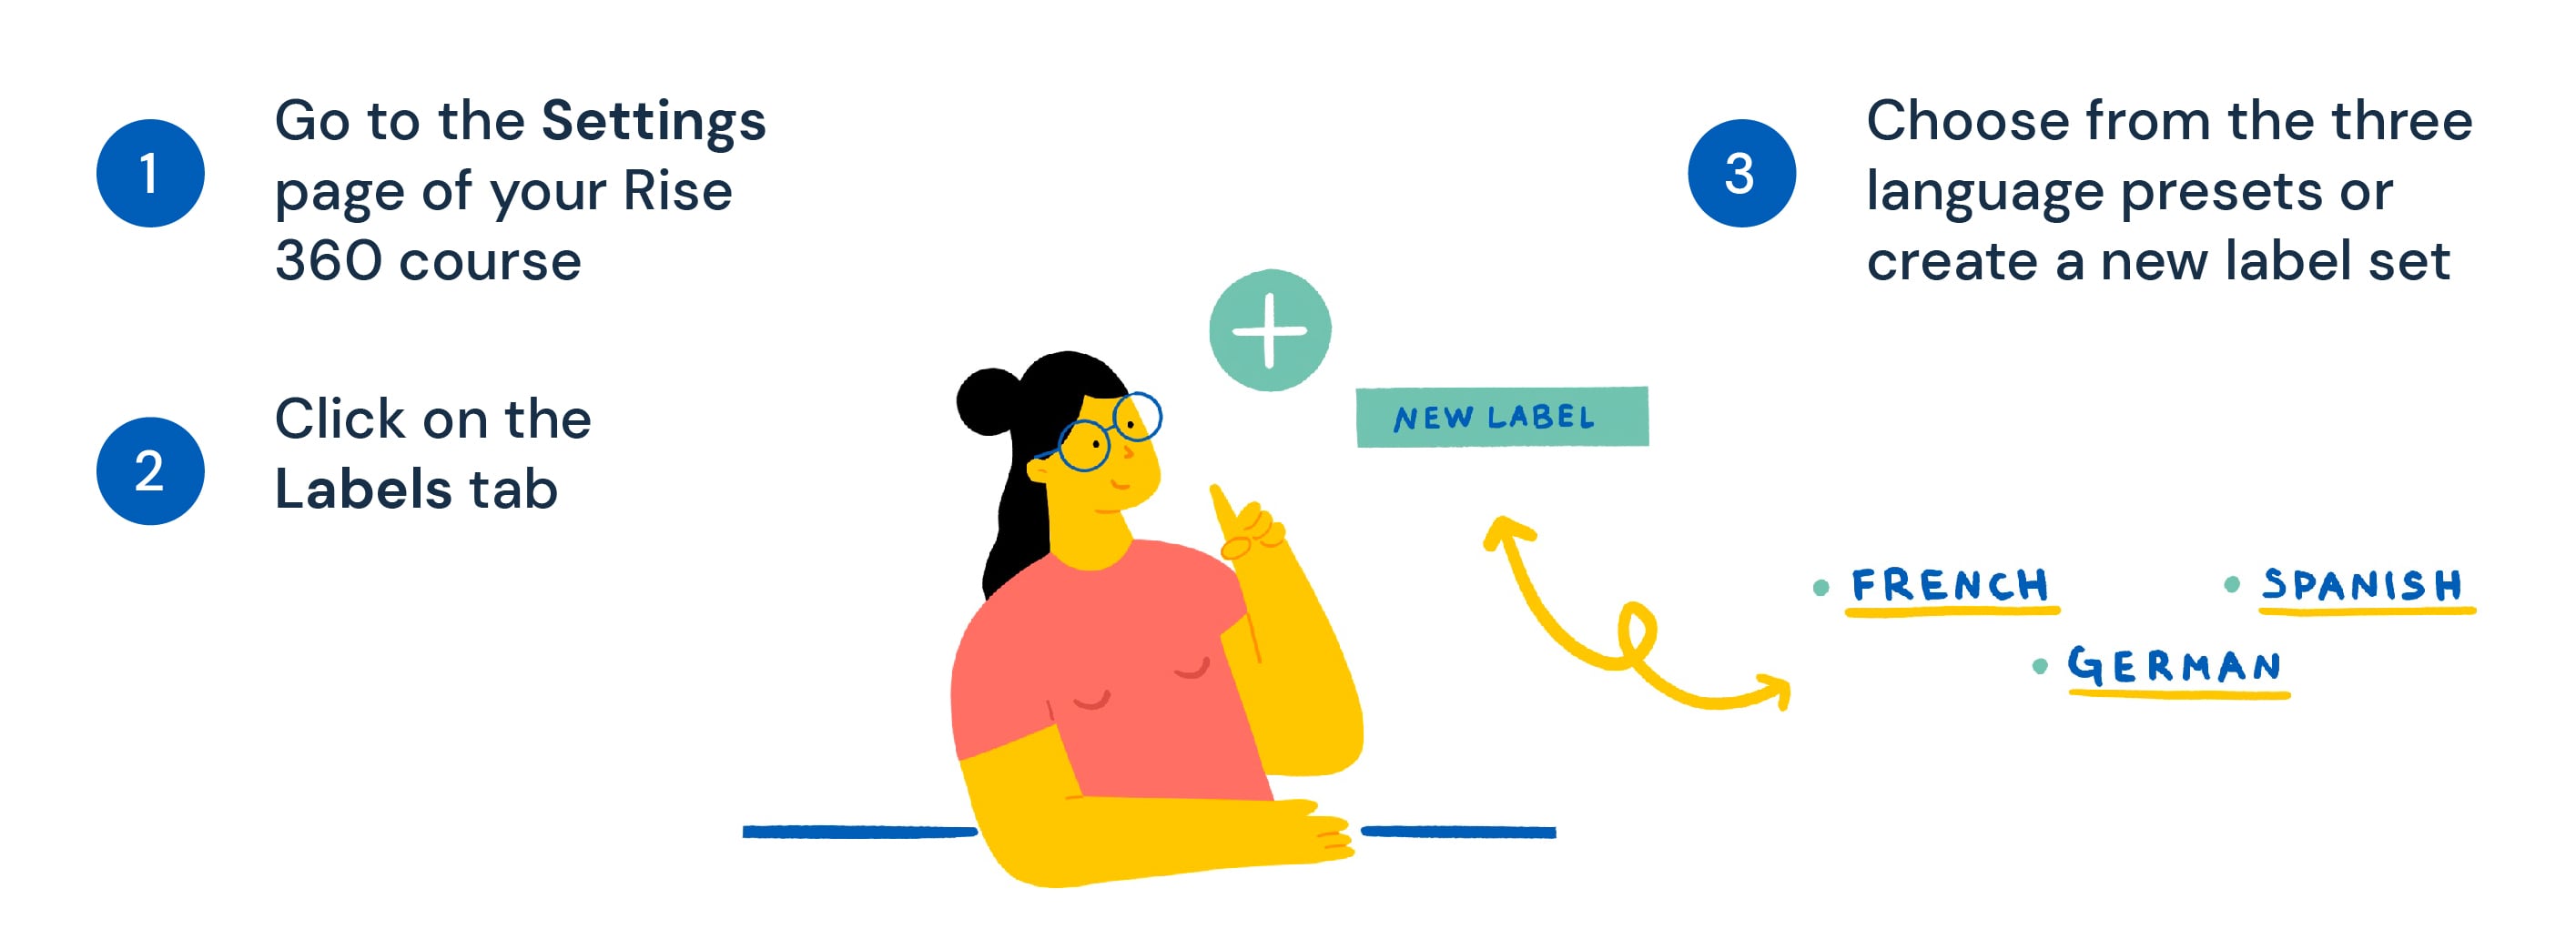
- Go to the Settings page of your Rise 360 course
- Click on the Labels tab
- There are two ways to translate your labels: (1) by choosing from the three language presets: German, French, or Spanish, or (2) by creating a new label set for any other language
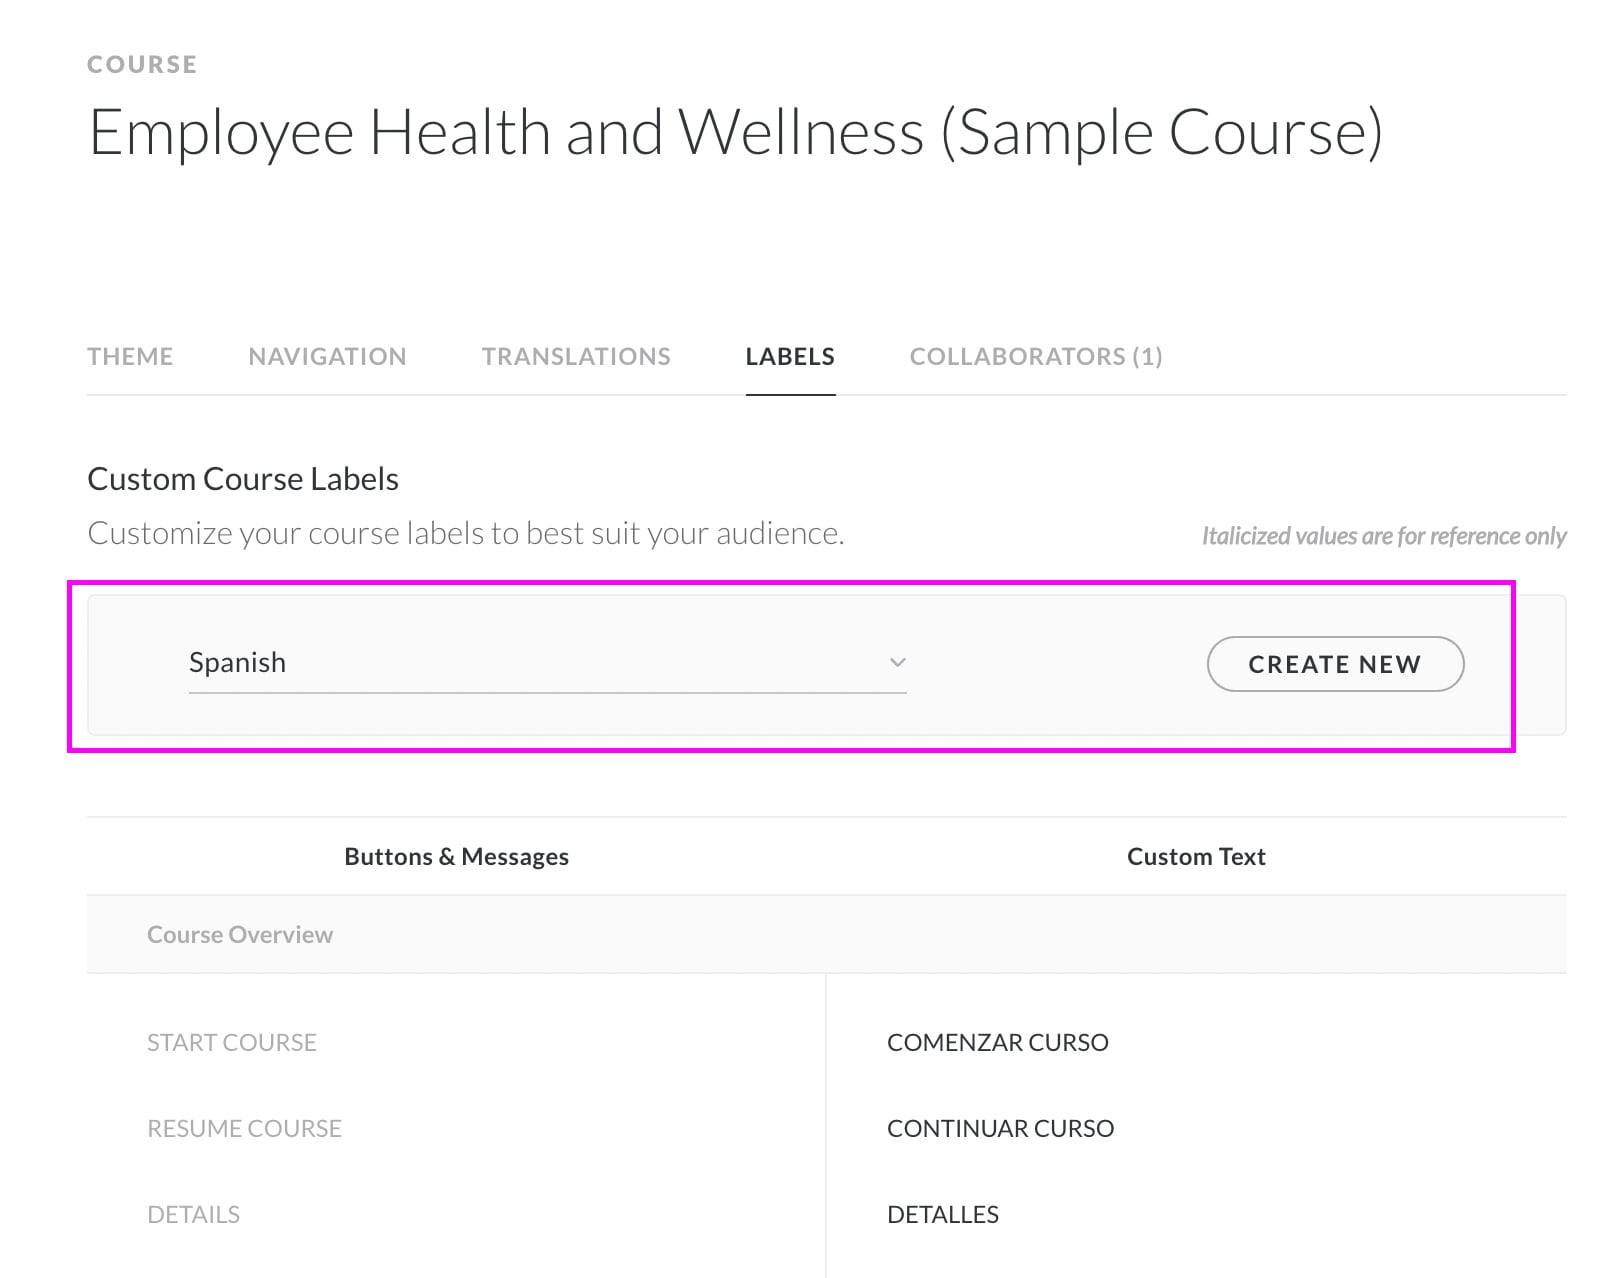
Click here for the official guide on how to customize text labels.
And now your courses are absolutely set for market.
Why use Redokun?
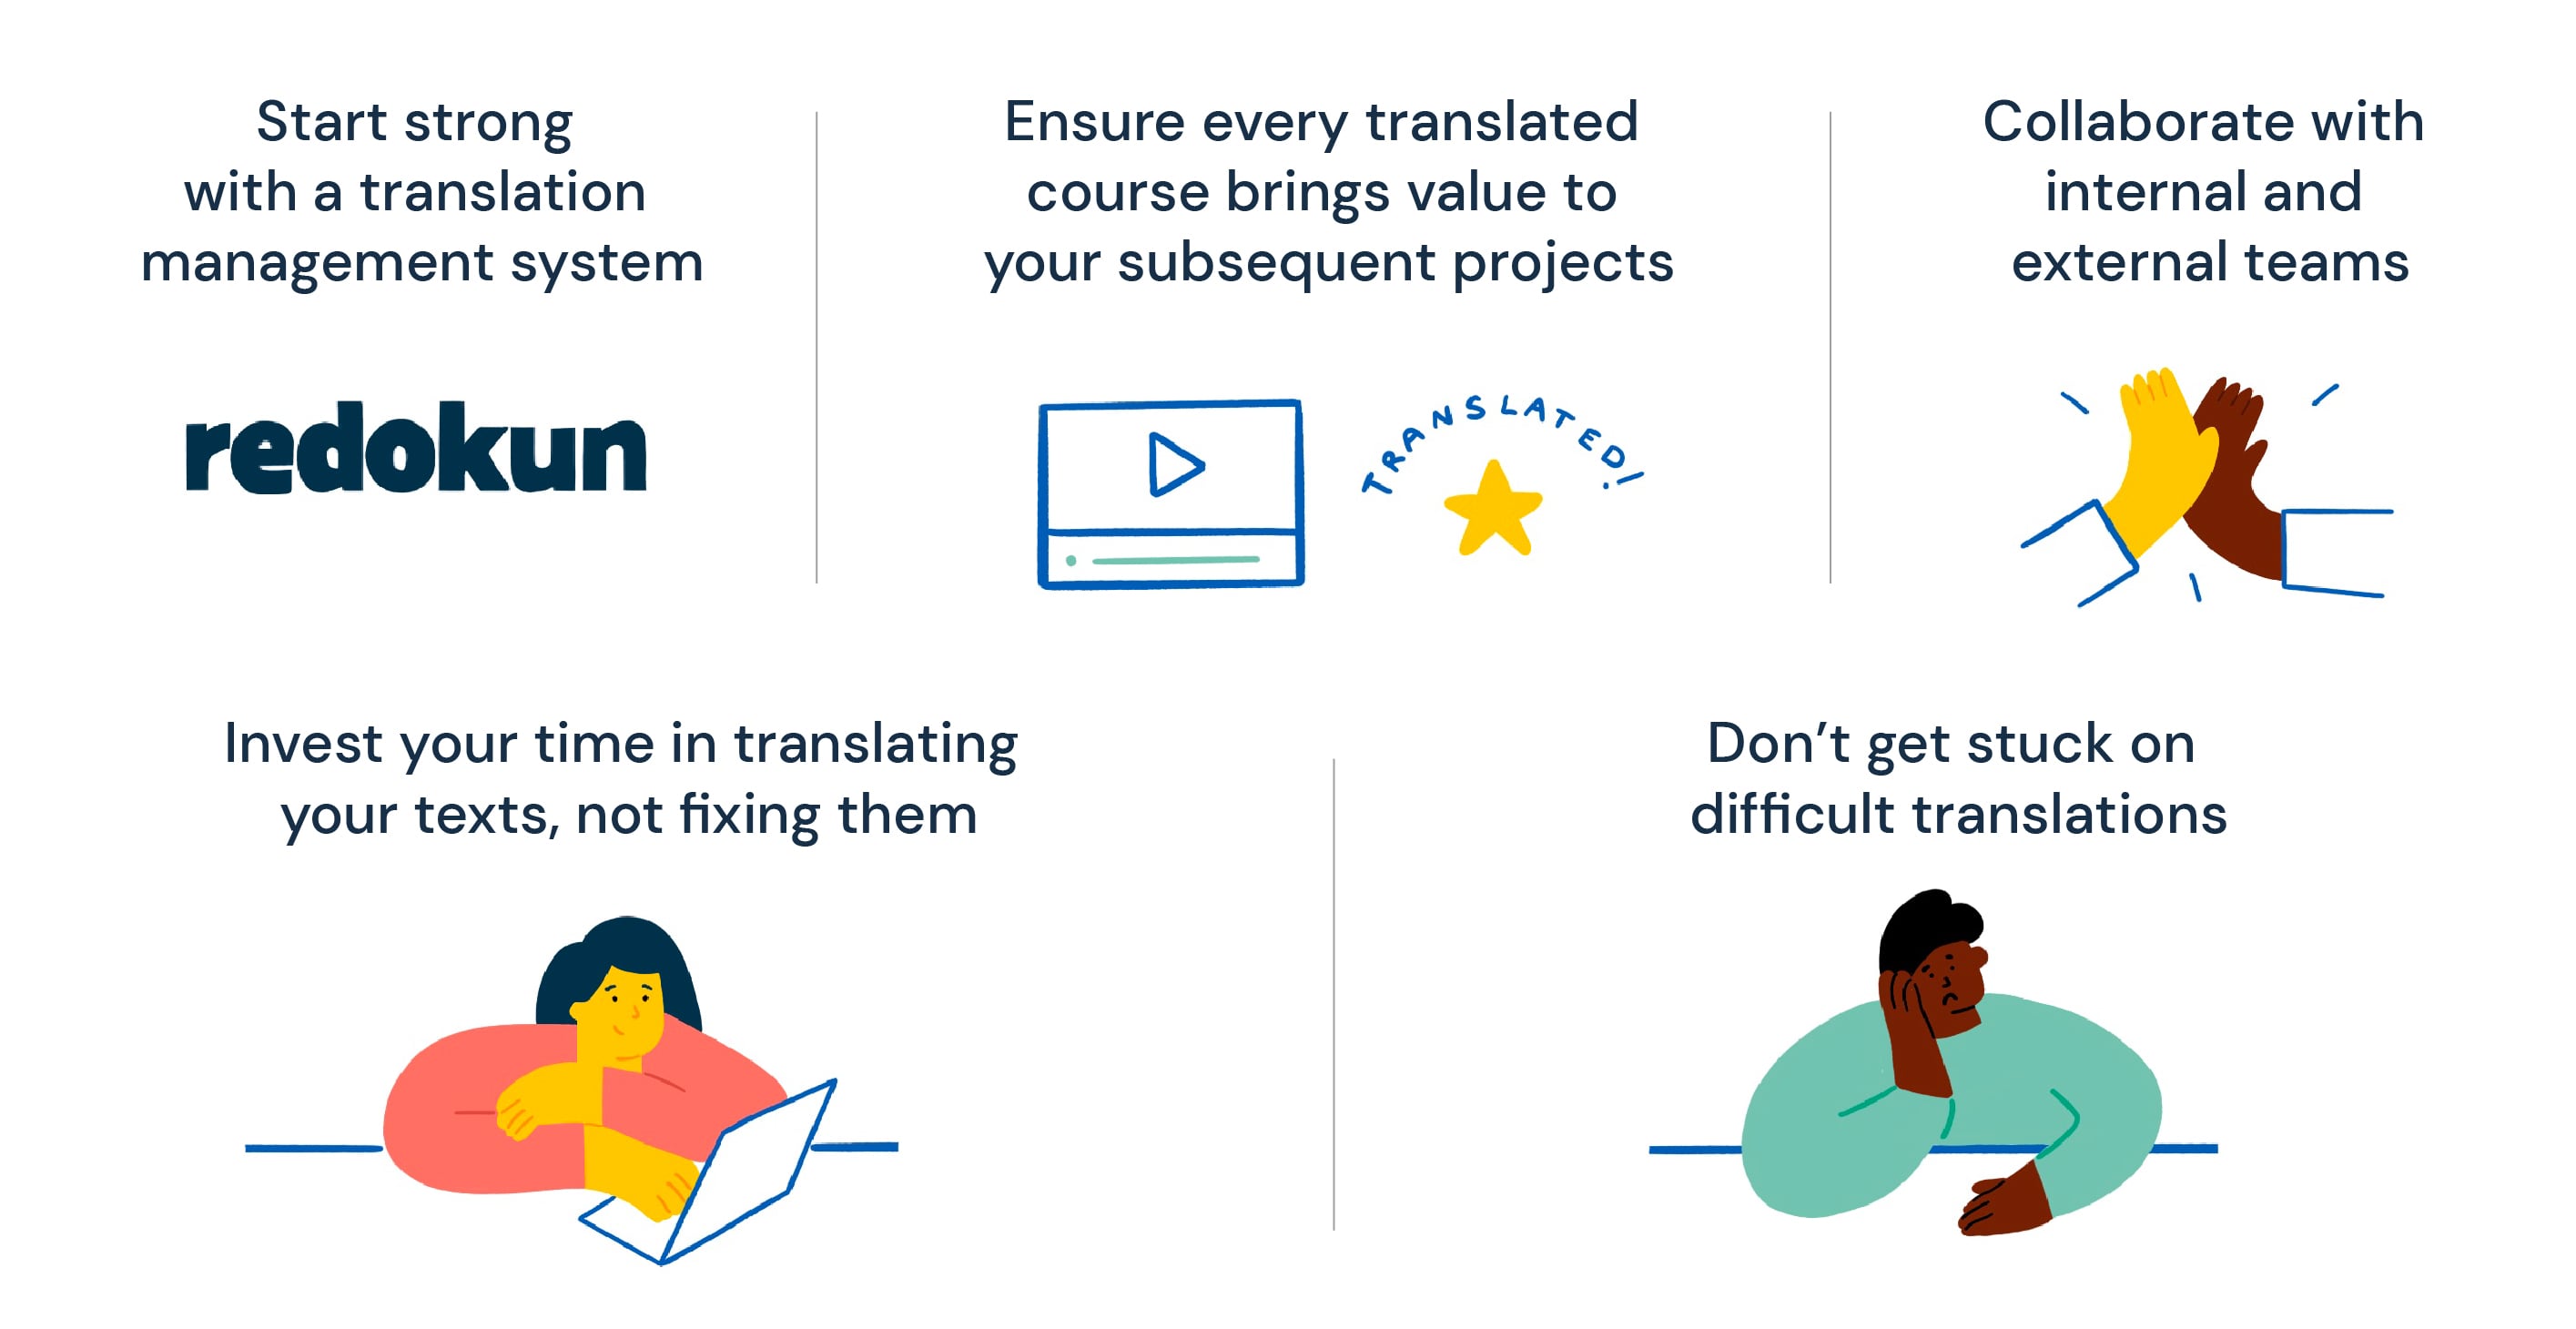
- Start strong with a translation management system: Your Rise 360 translation workflow would be a simple 4-step process with Redokun. It’s fast. It’s scalable. It’s one of the core systems that will set your market expansion plans in motion.
- Ensure every translated course brings value to your subsequent projects: Your courses will likely have overlapping content, whether it’s one word or one paragraph. If you have translated it before, you can translate it again with your eyes closed... because Redokun automatically detects similarities and find the matching translation. This is a nifty tool known as translation memories.
- Collaborate with internal and external teams: Always have the choice to work with in-house translators or vendors and share crucial feedback directly in the Web Editor.
- Invest your time in translating your texts, not fixing them: Your translated courses maintain their original stylings and layout when you download them from Redokun. Skip the dreaded “post-production” stage and go straight to market.
- Don’t get stuck on difficult translations: Your Redokun Web Editor is integrated with machine translation engines to help translators kickstart their thought process.
Redokun: Have a Sneak Peek
Want to see Redokun in action? Have a sneak peek at how Redokun works without any commitment:
Best Practices for Translating Rise 360 Courses
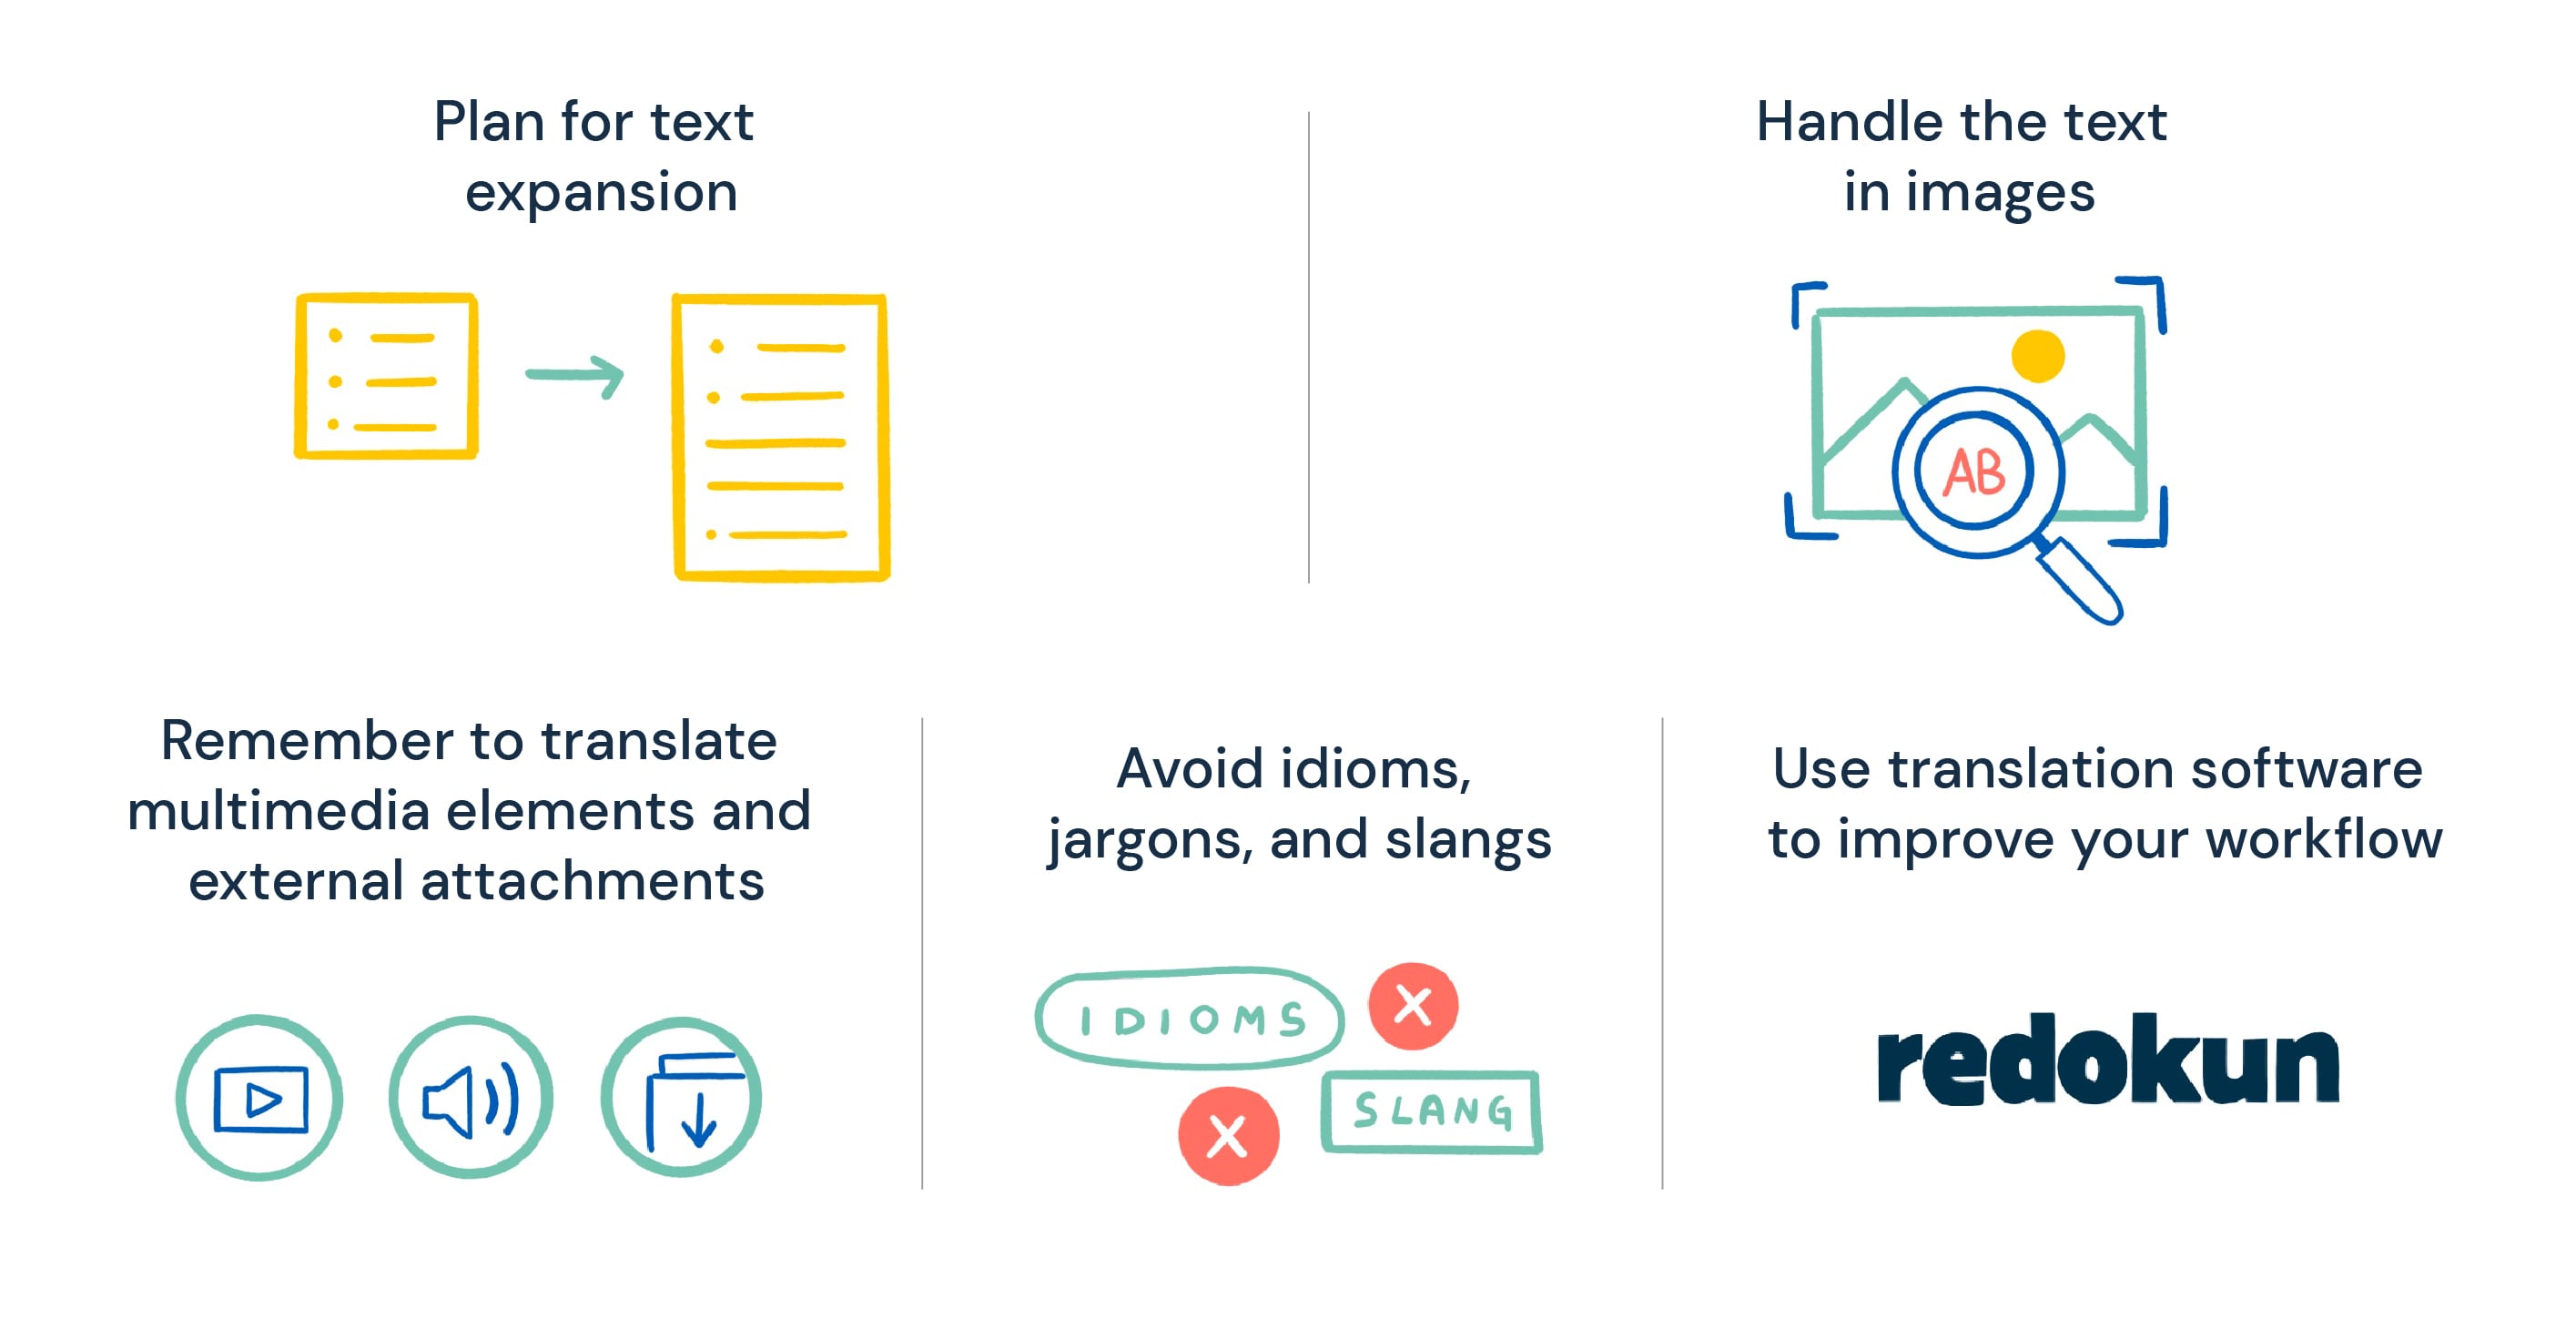
You can optimize your Rise 360 translation at many levels. Keep these best practices in mind to translate content effectively for your linguistically diverse audiences.
1. Plan for text expansion
A paragraph written in one language might take up more space than the same paragraph written in another language.
Thus, when designing your course, you should always plan for text expansion. In case a translation does use up more characters than the original text, you won’t have to readjust the layout.
The general rule is to leave 30% more room to allow the text to expand if needed. Avoid having cramped sections of text in your Rise 360 course.
2. Handling text in images
Before you even start creating your e-learning courses, you have to think about the images you want to use. While they’re great learning aids, translating them is a separate task because the text in images can’t be exported in the XLIFF document.
Avoid using images with text in your courses. However, if it’s unavoidable, you will need to consider a third party image translation tool. This is a type of software that will detect and extract the text within images - after which you may translate and reattach to the relevant courses.
3. Remember to translate multimedia elements and external attachments
Apart from images, your rise 360 courses may contain other multimedia elements and external attachments, such as videos, audios, e-books, downloadable worksheets.
It goes without saying that translating these elements would absolutely improve your user’s e-learning journey. However, bear in mind that this will likely increase your localization costs.
You can actually offset some of these costs if your translation software can be used to translate other types of attachments in your courses.
For example, Redokun supports more than just XLIFF translation. You can also use it to translate Word, Excel, PPTX, and video subtitles. So if you do decide to translate your supplementary learning materials, you won’t need to pay for additional tools, only the people who will do the translations.
4. Avoid idioms, jargons, and slangs
These don’t always translate well because not all your target languages will share the same linguistic quirks or cultural values.
Your translation projects will go by much faster if your translator isn’t trying to figure out how to make every idiom or slang word fit into new linguistic and cultural contexts.
Unless you have a dedicated localization expert on your team, simplify the language of your source text. If there is a way to say what you want to say in plain language, do so.
5. Use translation software to improve your workflow
And we’re not just saying this for shameless self-promotion (okay, maybe a little bit).
You probably want to translate your Articulate courses into multiple languages, not just one. That’s going to eat up your resources if your team doesn’t approach the work systematically.
You can use tools like Redokun to manage and streamline the translation of your Rise 360 courses. In doing so, your team is always focused on translating the text. Not on copy-pasting lines of text from one place to another. Not on fixing the layout of the translated courses.
Summary
At the end of the day, you have important messages to share through your courses. These messages have more impact if you deliver them in multiple languages.
Although Articulate Rise 360 lacks an integrated translation feature, the key is to work with the XLIFF file export function. And this applies to any software that allows you to export your content as an XLIFF document.
With this file format, you can quickly upload your content onto any translation management system like Redokun to enjoy a more intuitive workflow.
Do try Redokun for free with your team today. Feel free to let us know what you think!
Happy translating,
Ivana


