


In this article, I will show you how to translate your Lectora courses efficiently. Whether you're using Lectora on Desktop or Lectora online, you can refer to this guide, which doesn't require you to download any tool.
With this method, you can easily scale your eLearning translation efforts and build a reliable Lectora translation workflow for your team.
Overview
- How to Translate a Lectora eLearning Course (4 Steps)
- Why Use Redokun for Your Lectora Translation Projects
- Best Practices for Lectora Translation You Must Know
How to Translate a Lectora eLearning Course (4 Steps)
While there is no direct way to translate your eLearning content in Lectora, you can export your course as an XLIFF file. Then, you can simply use another translation software, such as Redokun, to translate your XLIFF file. This is a great way to automate the translation process and ensure a consistent layout across multiple languages.
XLIFF (XML Localization Interchange File Format) is a popular file format used in translation to exchange data between two different tools. By using XLIFF, you can share your course text with your translation team without messing up with the original document structured. Learn more about XLIFF translation here.
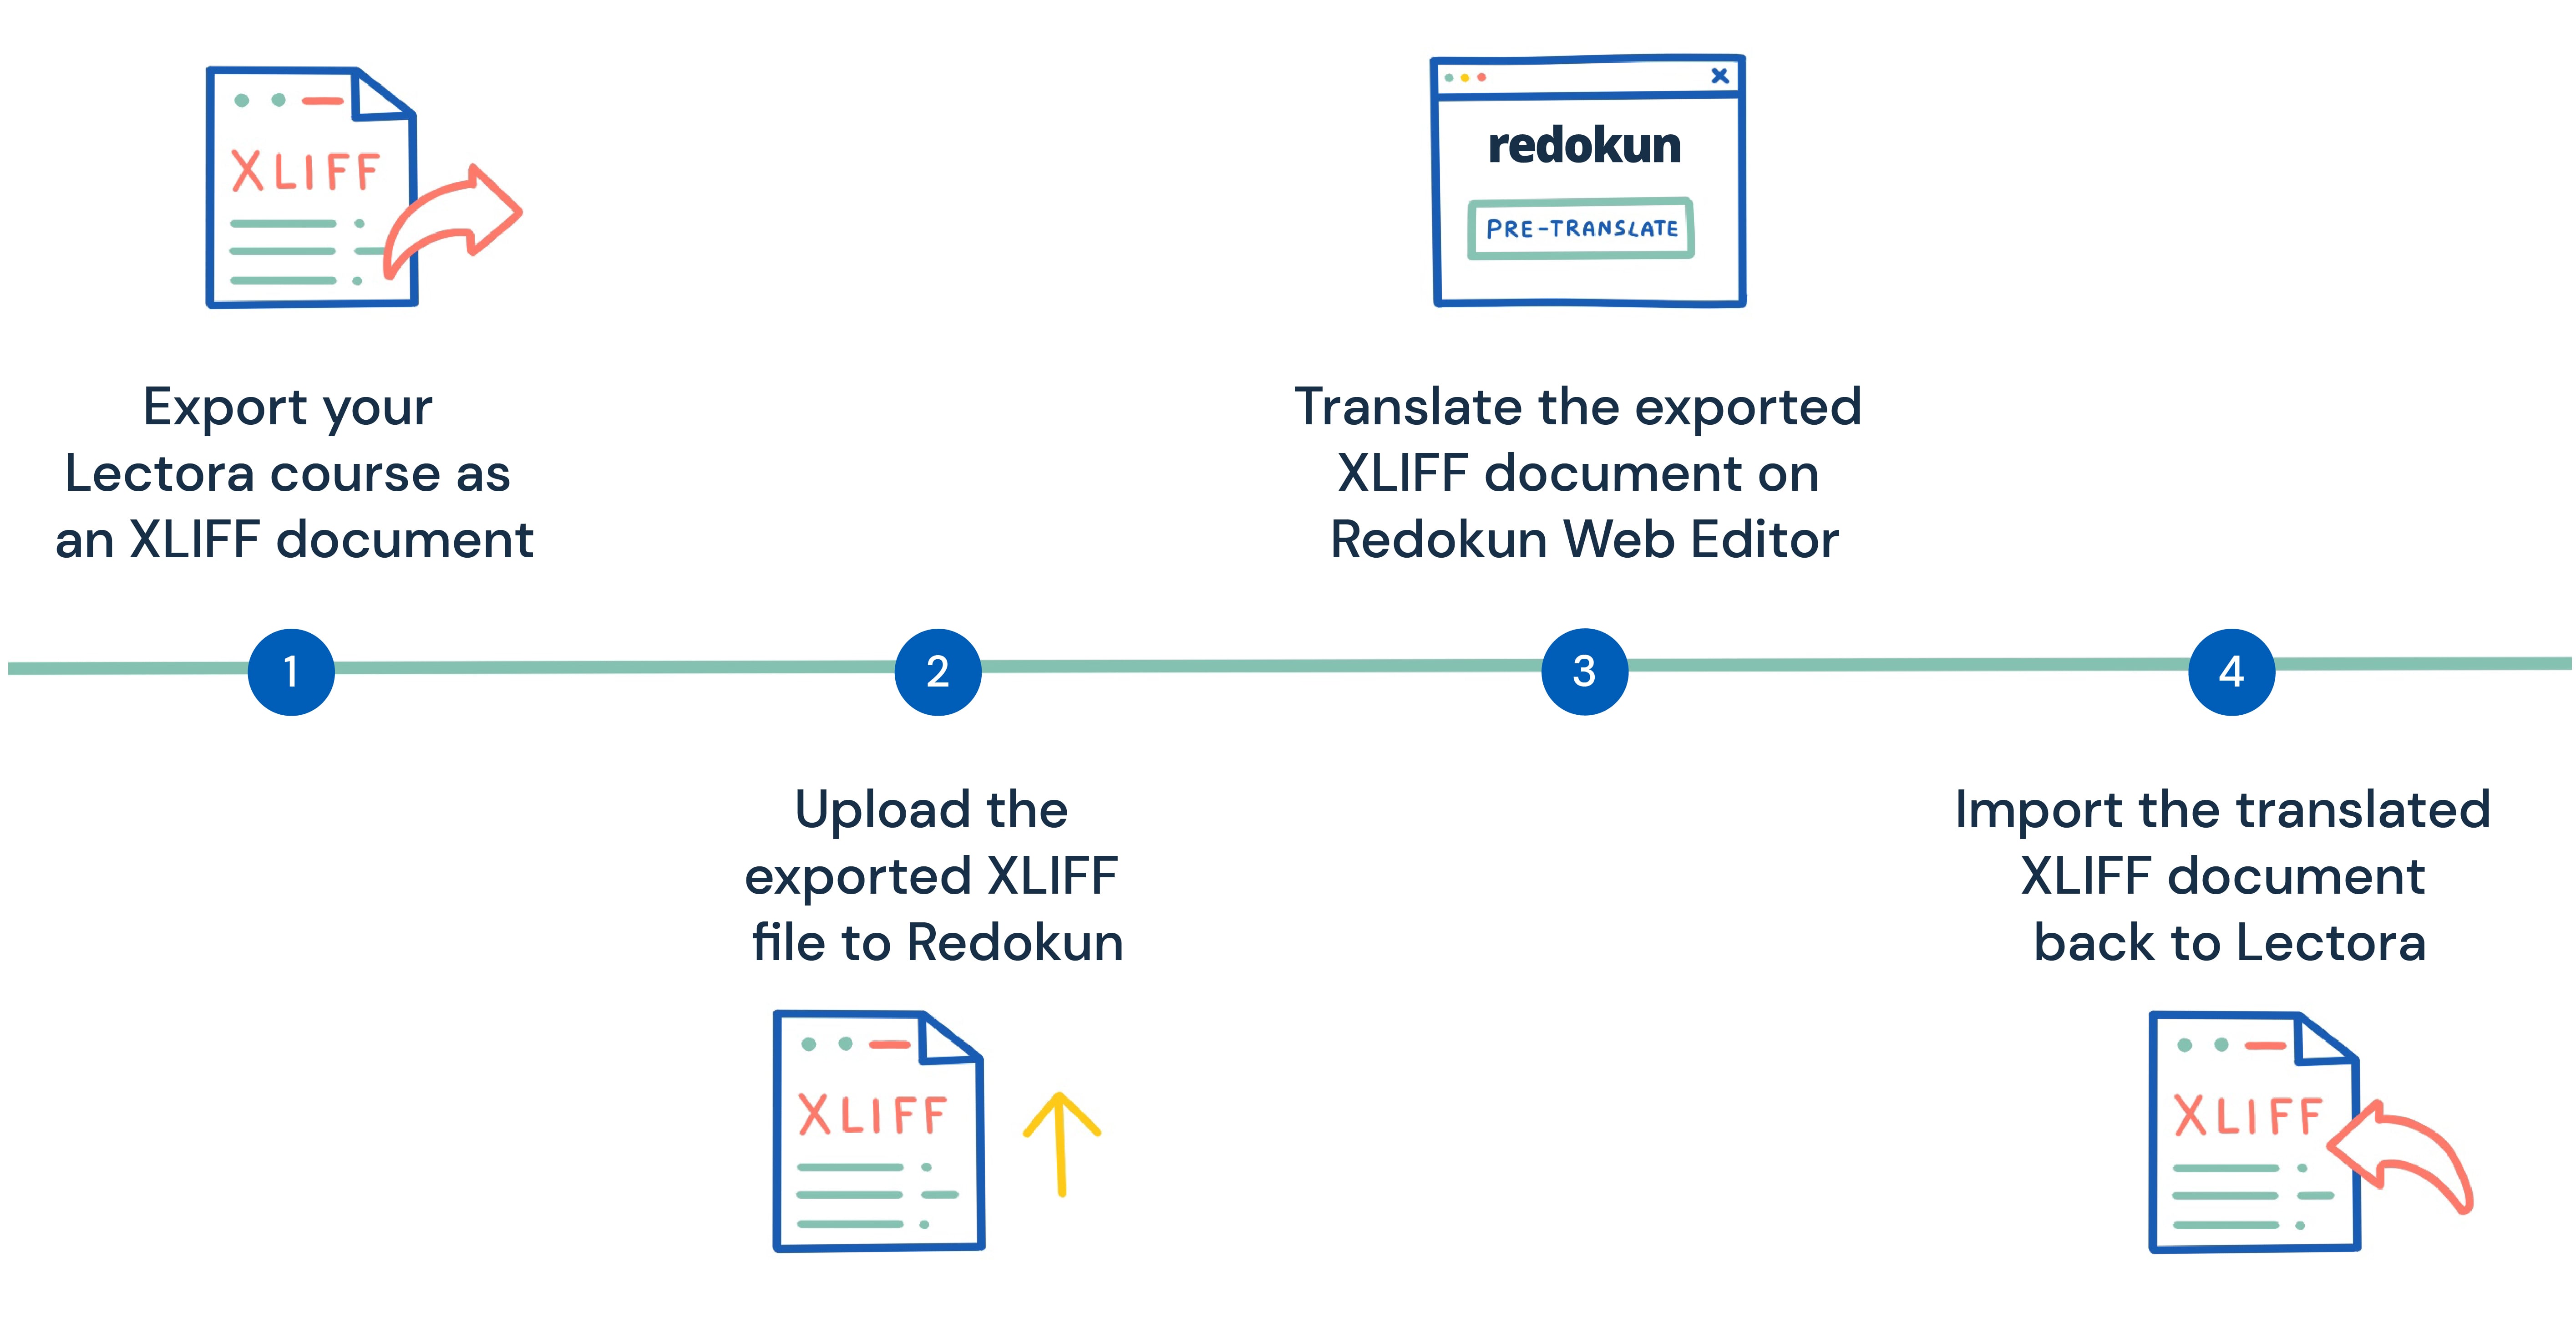
In this guide, we will use the XLIFF feature to share your eLearning course content between Lectora and Redokun for translation purposes. Let's break it down into 4 simple steps.
Step 1: Export your Lectora course as an XLIFF document
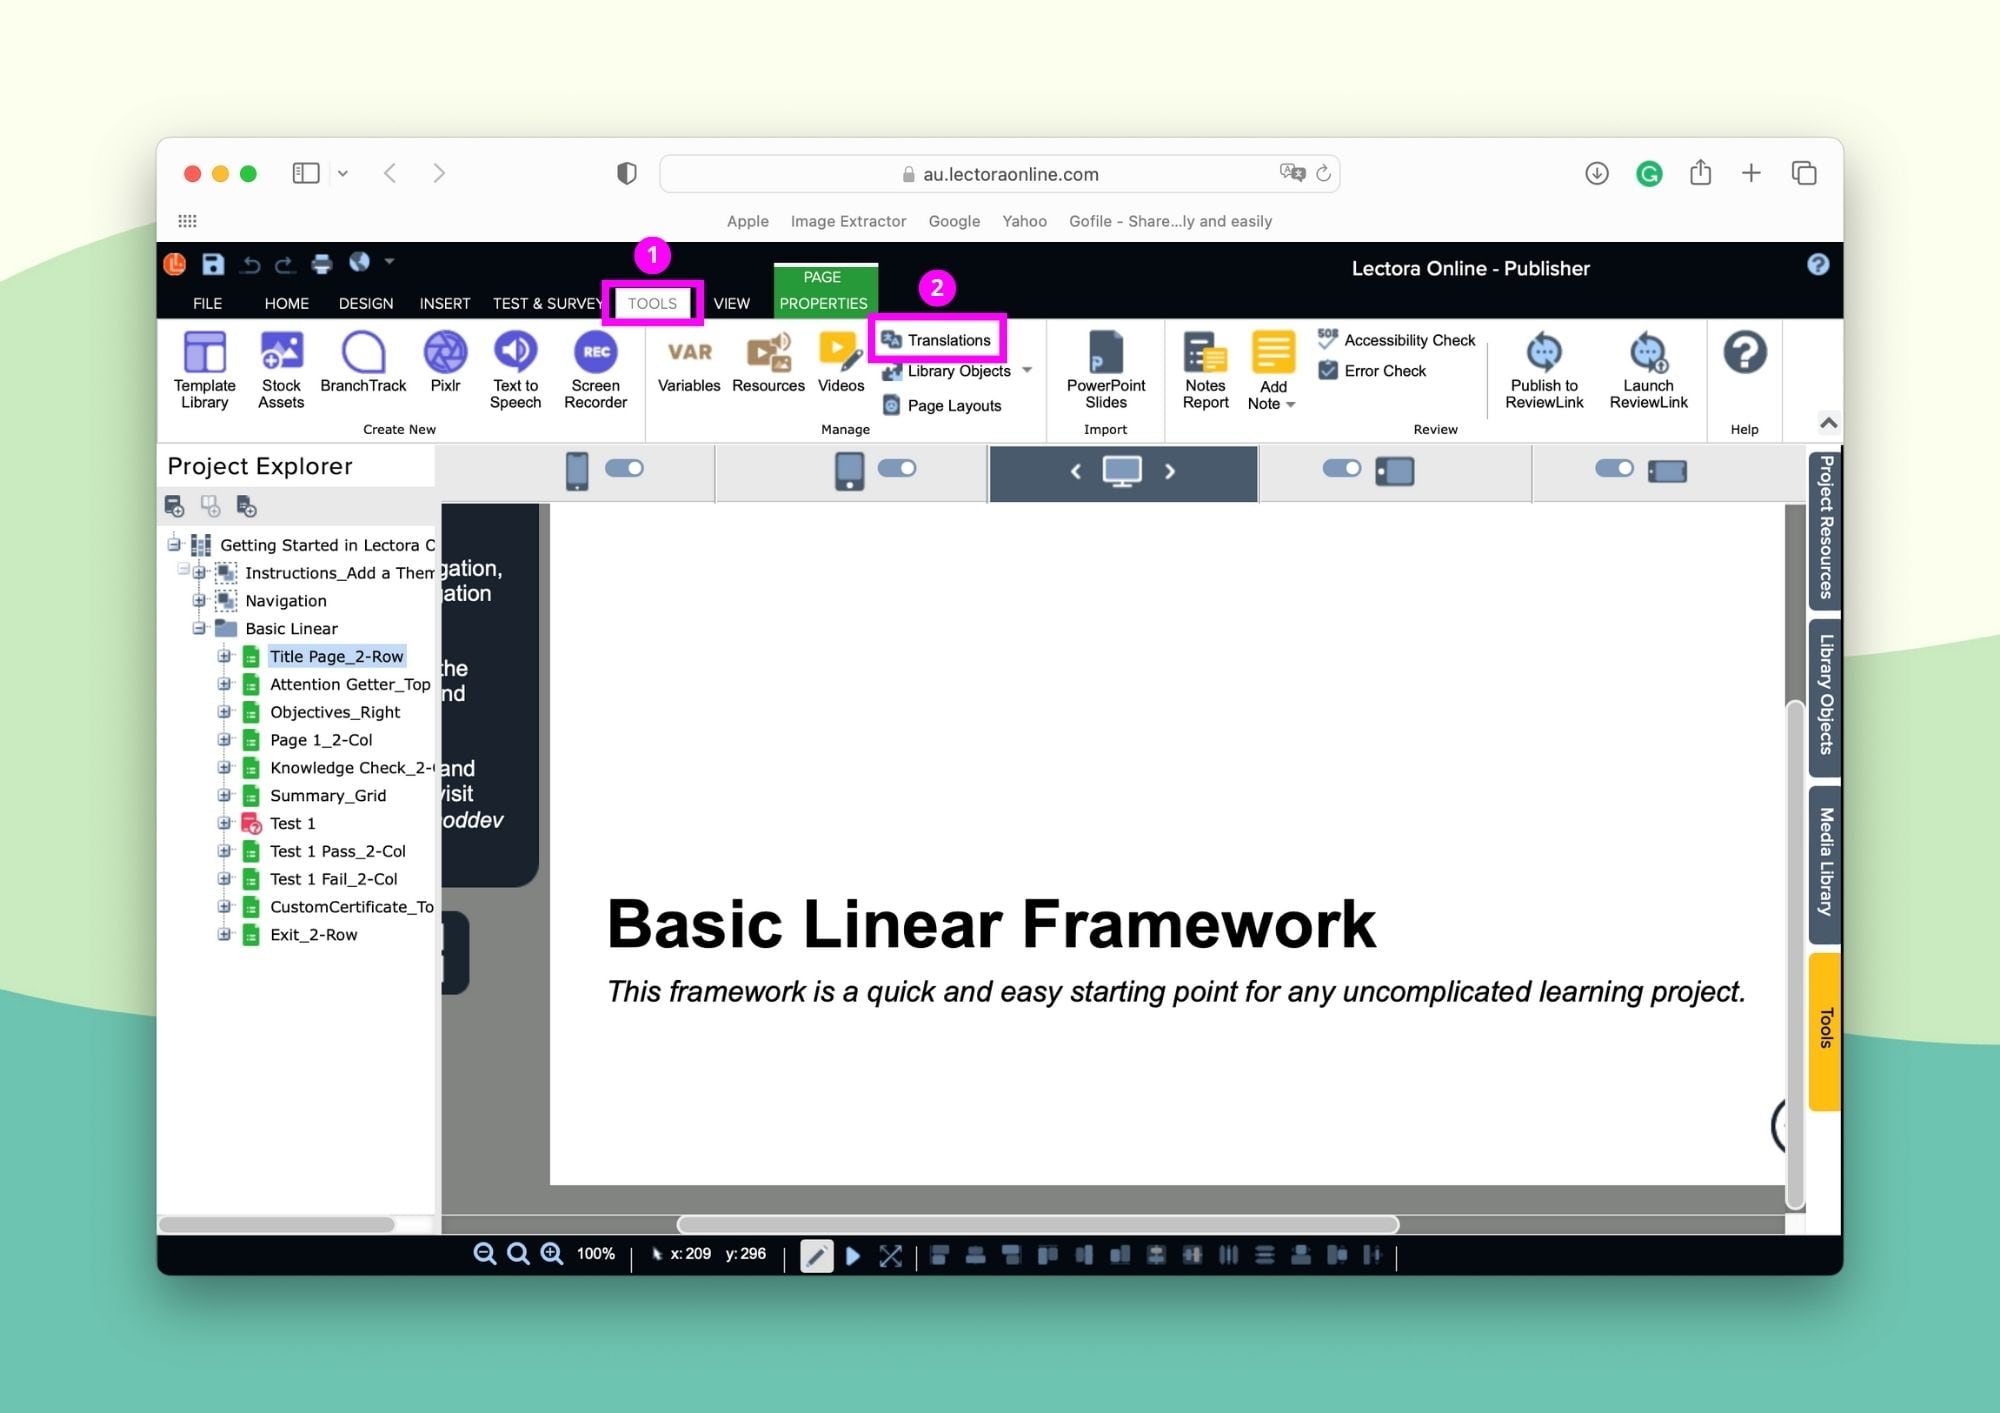
First, open your course on Lectora desktop or Lectora online.
- Go to the Tools section at the top of the interface.
- Choose Translations from the Tools ribbon (shown below).
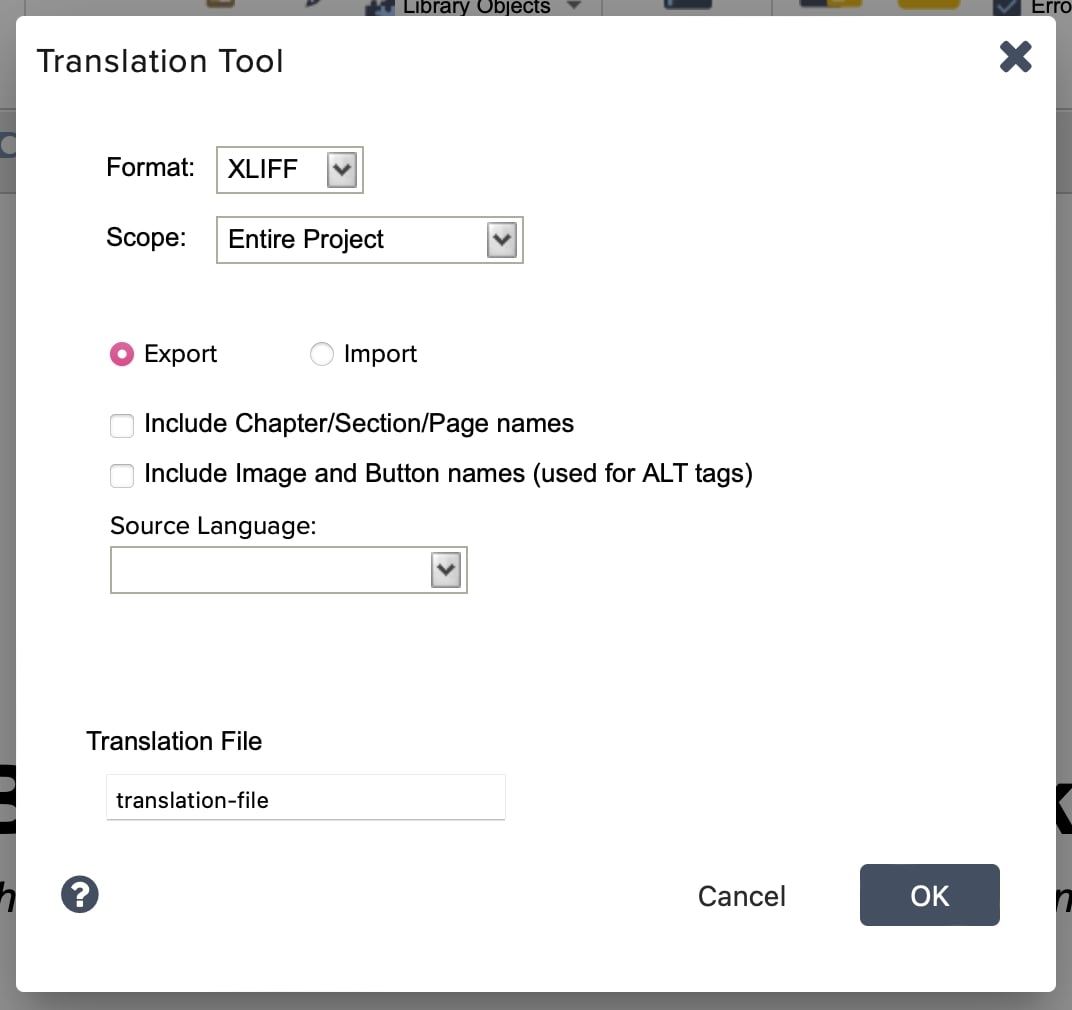
- In the pop-up window, set the Format to XLIFF.
- Select the scope of the course content you want to export for translation. It can be an entire title or separate chapters or pages.
- Make sure Export is selected (rather than Import).
- Select the Source Language for your document.
- Click OK and download the XLIFF file to your computer.
You can also rename the course file to include the target language (for example, FR for French or IT for Italian). This makes it easier for you to keep track of your documents as create different language versions of your Lectora course.
Step 2: Upload the XLIFF file to Redokun
- Create a free Redokun account here to start a 14-day trial (no need to provide your credit card details). Redokun works seamlessly in a browser so you won’t have to install additional software on your computer.
- Click Upload Document.
- Select the XLIFF file you exported from Lectora.
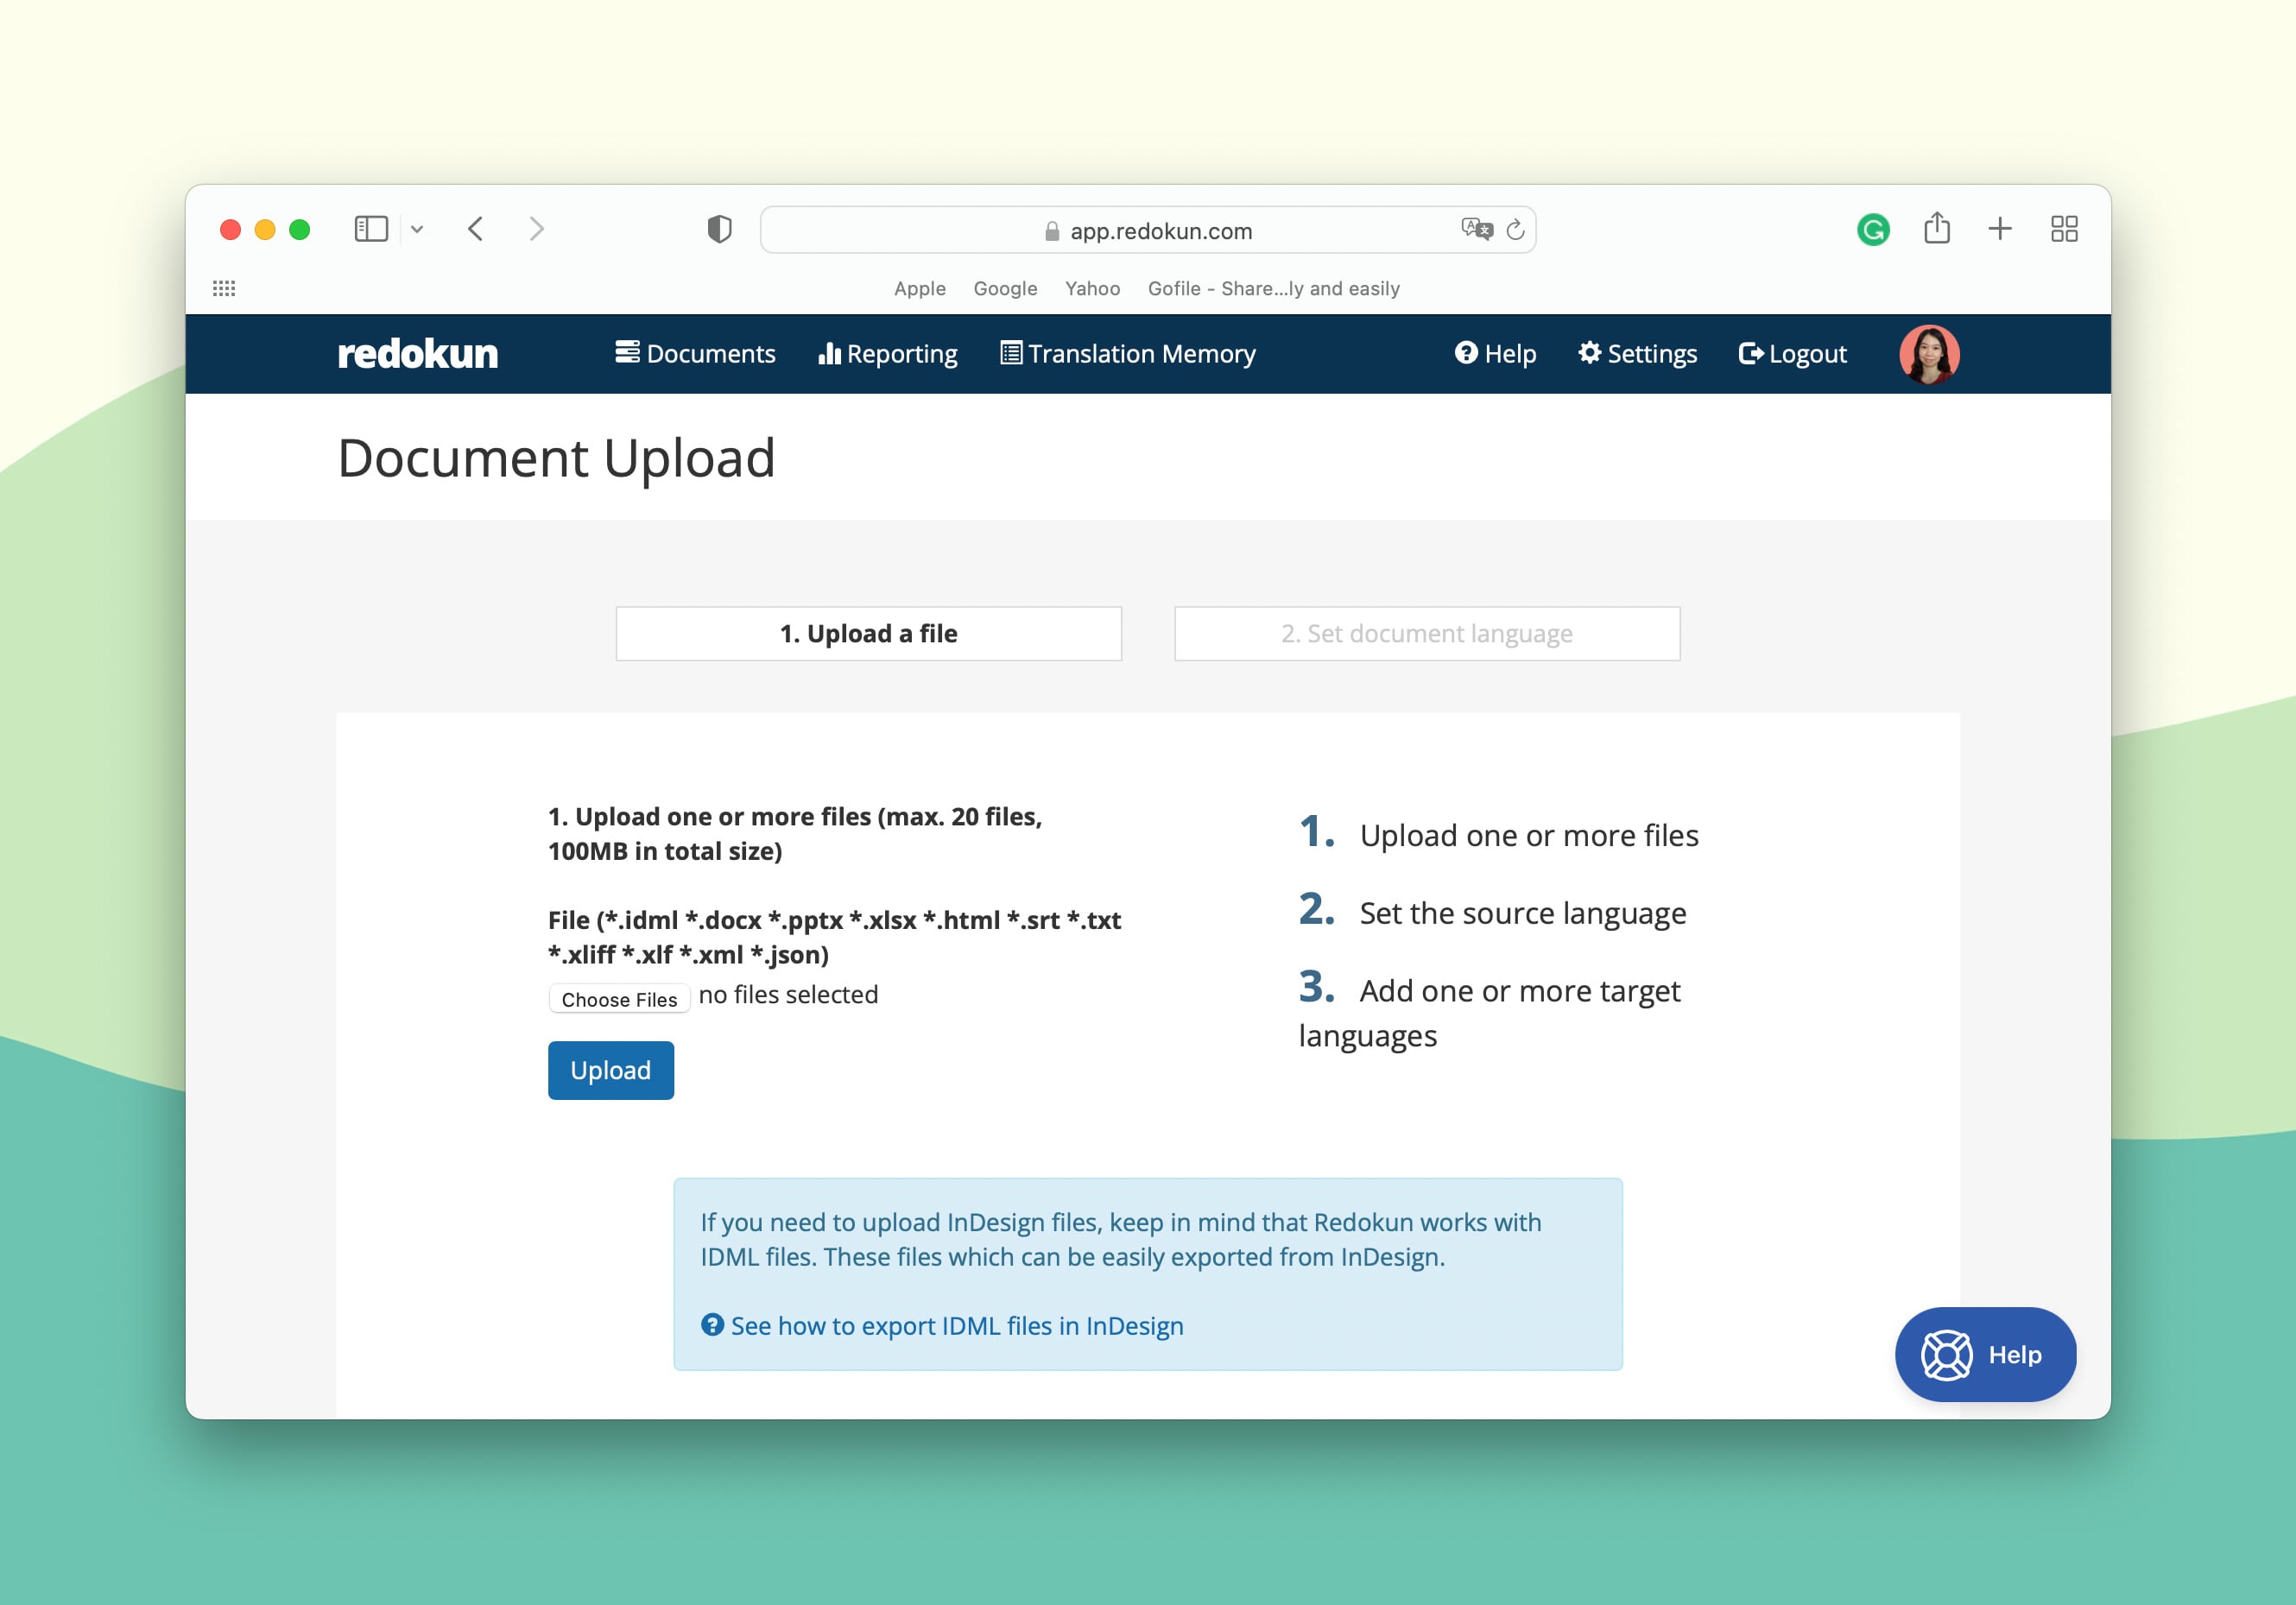
- Set the Source Language and Target Language(s) for this Lectora translation project. Redokun supports more than 88 languages.
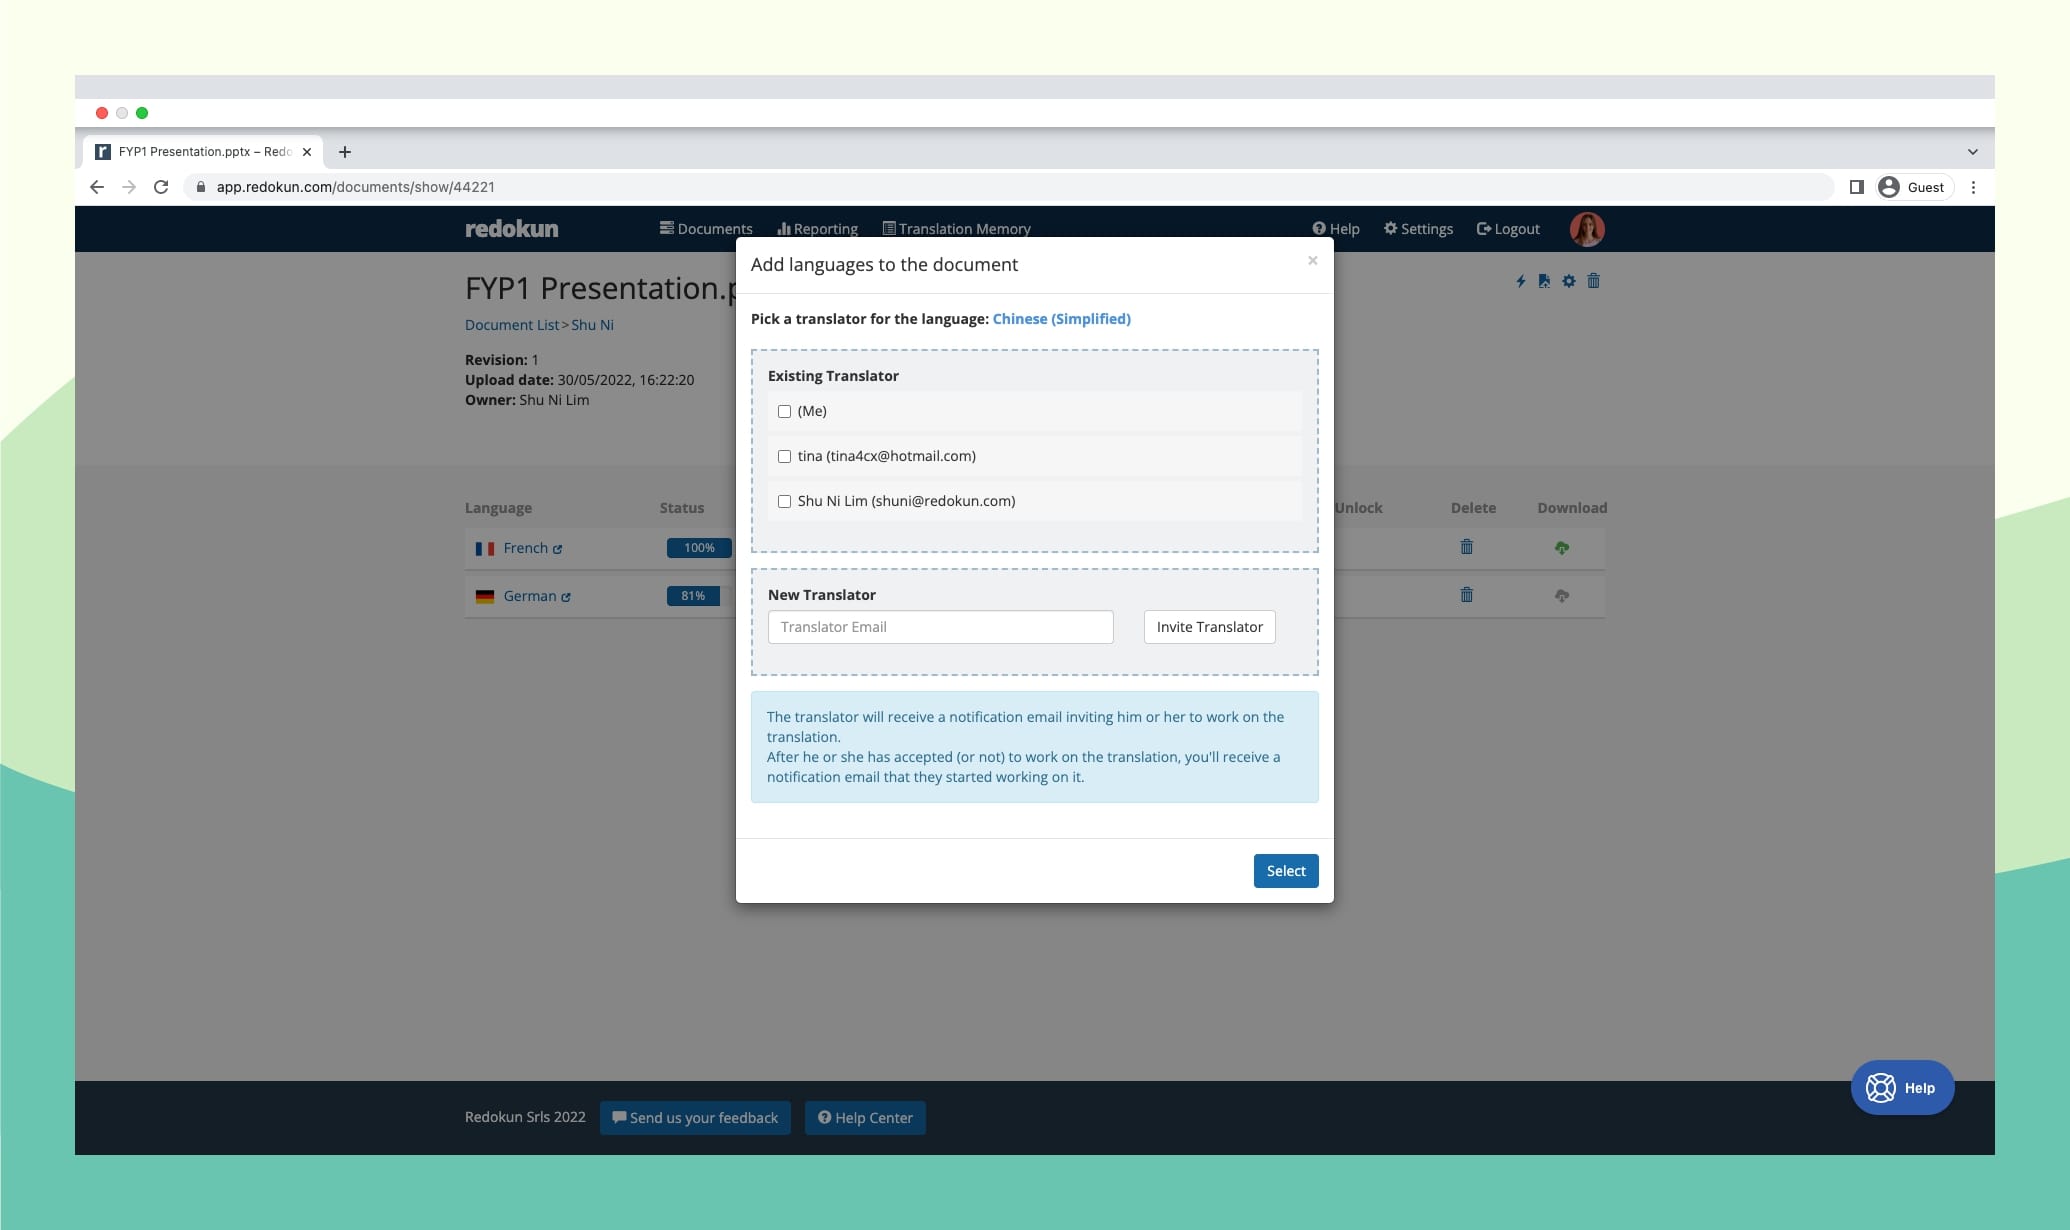
- Next, you can assign your translators for each target language selected. And they can start translating your Lectora course text in Redokun's Web Editor. To assign a translator, enter the translator’s email address in the New Translator field. You can also set yourself as the translator for a specific language.
Redokun will send an immediate notification to the translator’s inbox, and you'll be notified when they start working on their assigned document.
On Redokun, you can work with your in-house language team or efficiently outsource your project to outside translation vendors.
Step 3: Translate your Lectora course text on Redokun's Web Editor
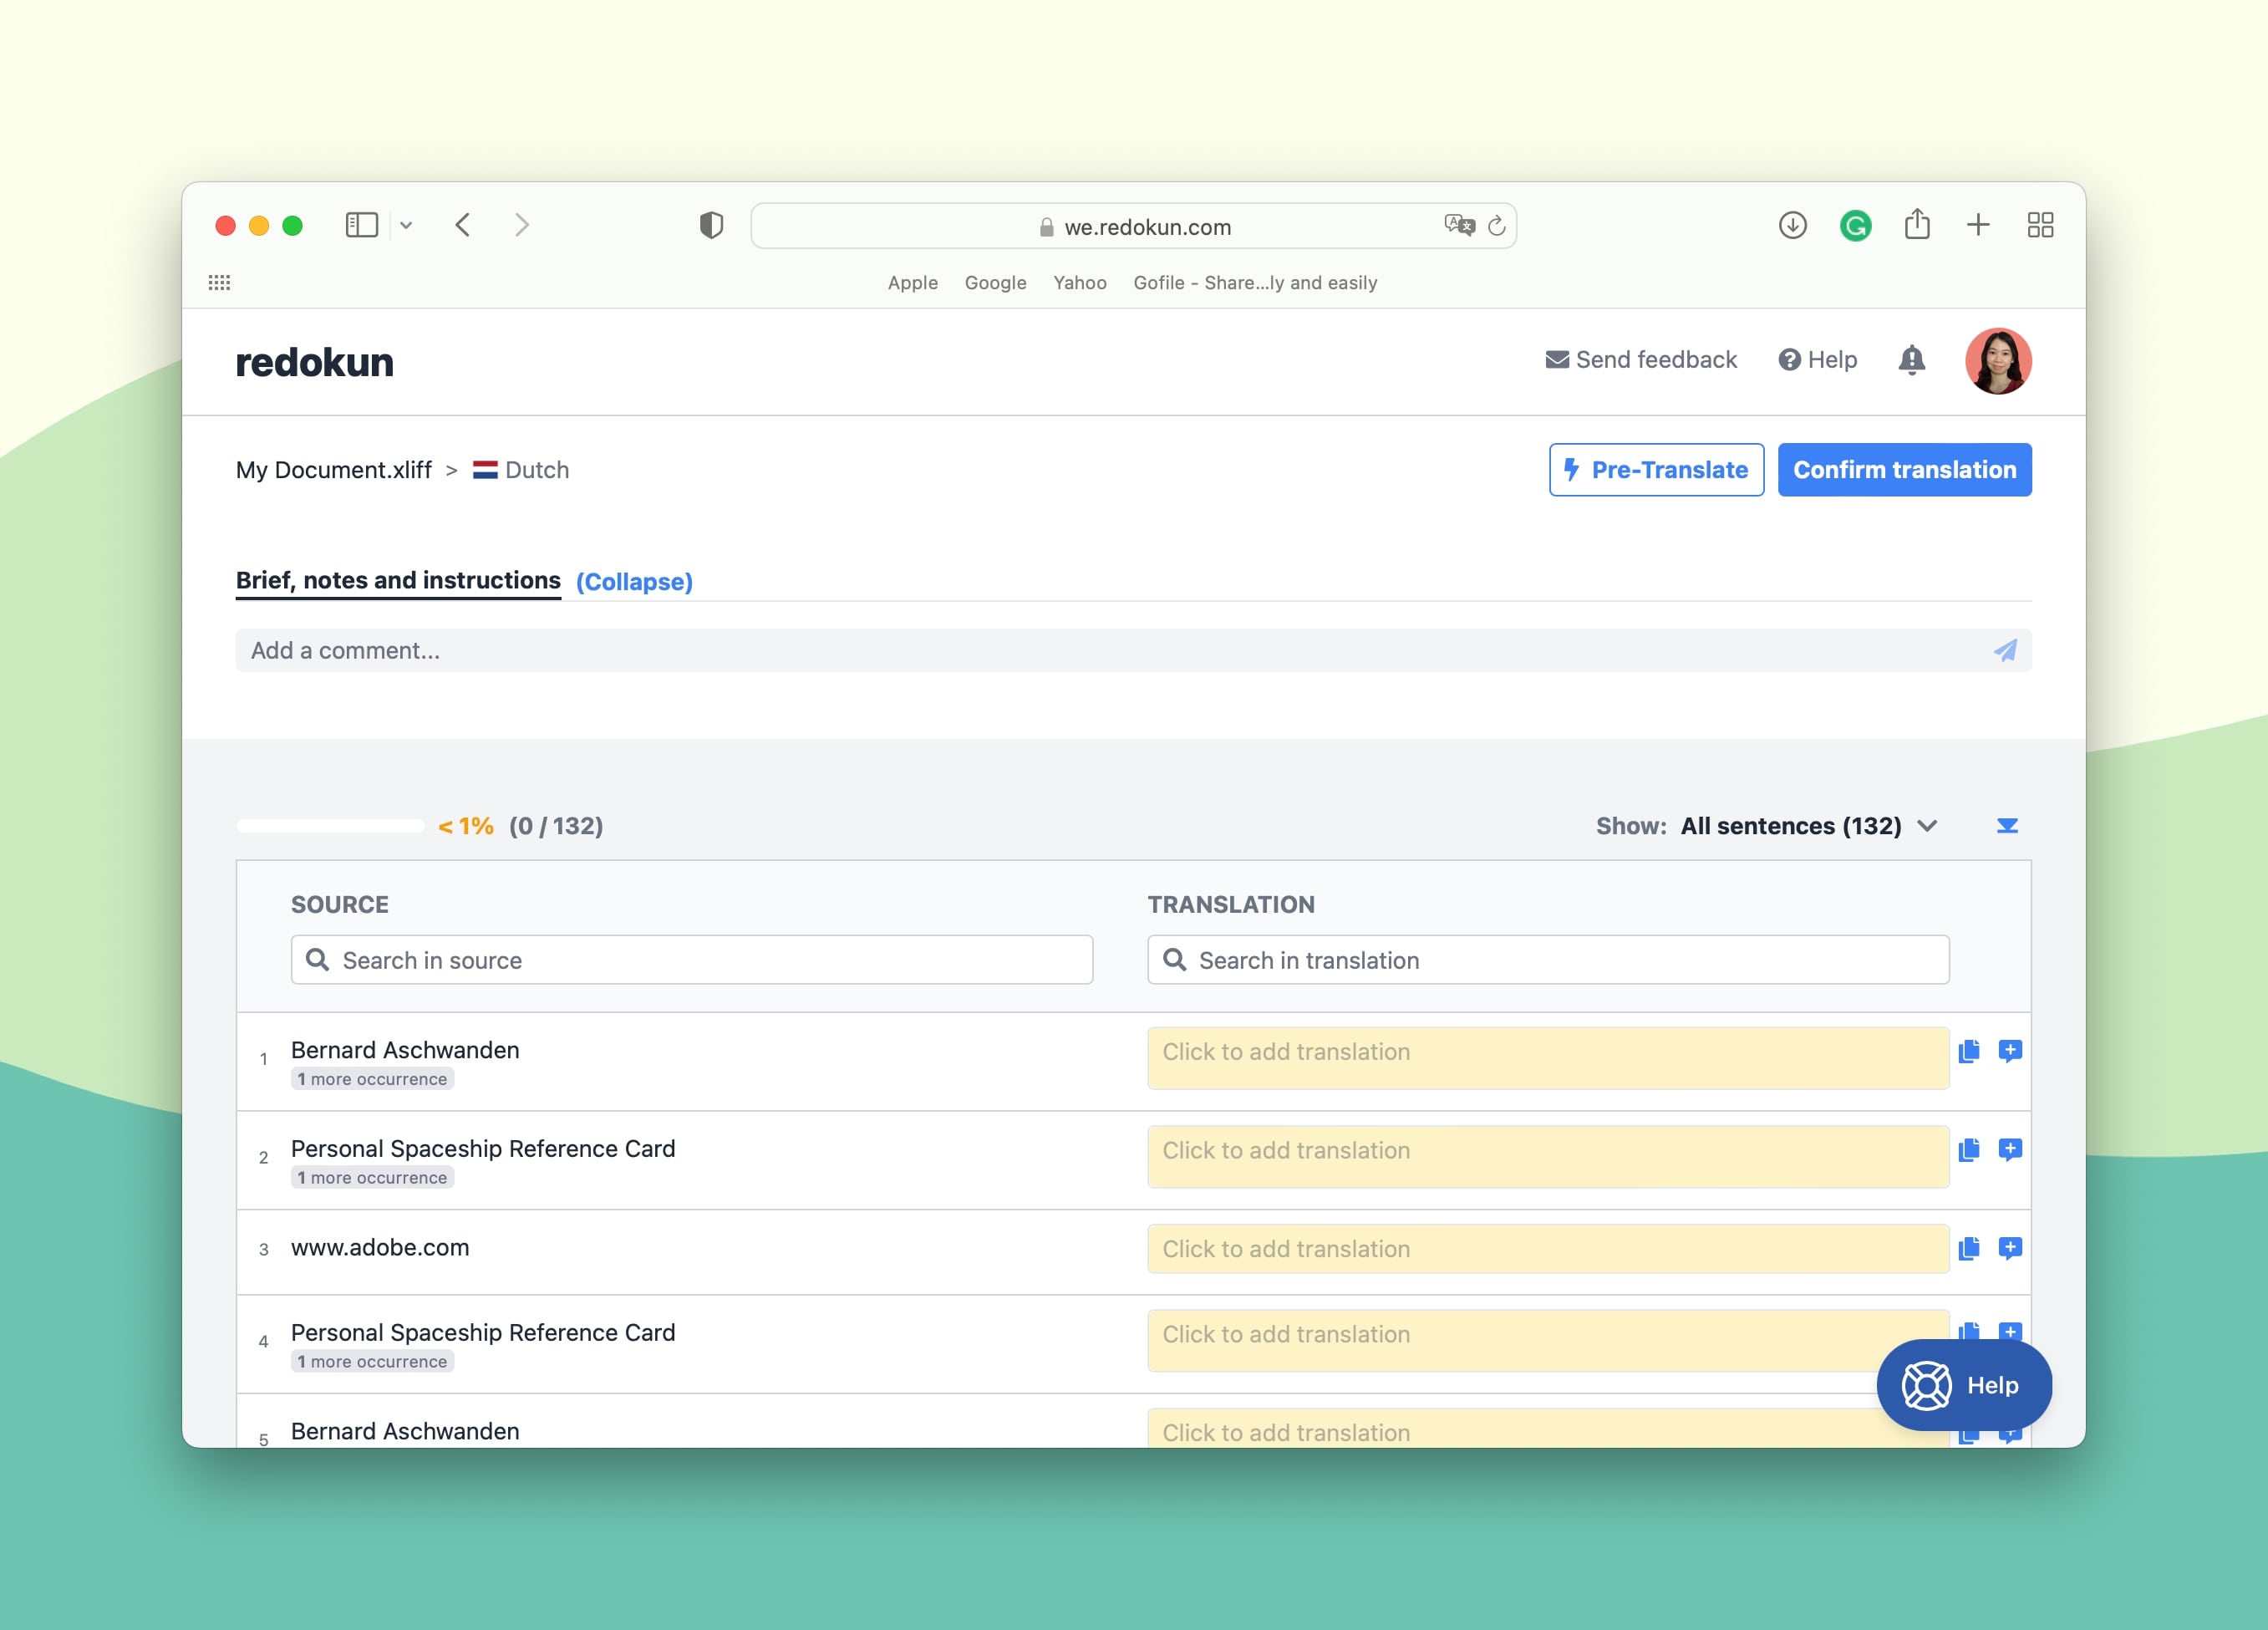
Once you’ve assigned the translators for every language pair, they can get to work on Redokun's Web Editor.
This is a translation-friendly interface that shows your translators only the text from your Lectora course. Even if they don't use Lectora, you're able to share with them the content from your course that needs to be translated.
When translating your course in the Web Editor, you have direct access to these productivity boosting tools:
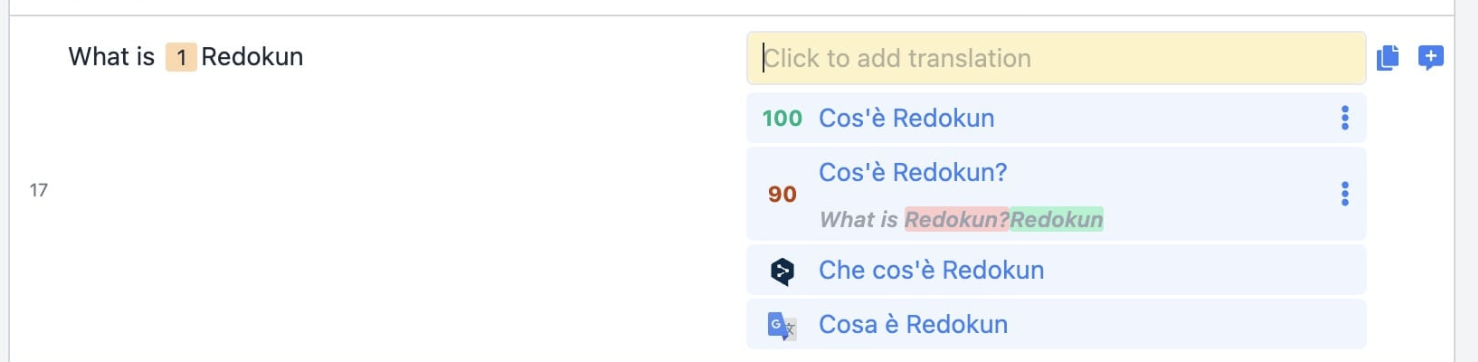
- Translation Memories (TM): This is a built-in bilingual database that's generated from your completed translation projects. It stores all your previously translated terms, sentences, and larger text units. When you translate a new course, your TM automatically detects identical or similar text segments, and provides accurate translation suggestions based on how you've translated them previously. If you’re only starting out with Redokun, this is a great way to build a unique "translation dictionary" that will help speed up your future translation projects.
- Machine translation: The Web Editor is equipped with two top machine translation engines, Google Translate and DeepL. Their suggested translation will appear right below the text segment you want to translate next (shown below). Just click to use or edit.
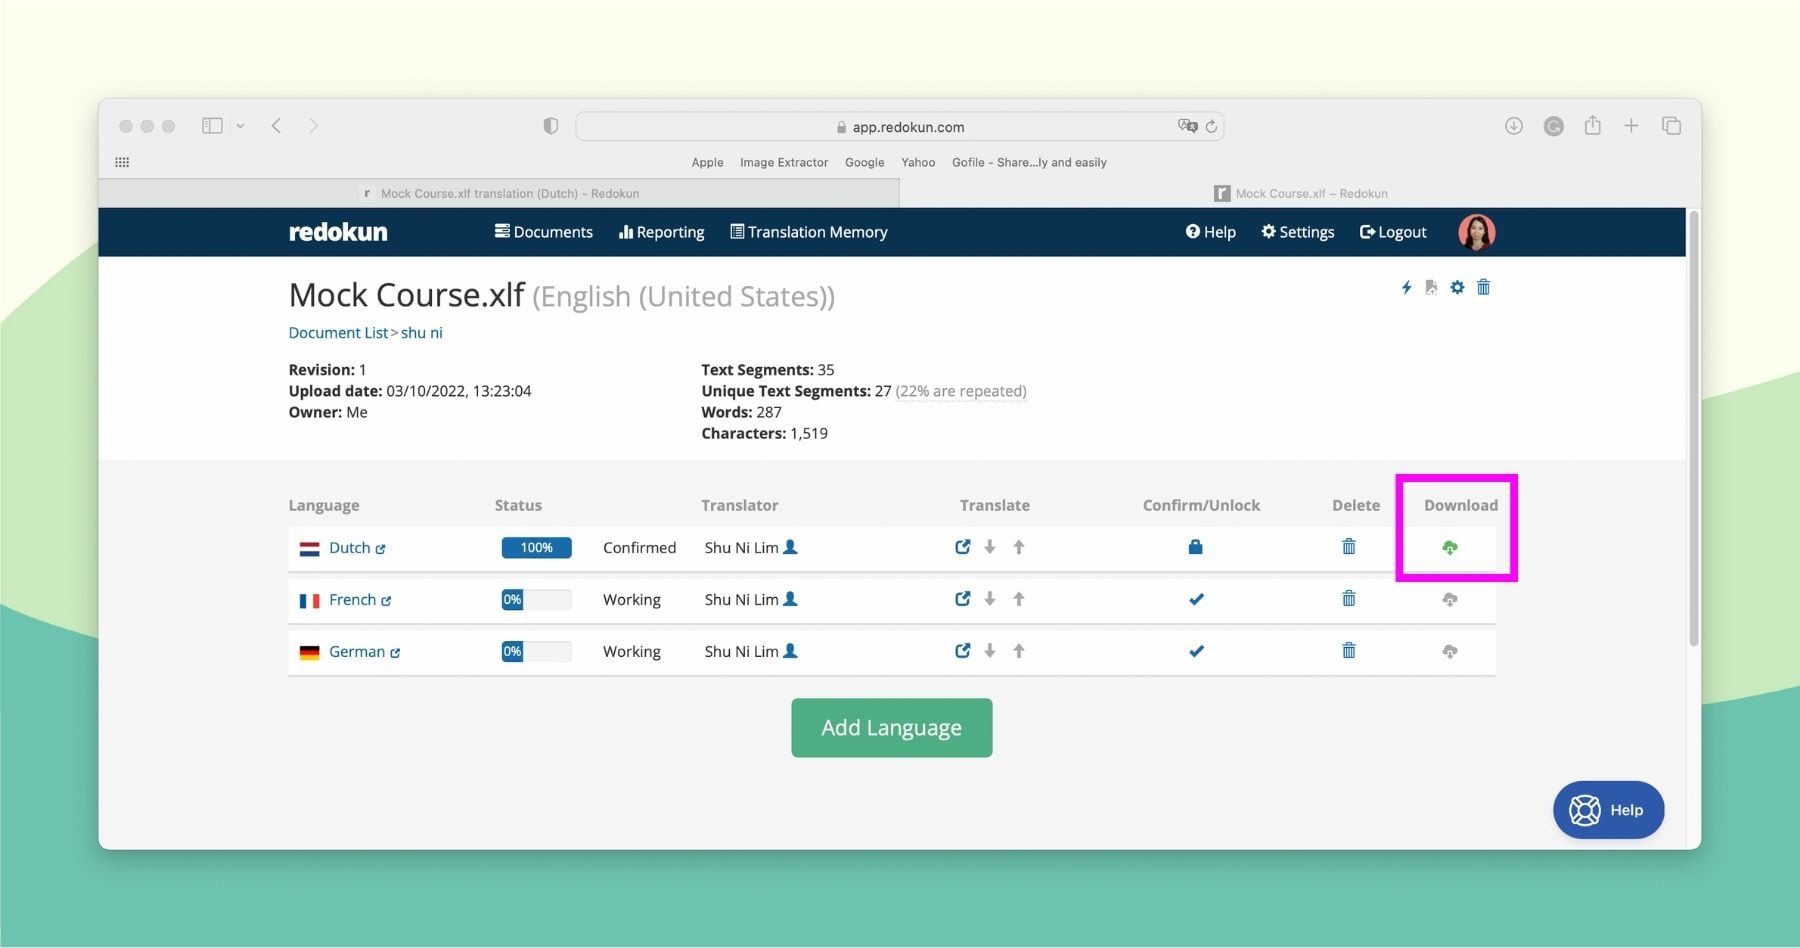
Once the XLIFF document translation is ready, you or your translator can review it, then click Confirm Translation at the top right corner of the Web Editor. Now you just need to download the XLIFF file containing the approved translation. To do so:
- Go to the Document Detail page for this translation project.
- Click the green Download icon on the right side of the target language that is marked as complete (shown below).
- Redokun will instantly generate an XLIFF document containing your translated Lectora eLearning content.
- Save the file to your computer.
Step 4: Import the translated XLIFF document back to Lectora
- Go back to Lectora and open your course.
- In the Tools menu, click on Translations.
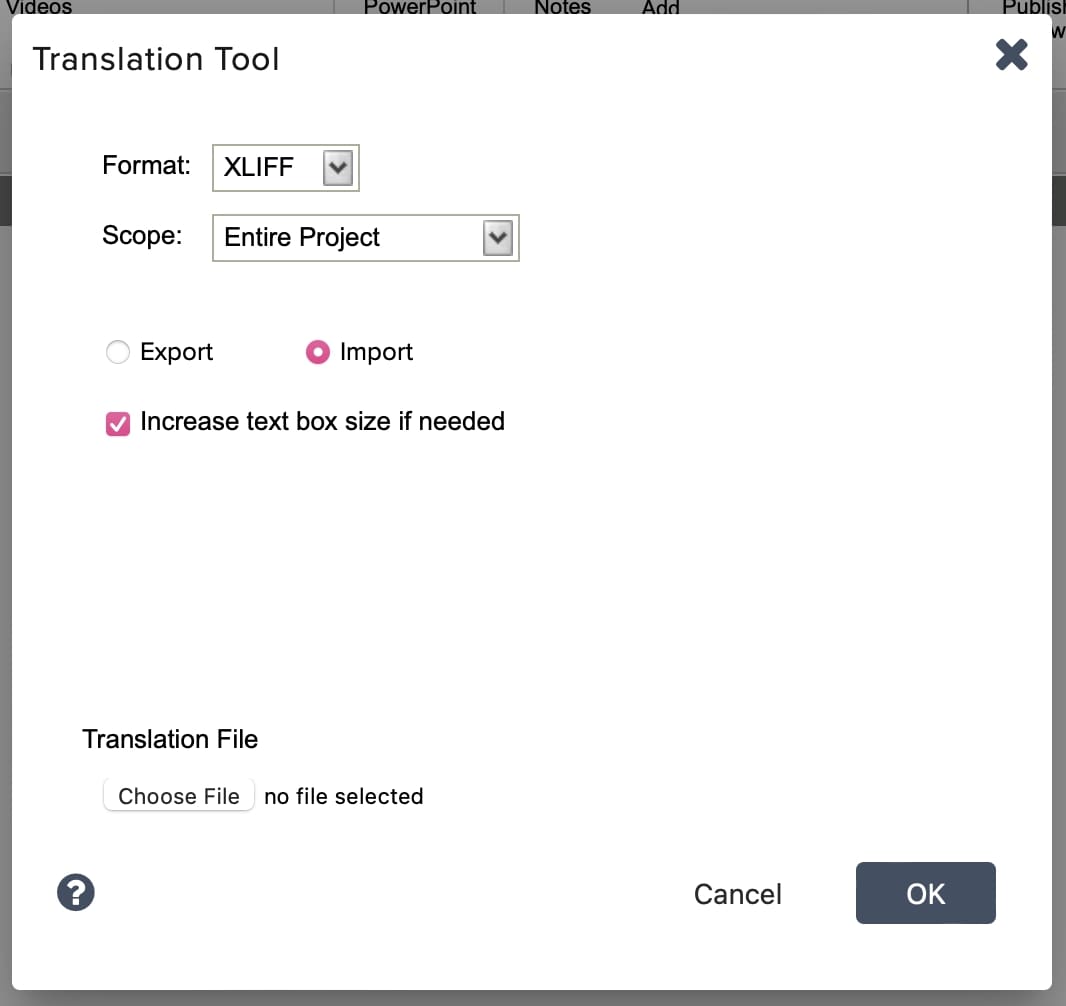
- In the pop-up window, make sure the Format is set to XLIFF, then select Import.
- Optional: Tick the box for "Increase text box size if needed". Lectora will automatically expand the text boxes to accommodate any text expansion in the target language. This is useful because the translation might not fit into the text blocks you designed for the original course.
- Next, click Choose File and upload the XLIFF document you downloaded from Redokun.
And that’s it! You have completed your Lectora translation and can now roll out your eLearning content to new international audiences.
Why Use Redokun for Your Lectora Translation Projects
Redokun is a translation management system you can use to scale your eLearning translation efforts without stretching your budget.
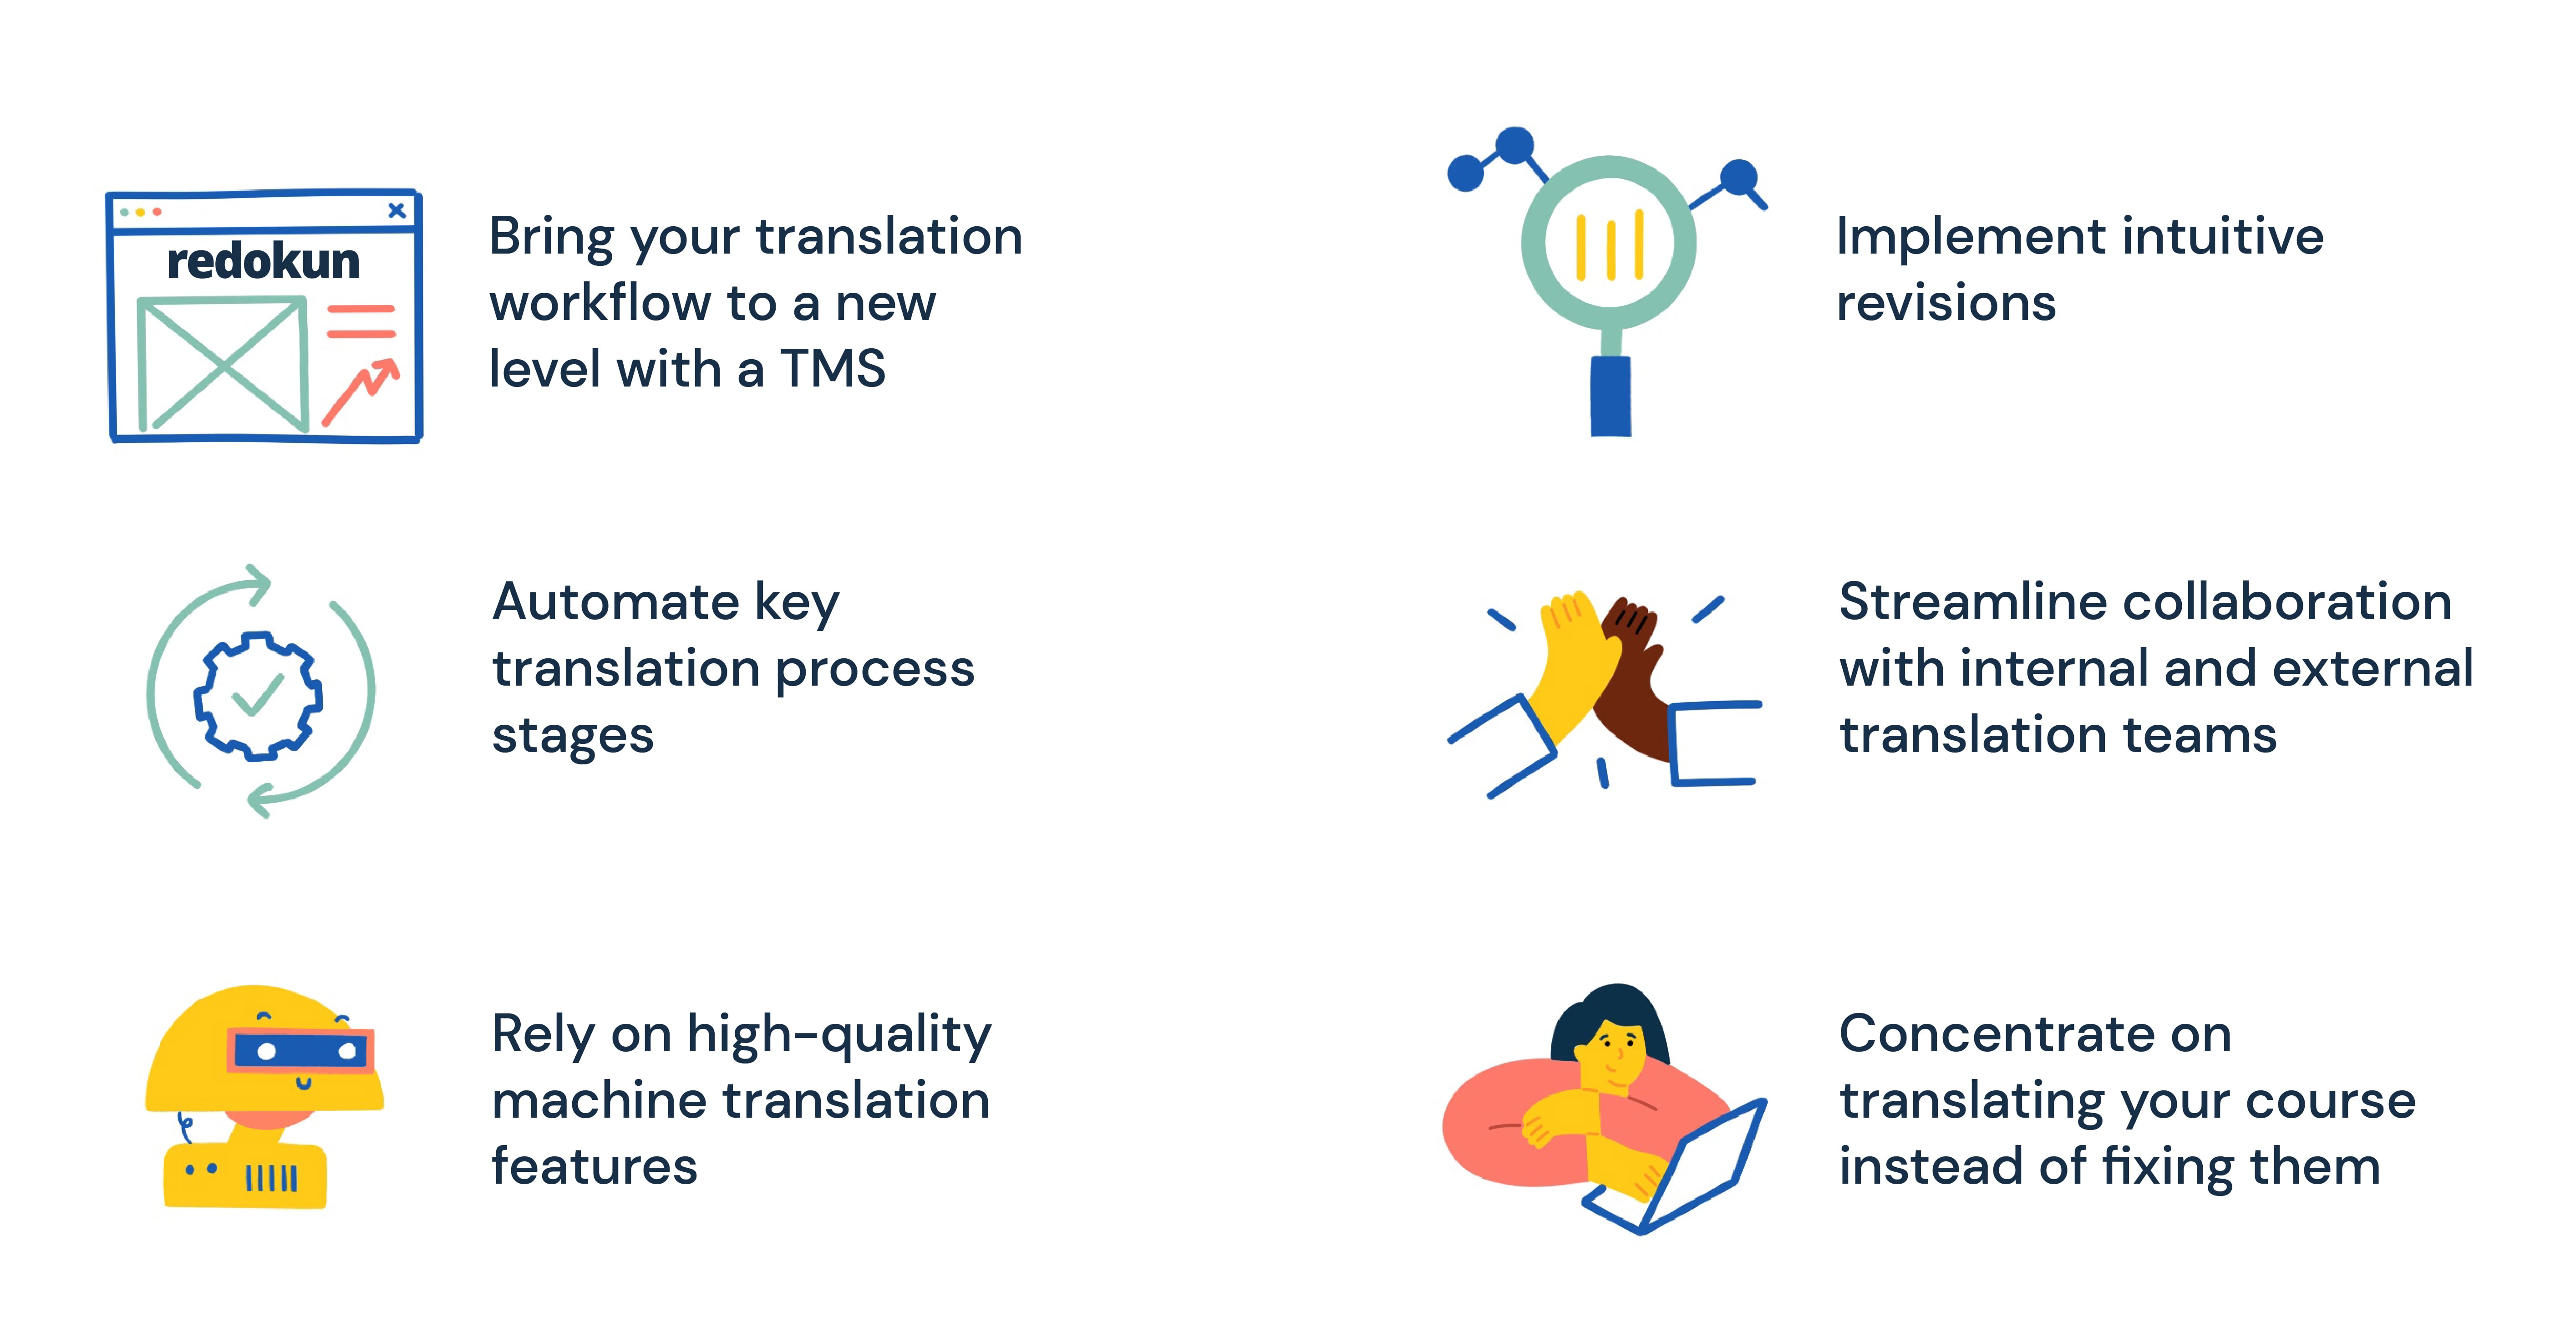
- Translate like a pro using a tool that's incredibly easy to learn and use. Redokun is a beginner-friendly tool that requires virtually no onboarding, even if you’re using translation software for the first time. Redokun’s key features allow you to build a stable translation workflow you can rely on for all ongoing and future projects.
- Automate key translation process stages. Automation is key, especially when you’re translating your Lectora courses into multiple languages. Redokun takes a load of manual tasks off your shoulders. Automate content export and import, document management, notifications, and much more. It will save your team a ton of time and resources.
- Rely on high-quality machine translation features. Translate your Lectora courses faster and more consistently with integrated CAT tools. They come in especially handy when you translate large-volume texts into several languages at once. On top of that, Translation Memories allow you to leverage your past translations in your new projects. This way, you ensure translation consistency across different documents and never have to translate the same word more than once.
- Implement intuitive revisions. Don’t worry about making last-minute updates and changes to your original Lectora course with Redokun. We have developed an intuitive revision system that will automatically notify your translation team of the changes to the document. Translators will see the new textual segments for translation highlighted separately. At the same time, the ongoing translation progress for the remaining parts stays intact.
- Streamline collaboration with internal and external translation teams. Redokun is not just a translation tool. It is also a collaboration platform where you can leave comments, highlight important notes and requests, ping team members, etc. Translate your Lectora course with your in-house language team or outsource tasks to translation vendors. Whichever path you choose, Redokun makes project collaboration easy and efficient.
- Concentrate on translating your course instead of fixing them. Redokun retains the style and formatting of your original Lectora course across all of its translated versions. You don’t need to worry about adjusting your course design or fixing your layouts for every language pair you produce. The visual consistency of your eLearning content is guaranteed.
Best Practices for Lectora Translation You Must Know
Lectora translation is made simple and efficient with Redokun. And if you’re willing to go the extra mile, you can further boost the quality of your translated courses. Implement these Lectora translation practices to get an outstanding final eLearning product in different languages.
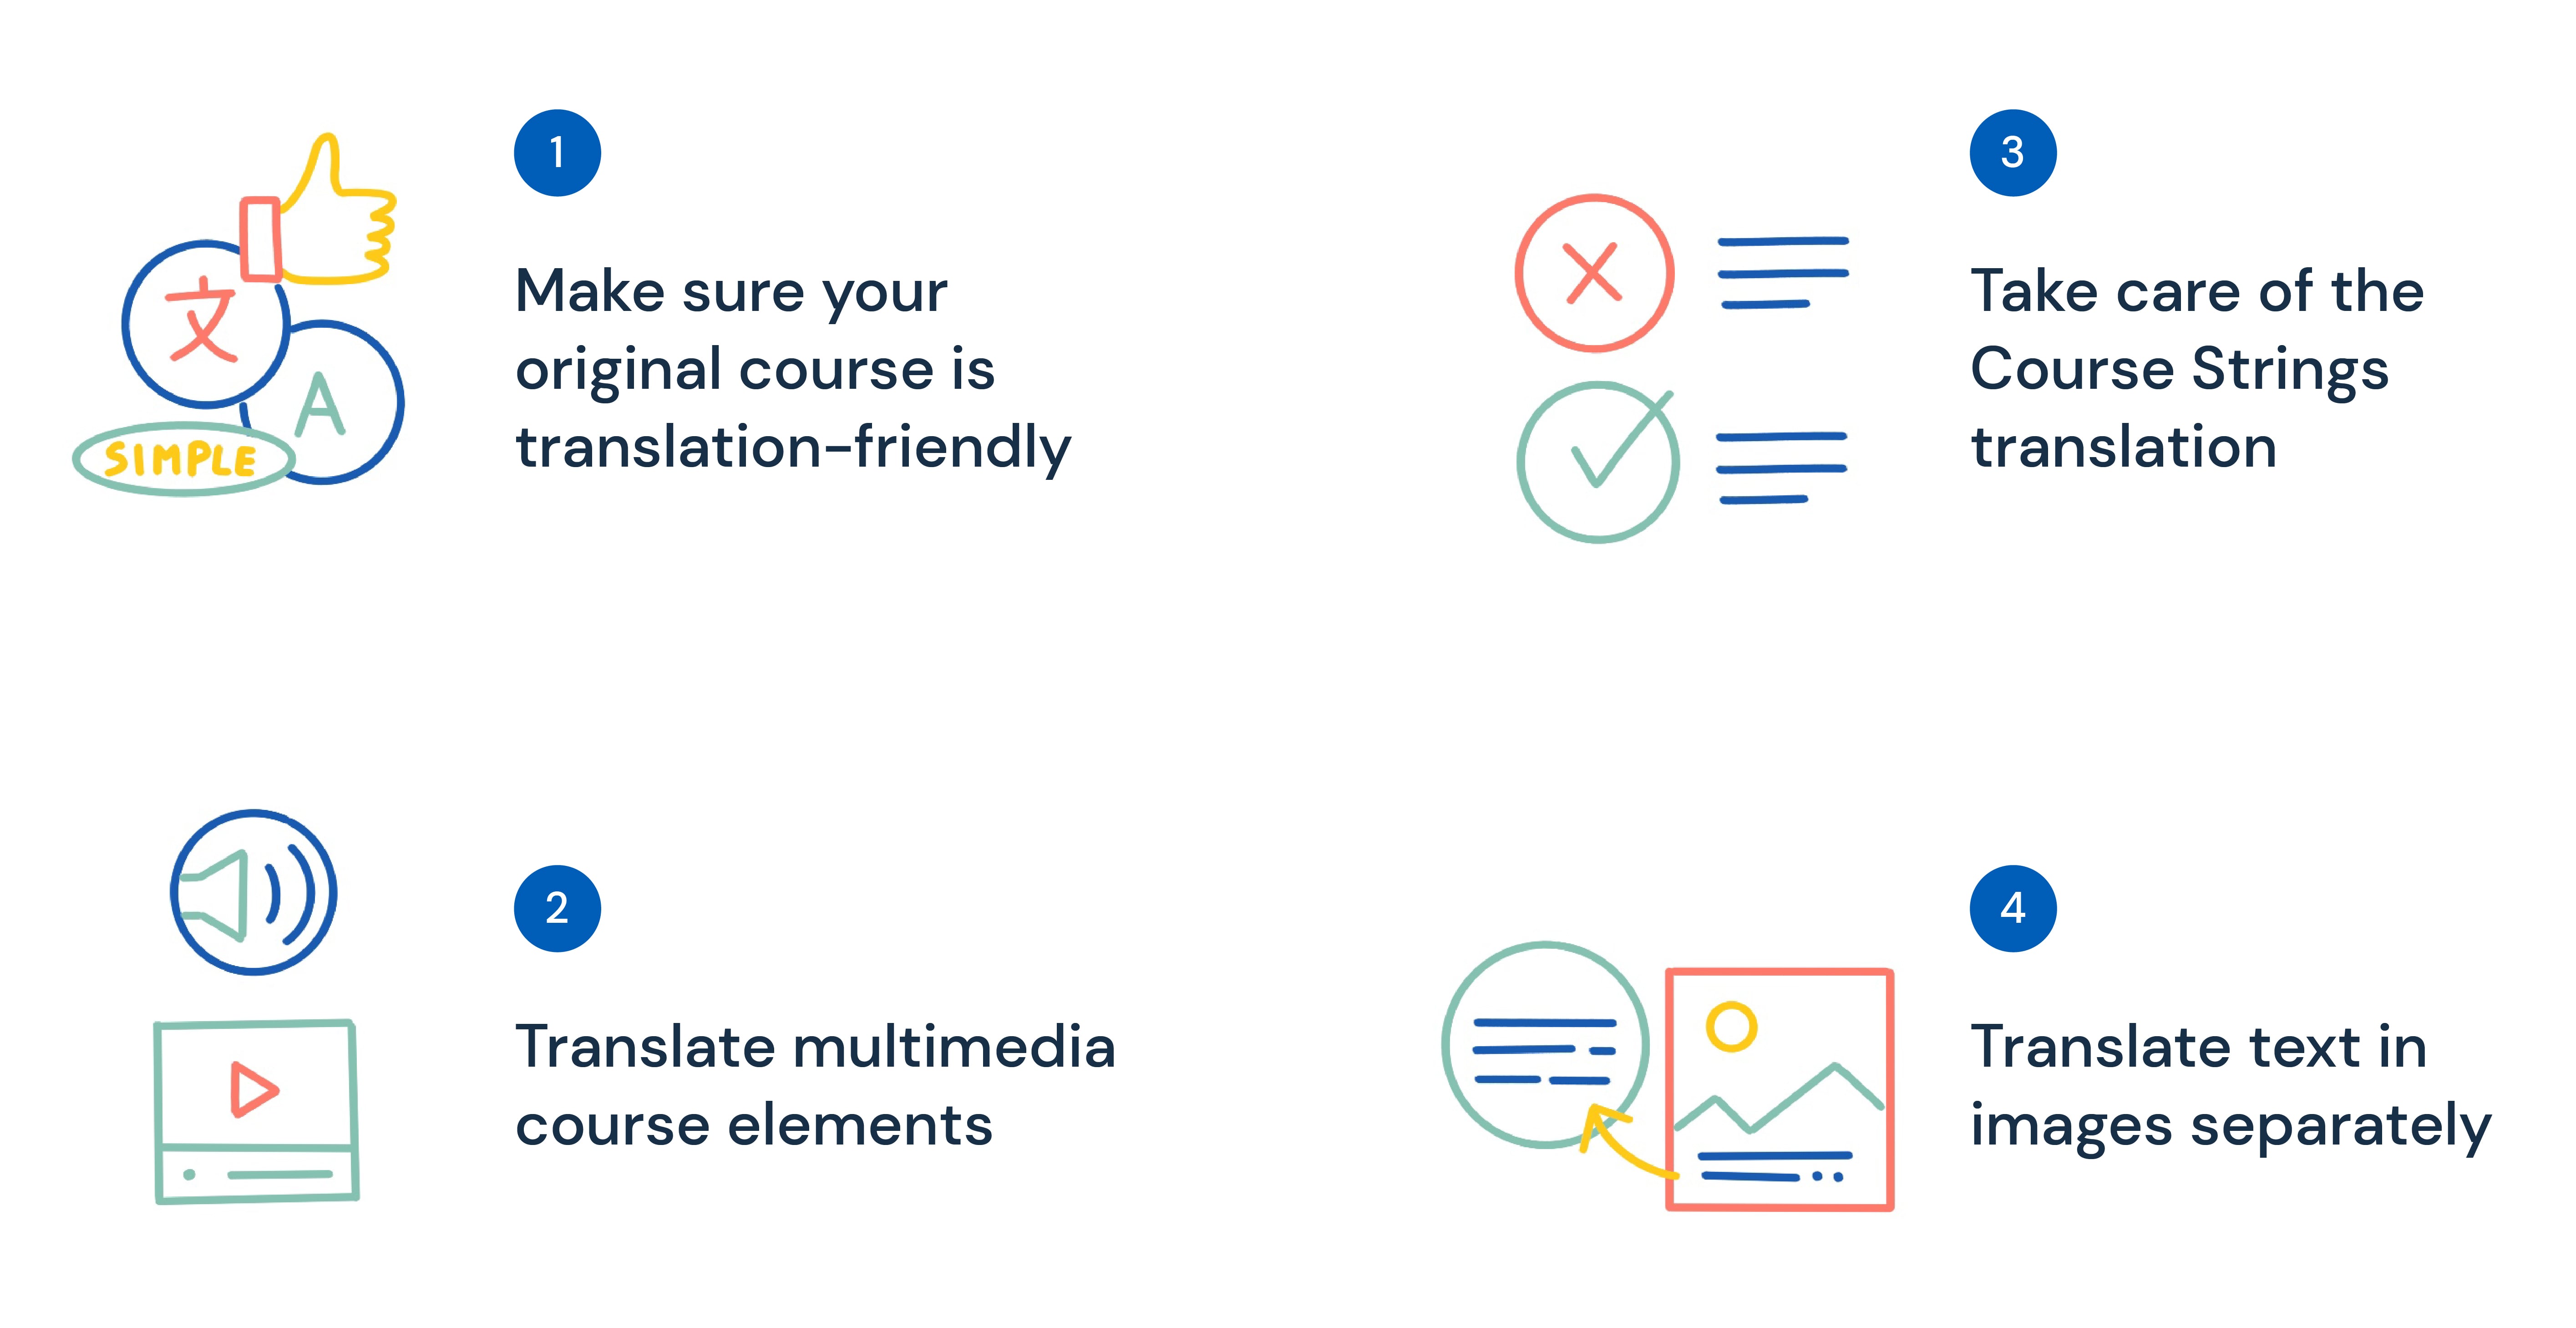
Practice 1: Make sure your original course is translation-friendly
You can guarantee the high quality of your eLearning content in multiple languages even before you get down to localizing it. Polish your course language to make it easier to translate and more adaptable for various international audiences.
- Use shorter sentences. Complex, bulky syntax can be hard to translate into foreign languages. Stick to short sentences (25-30 words max) with direct word order.
- Avoid culturally-specific language units. These include slang, jargon, idioms, euphemisms, etc. They can be irrelevant, confusing, or even offensive in another language. Instead, use simple words and phrases that don’t produce any ambiguity in meaning.
- Cut down on synonyms. Synonyms might enrich your language in the original content but generate confusion in another. Often, two synonymic words can have very different meanings once translated. Try to stick to the same terms and expressions across your course materials to create consistency and avoid misunderstanding.
Practice 2: Translate multimedia course elements
When you extract your course content as an XLIFF file for translation, remember that external course attachments and multimedia content are left out of the export process. In some cases, you might do without these assets and only translate the core content of your eLearning product. However, multimedia content is usually a valuable addition to your Lectora course that can enhance your users’ learning experience and success.
- Make sure to translate external attachments and multimedia components along with your course slides. These can include worksheets, subtitles, audio/video files, manuals, etc.
The best way to do this while keeping translation costs at bay is to translate these assets in the same translation management system you used to work with the main XLIFF course file.
- Needless to say, your translation software of choice should support versatile file formats to do the job. With Redokun, you can translate Adobe InDesign, HTML 5, PowerPoint, PDF, SRT, and other types of documents.
In short, with the right translation management system, you can easily translate extra course elements that bring value to your educational product.
Practice 3: Take care of the Course Strings translation
When translating your eLearning product, be aware that Lectora publishes some strings automatically as part of your course. These strings are, for example:
- Test results.
- Errors messages.
- Confirmation messages.
To translate Lectora strings, you need to take a few simple steps:
- Go to the File ribbon and choose Lectora Preferences.
- Click on the Publish Strings tab.
- Click Export to download the strings as a TXT file.
- Translate the exported file with Redokun.
- Import the translated TXT file back to Lectora.
You can repeat the cycle for as many translated strings as necessary.
Practice 4: Translate the text in images separately
Another unexpected issue you might face in the process of Lectora translation is text embedded in images. It is not automatically exported into an XLIFF file when you prepare your course for translation. To solve this problem, you can:
- Avoid images with embedded text altogether. You can accompany images you use in your Lectora courses with separate text captions.
If you still want to include images with text in your slides, you must translate this text separately. Here, you can go down two different paths:
- Export the text manually, translate it in the text editor, and import it back to the image (you can seek assistance from a designer to do this);
- Or use image translation software. It recognizes the embedded text and automatically translates it.
Summary
If you want your eLearning content to stand out and be relevant to learners from around the globe, optimizing your Lectora translation workflow is key.
This process is made simple and cost-effective by an XLIFF export function. Once you’ve exported your course content from Lectora, you can translate it with the help of quality translation software such as Redokun. In just 4 steps, you’ll get a fully translated Lectora course ready to be published for your international audiences.
Try Redokun for free today and explore the power of a professional translation management system for efficient eLearning translation.
Till next time,
Anastasia


